What is Utthita Padangusthasana (Extended Hand-to-Big-Toe Pose)?
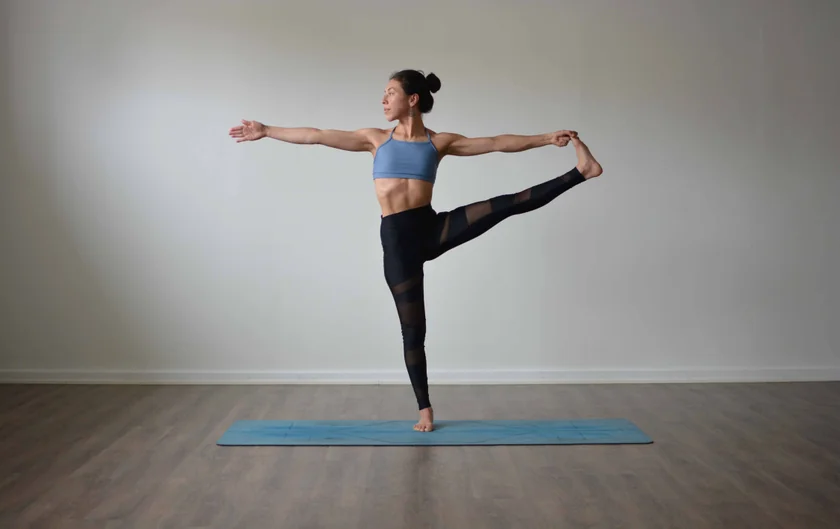
Utthita Hasta Padangusthasana, or Extended Hand-to-Big-Toe Pose, is a standing balance pose for intermediate to advanced yogis.
From Mountain pose, lift one leg close to your chest and grab the big toe of that same leg. Keep your body straight and grounded on one foot and slowly extend your lifted leg sideways.
This pose helps you develop strong balance and improves awareness and concentration.
Overview & Etymology
Utthita Hasta Padangusthasana is a combination of a few Sanskrit words. 'Utthita' means extended, 'Hasta' means hand, 'Pada' means foot, 'Angustha' means big toe or thumb, and 'Asana' means posture.
There is no reference to the Extended Hand-to-Big-Toe Pose in any ancient Hindu texts, making it a modern yoga pose.
The big-toe pose was picked from 19th-century Scandinavian gymnastics tradition. Later, it was introduced in India by Swami Kuvalayananda (a yoga teacher and researcher) as a yoga pose in his teaching system. Soon after, Tirumalai Krishnamacharya was also influenced and took this pose even further.
Sanskrit Name: उत्थित हस्त पादाङ्गुष्ठासन
Pronunciation: U-tthi-tuh Huh-stuh Paa-dahn-goo-STHA-suh-nah
Pose Type: Standing Balance Also known as: Extended Hand-to-Big-Toe Pose
Strengthens: Legs, Ankles, Core & Shoulders
Stretches: Inner Thighs, Arms, Hamstrings, & Shoulders
Health Benefits of Utthita Padangusthasana
Improves balance.
Alleviates stress and anxiety.
Opens your shoulders and chest.
Improves flexibility in your hamstrings.
Strengthens your core, legs, and ankles.
Lengthens your spine and improves your posture.
Improves concentration and mental awareness.
Stimulates the Muladhara and Svadisthana Chakras.
Increases range of motion in the glutes and hip flexors.
When to Avoid Performing Utthita Padangusthasana
Avoid if you have knee arthritis.
Avoid during pregnancy and menstruation.
Avoid if you’ve recently had knee, hip, or spine surgery.
Avoid if you currently have any severe body pain or injury.
How to do Utthita Padangusthasana (Extended Hand-to-Big-Toe Pose)
To get into this pose, the main practice is divided into a few simplified parts. Follow the steps mentioned below:
Part 1 - Preparatory Poses for Utthita Padangusthasana
The warm-up stage before Utthita Padangusthasana is essential since it prepares your body and mind for the main posture. It’s important to straighten your spine and open your hamstrings so that you can balance in this pose. Here are some postures that will help:
1. Tadasana (Mountain Pose) - Stand with your feet hip distance apart. Keep your arms relaxed at your sies and your palms facing forward.

Inhale, spread and lift your toes. Exhale, bringing them back to the ground. Relax and engage the muscles in your front upper leg, back upper leg, calves, and glutes. Hold this pose for a couple of minutes and feel your legs activate.
2. Vrksasana (Tree Pose) - Continue in Tadasana position, and slowly shift your weight to your left leg, lifting your right leg off the ground while ensuring your left leg remains straight and relaxed.
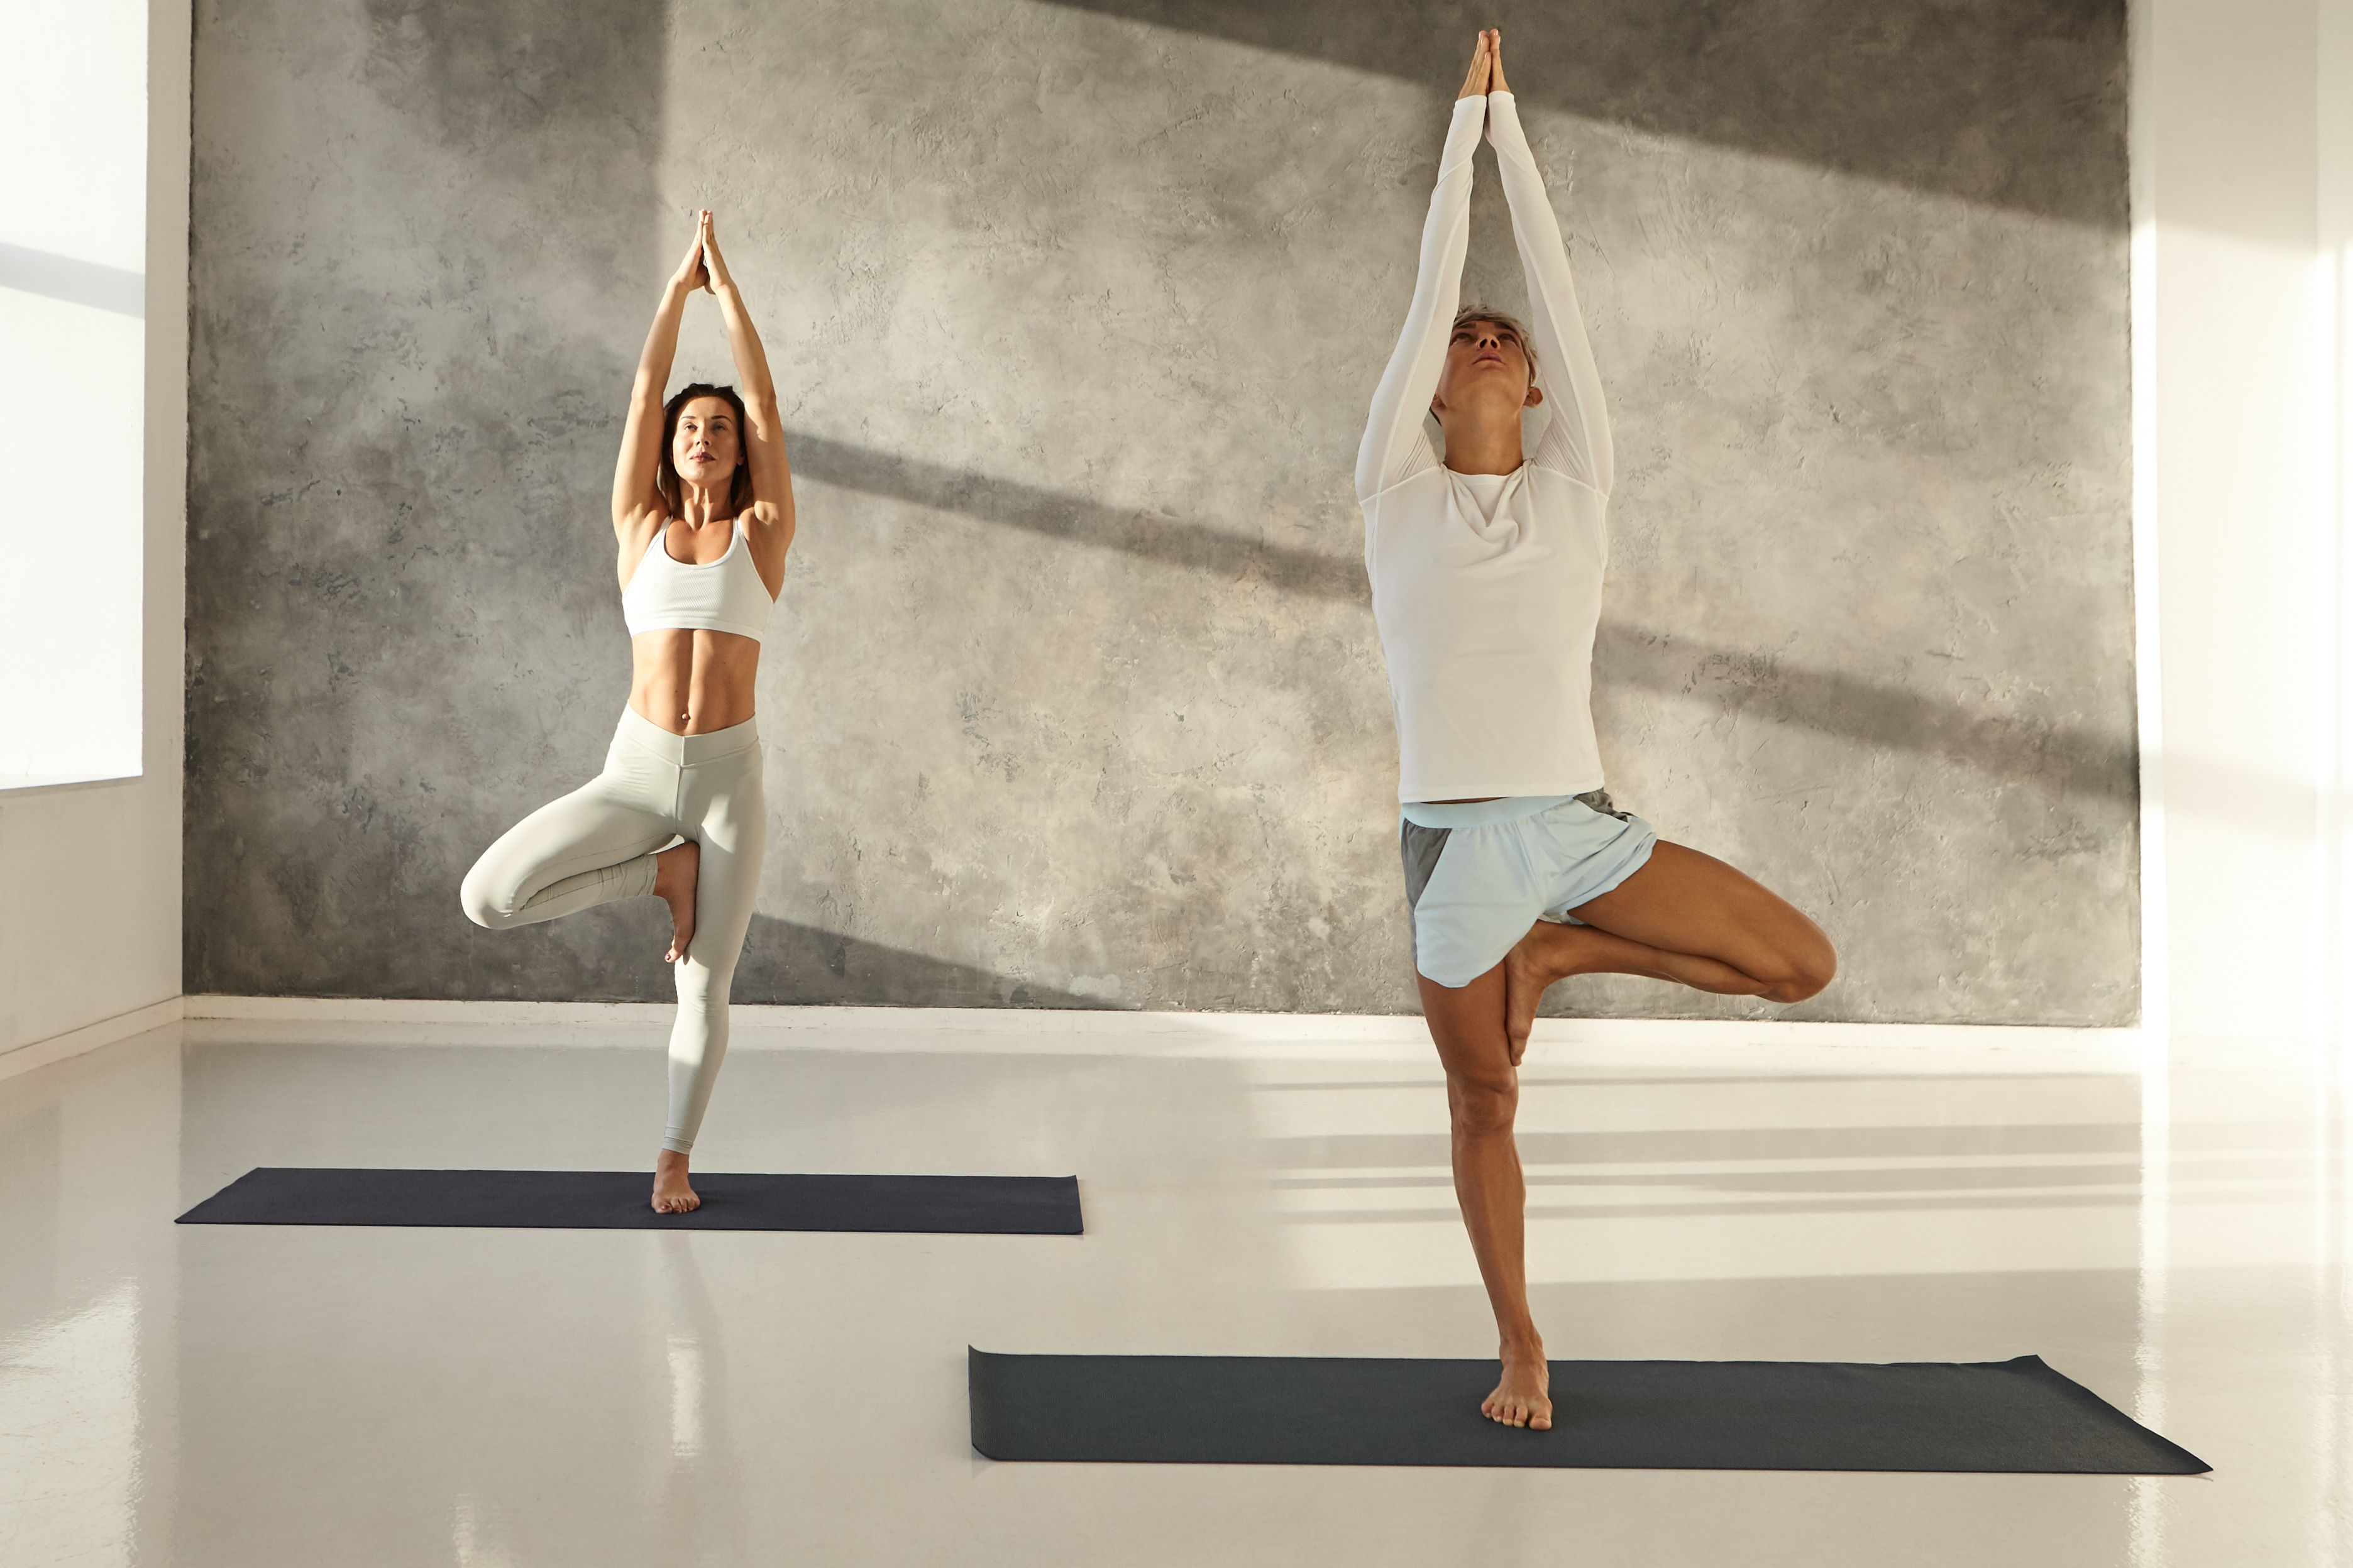
Bend your right leg and rest your lifted foot’s sole against the inner thigh of your left leg. Bring your hands together into Anjali Mudra, also known as the prayer position, and lift them toward the ceiling above your head. Fix your gaze in one place in front of you for balance.
Hold Vrksasana pose for 1 to 2 minutes, and repeat the same on another side while feeling activation in your legs.
3. Supta Padangusthasana I (Reclining Hand-to-Big Toe Pose I) - Lie on the floor on your back as if in a reclining mountain position. Slowly lift your left knee close to your chest and hug your leg. Make sure to keep your right leg flexed on the ground.
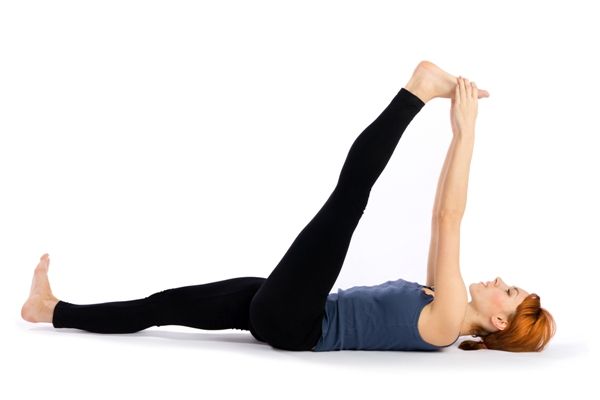
Hook two fingers onto your big toe and slowly lift your left leg straight toward the ceiling. Your arm should be straight as well, with your shoulders flat on the floor.
Once your left leg is entirely straight, feel a deep activation in the hamstrings of both legs. Hold this position for 5 to 10 deep breaths.
Part 2: Step-by-Step Instructions to Perform Utthita Padangusthasana
The following are steps to practice extended hand-to-big-toe pose:
Step 1- Start in Tadasana with your weight spread evenly across your feet and your eyes gazing softly at one spot right in front of you.
Step 2- Next, breathe in, and on your next exhalation, transfer your body's weight to your left foot as you lift your right knee off the ground.
Step 3- With your first two right fingers, reach for the big toe of your right leg. As you inhale, slowly extend your right leg in front of you while maintaining a straight spine and open chest.
Step 4- Hold this pose for five breaths, and on your next inhalation, open your right leg to your right side and hold it there for another five breaths.
Step 5- To return to your original position, inhale and slowly bring your right leg back to the center and lower it to the ground as you exhale.
Step 6- Repeat this process with your left leg.
Breath Awareness:
Inhale: Inhale as you extend your leg forward, open it outward to one side, and bring it back to the center.
Exhale: Exhale as you transfer your weight to one foot and lift your leg off the ground. Finally, exhale as you lower your foot back on the floor.
Performance Duration for Beginners: Hold Utthita Padangusthasana for 15 to 30 seconds on both legs.
Performance Duration for Advanced: Hold Utthita Padangusthasana for 60 to 90 seconds on both legs.
Part 3: Things to Keep in Mind
Without the correct form, you could strain your hamstrings and spine while practicing Utthita Padangusthasana. Below are a few points to keep in mind to ensure your safety as you perform this pose:
Lengthen your spine - As you inhale, elongate your sternum outward, which will cause your spine to lengthen. During the exhale, relax your spine and release it downward.
Do not lean back - Keep your back straightened during this pose. Leaning backward might hurt your spine or cause you to lose balance. Lengthening your spine will make it easier to maintain a straight back in this pose.
Do not lock the knees - Locking your knees will immobilize your body and make it more challenging to support your body. Make sure you keep your standing knee softly bent for better balance.
Prepare your mind - Always remember to breathe. Breathing in and out with mindfulness while maintaining your gaze on one point in front of you will keep you focused in the posture and balanced throughout.
Part 4: Relaxing Poses After Utthita Padangusthasana
The following counter yoga poses will relax your hamstrings and spine after a long session of Utthita Padangusthasana.
1. Uttanasana (Standing Forward Bend): Start from Tadasana with the weight of your body on your feet, and raise your arms above your head with your palms together. Next, lengthen your spine and bend forward into a fold, with your arms also folding forward. Make sure you keep your back flat.
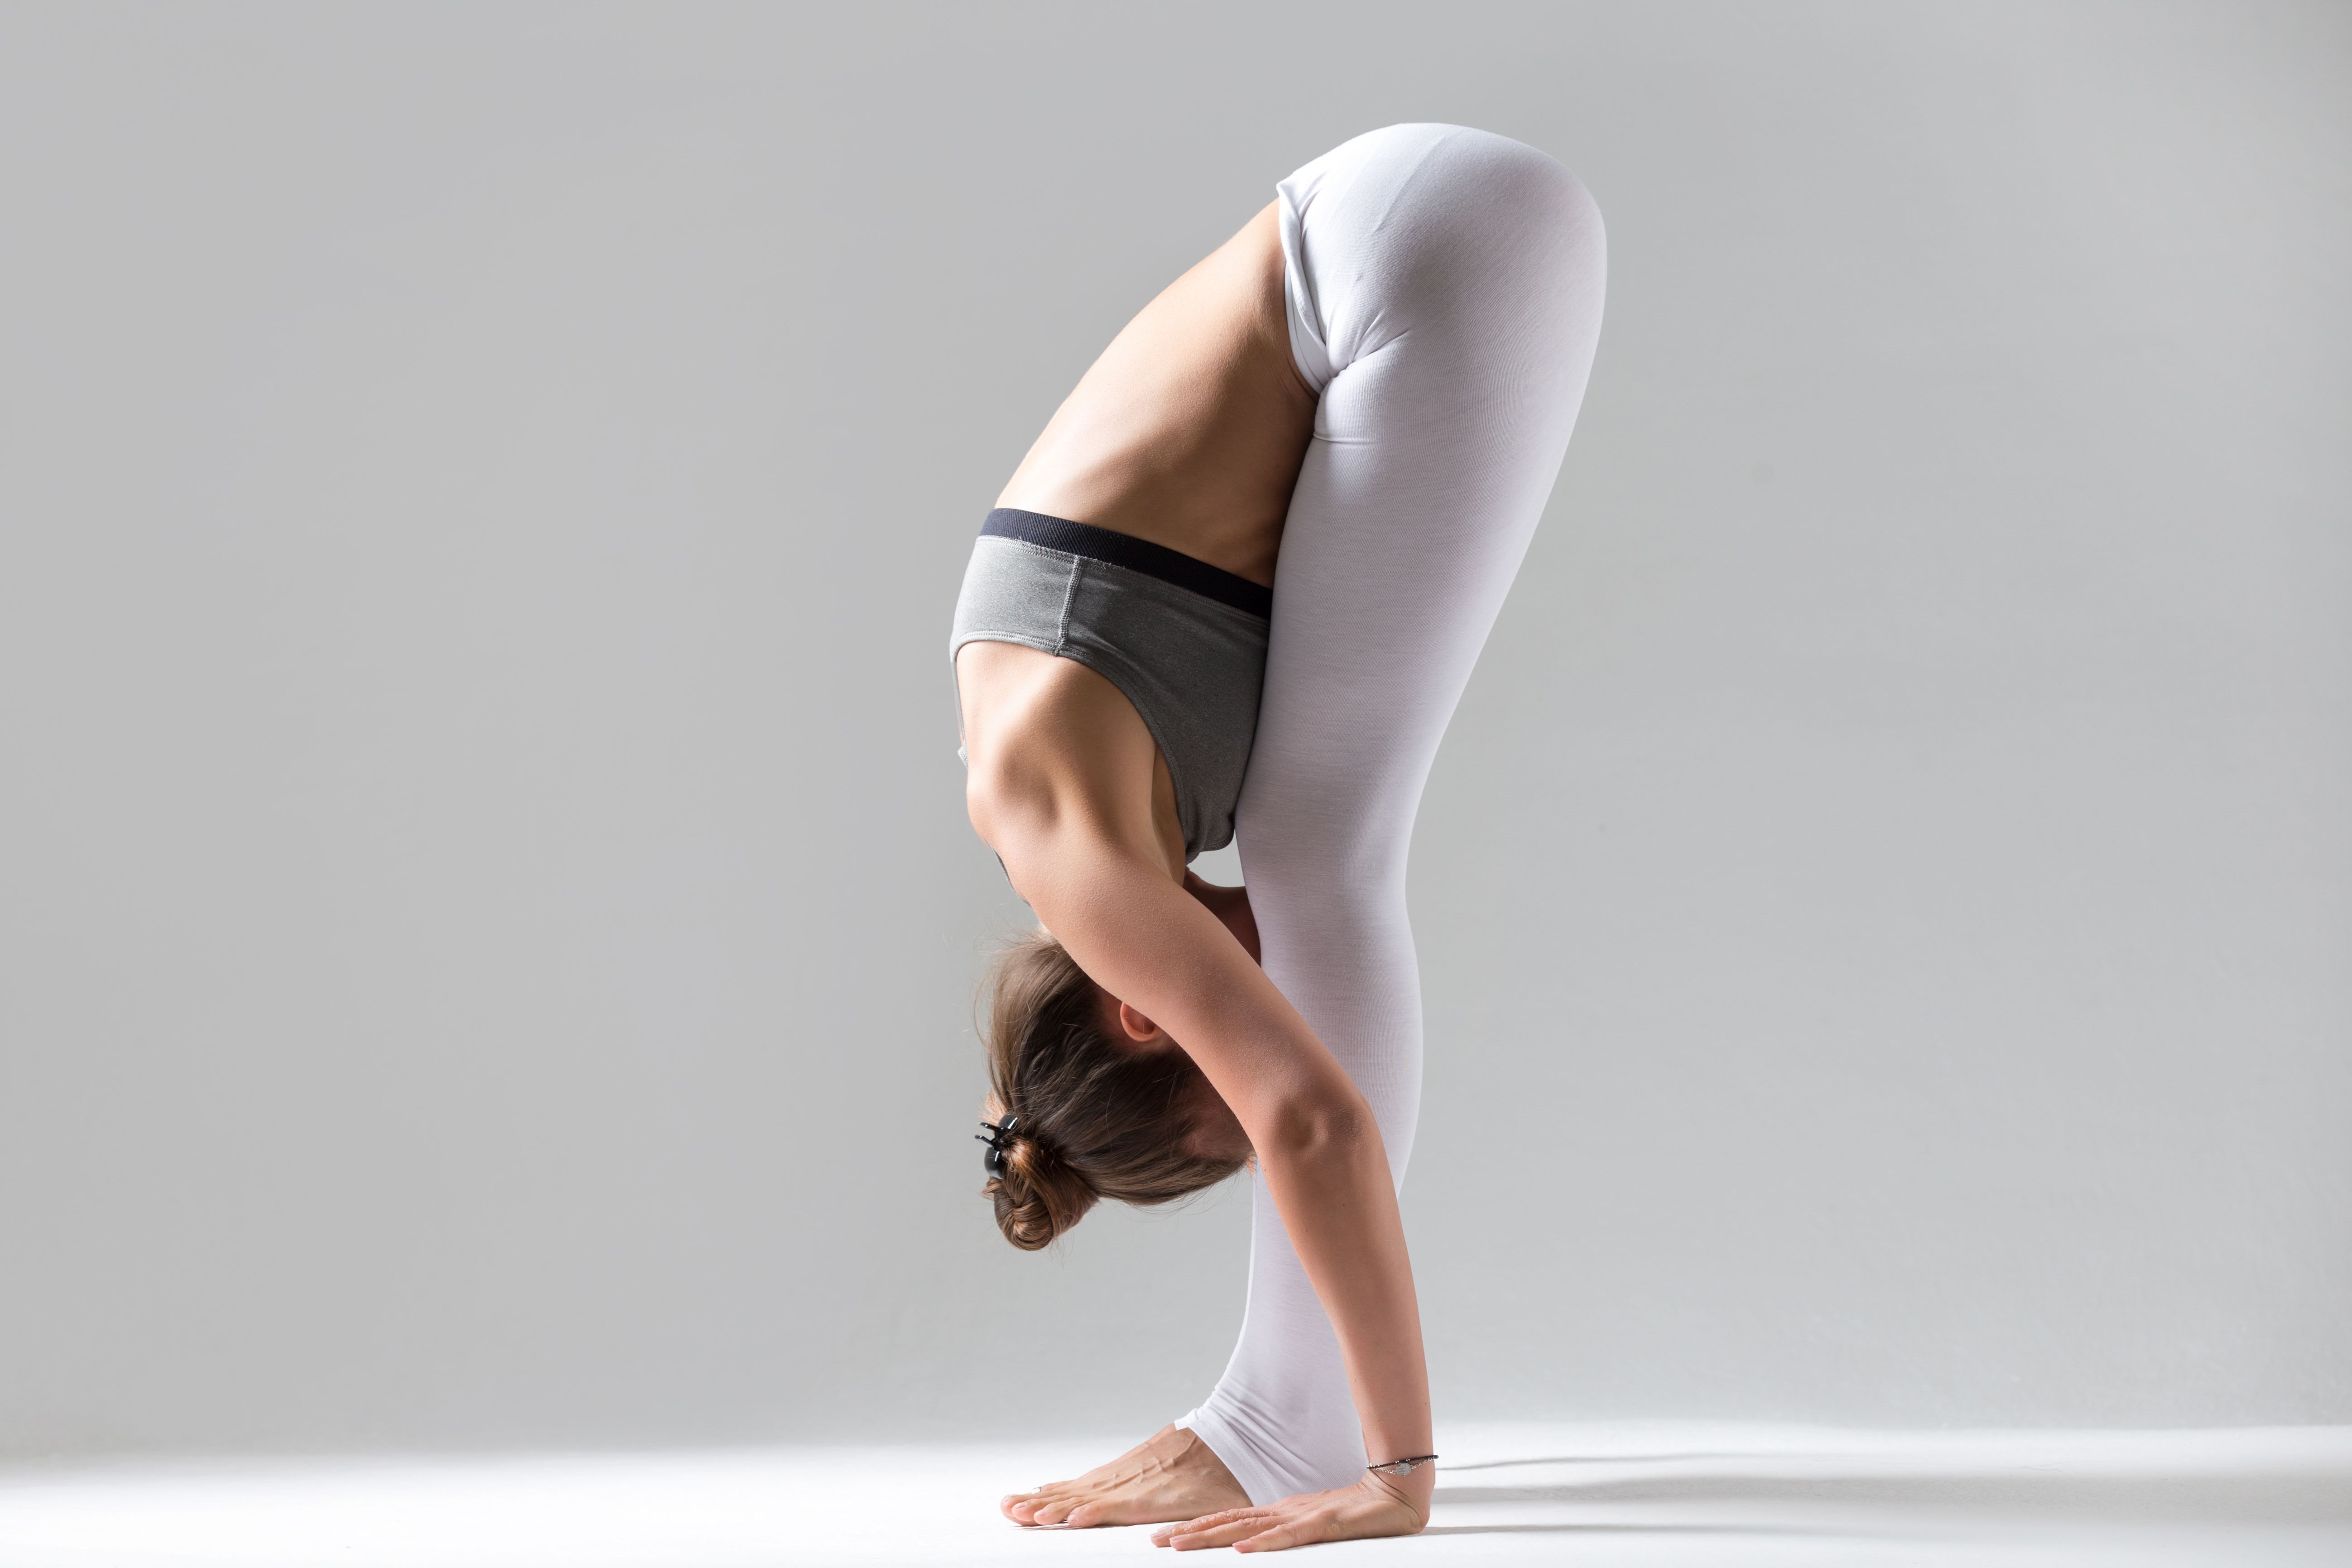
Continue folding your body and arms until your fingertips touch the floor, or your palms are parallel to the floor. Combine with Pranayama and hold here for 2 minutes.
On inhale, return to Tadasana and relax your legs and spine.
2. Prasarita Balasana (Wide Child Pose): Kneel on the mat and spread your knees to match the width of the mat. Make sure the tops of your feet are touching the floor, and your big toes are touching. Slowly stretch your arms forward and fold your body forward, lowering your belly to the ground until it rests on your thighs.

Touch the floor with your stretched palms and lower your forehead to rest on the floor. Make sure your hips and shoulders are relaxed, and that your spine is lengthened. This pose is a great way to lengthen your ankles, thighs, and hips and relieve back pain.
Utthita Padangusthasana Variations to Consider
Want to ease or level up your primary practice? Here are a few other variations to try:
1. Big Toe Pose in Front: This is an excellent variation for intermediate yogis, since extending the leg at one side requires more balance.
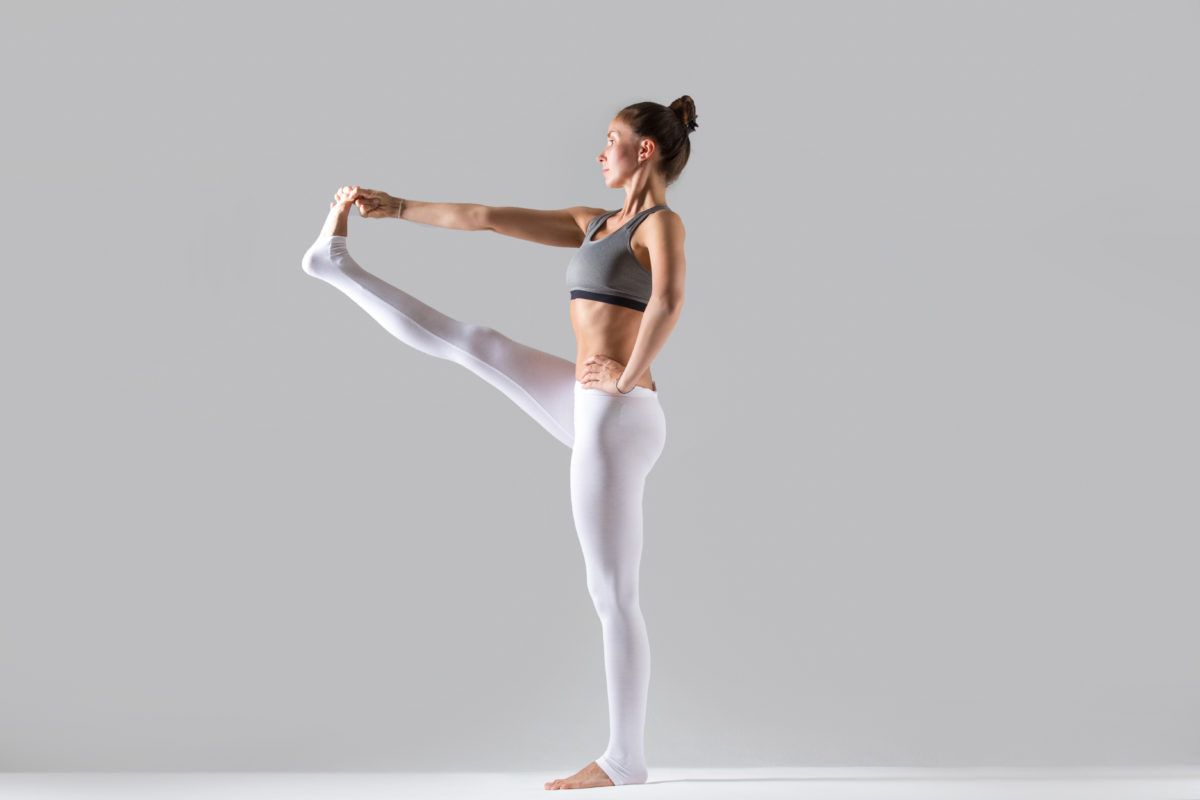
Start from Tree pose and hold the big toe of your lifted leg. Rather than extending the leg on the side, stretch your leg in front and hold the position for 30 seconds on each side.
2. Parivrtta Hasta Padangusthasana (Revolved Big Toe Pose): Get into Utthita Padangusthasana, and stretch your free arm toward the back of your mat. Next, slowly twist your tailbone and extend your leg on the reverse side while keeping your gaze on your hand behind you.
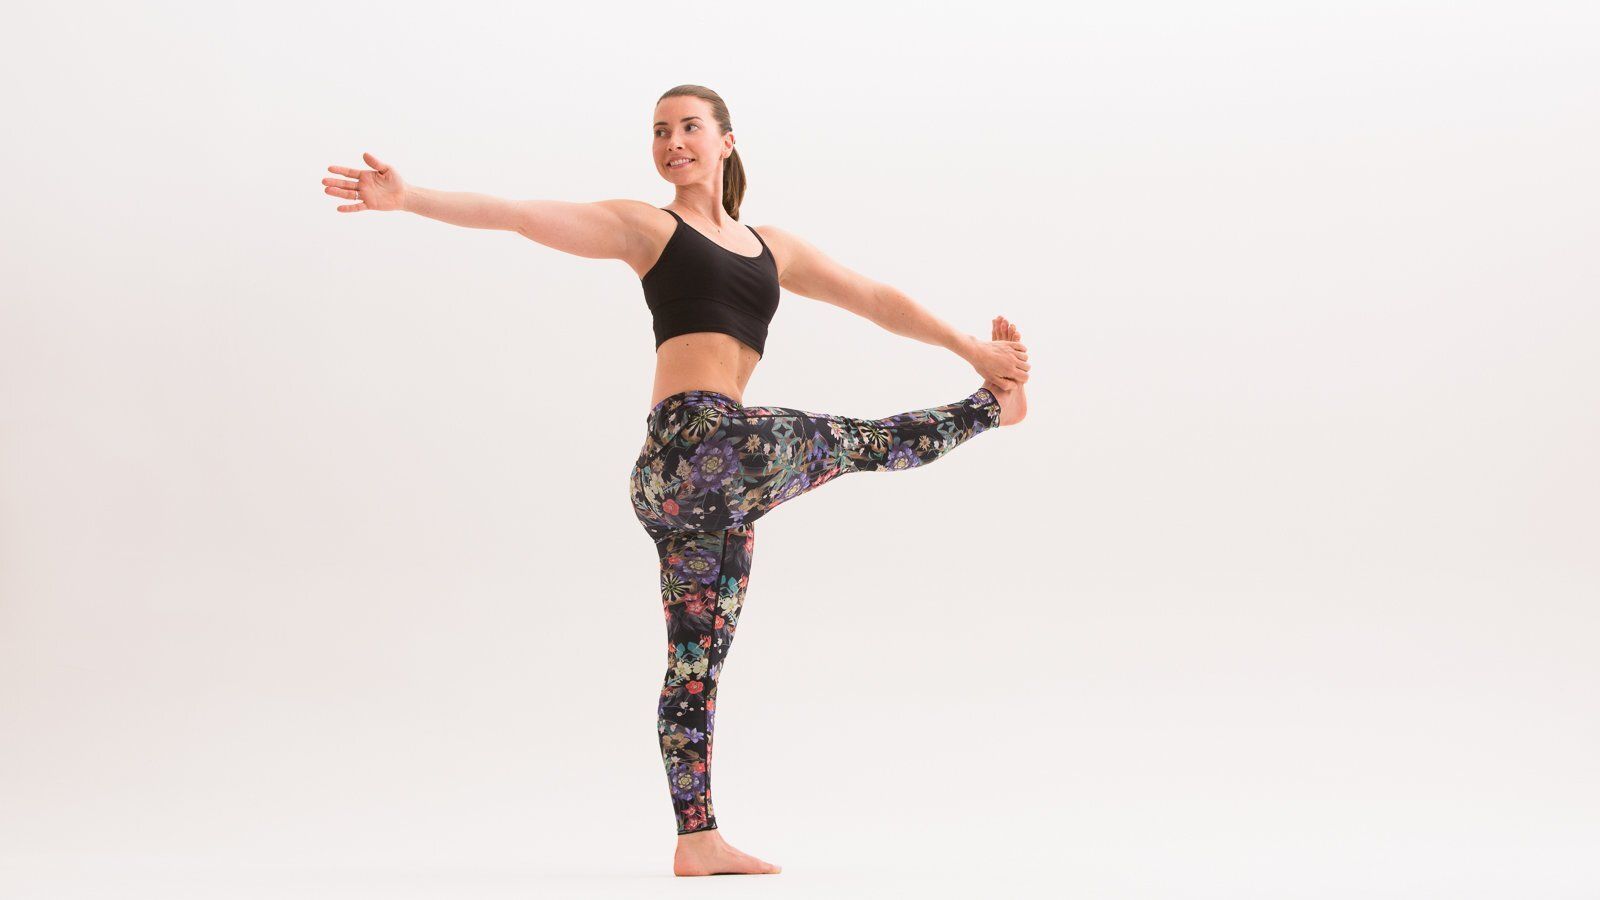
Maintain the pose for 5 to 10 breaths and repeat the process on the other leg.
Enjoy a Free 1-on-1 Session with a Coach!
Receive personalized guidance tailored to your unique fitness goals, live with a dedicated coach—no credit card required.
Frequently Asked Questions about Utthita Padangusthasana
Utthita Hasta Padangusthasana is a modern standing single-leg yoga pose. In this position, one leg is placed on the ground, and the big toe of the other leg is held in extension.
Beginners should start by working on their lower body flexibility and core balance with modified variations of this asana to build strength for the main pose.
The following are some benefits of Utthita Hasta Padangusthasana:
- Increases focus.
- Improves balance.
- Opens the arms and shoulders.
- Strengthens the lower body and core.
- Burns lower body fat and tones the legs.
- Lengthens the spine, hamstrings and glutes.
Extended bent leg and side leg balance with wall support are some easy variations for Parivrtta Utthita Hasta Padangusthasana that you can try.
Avoid performing Utthita Padangusthasana if you are pregnant, menstruating, or if you have knee arthritis or a recent injury. You may also want to avoid this pose if you are experiencing severe stress or fatigue.


.webp)
%20(7).jpg)
