What is Paschimottanasana (Seated Forward Bend)?
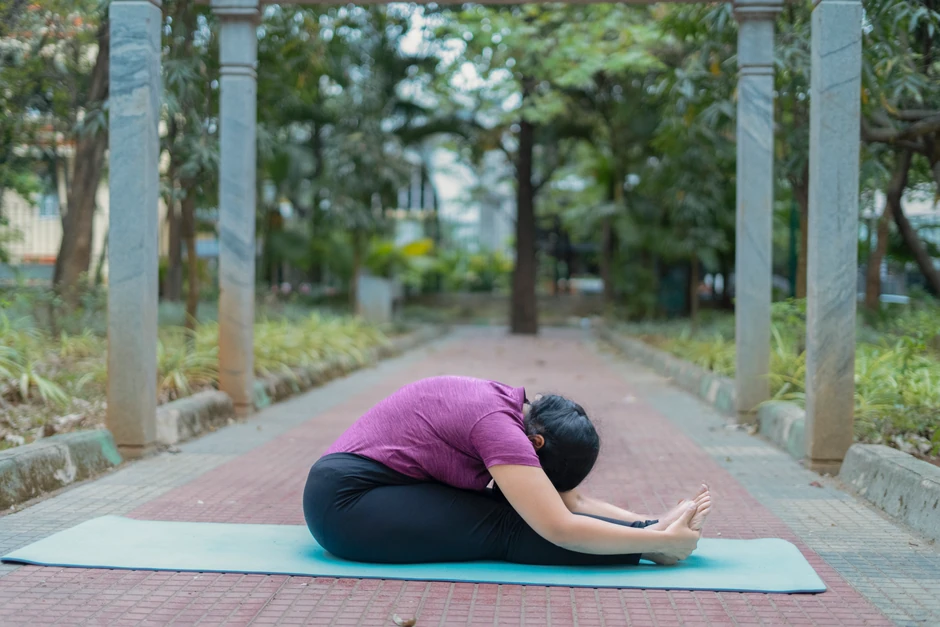
Paschimottanasana, commonly known as Seated Forward Bend, is a foundational seated yoga posture in which the body folds forward from the hips over extended legs. This calming posture stretches the entire back body, lengthens the spine, supports digestion, and helps regulate the nervous system—making it one of the most therapeutic forward bends.
When practiced with bent knees and appropriate support, Paschimottanasana is accessible to beginners without losing its depth. It works progressively on the hamstrings, spine, and nervous system, offering meaningful benefits at every stage. While it is often introduced early in yoga classes, its calming and corrective effects make it a posture that practitioners keep coming back to.
Paschimottanasana: Overview & Meaning of Seated Forward Bend
The name Paschimottanasana, pronounced PASH-chee-moh-tan-AHS-anna, comes from three Sanskrit words: paschima (west or back of the body), uttana (intense stretch or extension), and asana (pose). Together, the name means “an intense stretch of the back side of the body.”
In traditional yoga practice, practitioners faced east toward the rising sun. As a result, the back of the body faced west, giving rise to the poetic description of stretching the “west side.” On a symbolic level, forward folds like Paschimottanasana represent turning inward, surrender, and letting go. As the body folds toward itself, attention naturally shifts away from external distractions and toward internal awareness. This inward movement is one reason the pose has long been associated with calmness and introspection.
In the Hatha Yoga Pradipika, Paschimottanasana is described as one of the most beneficial postures for regulating energy and calming the mind. Traditionally, the pose was practiced for extended periods to prepare the body and nervous system for meditation. It was believed to balance internal energies and support healthy digestion and elimination.
In modern yoga, Paschimottanasana is widely taught as a foundational seated forward fold. It appears in Hatha, Vinyasa, Yin, and restorative practices, often near the end of a session to encourage relaxation. Today, it is commonly recommended for people who sit for long hours, experience mental fatigue, or have tight hamstrings and lower-back tension.
At a Glance
- Sanskrit Name: पश्चिमोत्तानासन (Paschimottanasana)
- Pronunciation: PASH-chee-moh-tan-AHS-anna
- English Name: Seated Forward Bend
- Pose Type: Seated forward fold, cooling pose
- Level: Beginner (with bent knees) to Intermediate
- Duration: 30 seconds to 5 minutes
- Main Benefits: Hamstring flexibility, spinal length, stress relief, and digestion support
- Props Commonly Used: Strap, blanket, bolster
Benefits of Paschimottanasana (Seated Forward Bend)
Paschimottanasana offers benefits that go far beyond flexibility. Because it works simultaneously on the muscles, spine, nervous system, and internal organs, it is considered one of yoga’s most holistic seated postures. When practiced with proper alignment and steady breathing, it supports both physical ease and mental clarity.
Physical Benefits
- Deep hamstring stretch: Lengthens the hamstrings, which commonly tighten due to prolonged sitting, driving, and limited movement.
- Stretches the entire back body: Targets the calves, backs of the knees, spine, and upper back in one integrated movement.
- Improves spinal flexibility: Encourages controlled forward flexion while maintaining spinal length and mobility.
- Releases lower back tension: Gentle traction helps reduce compression in the lumbar spine when practiced with bent knees.
- Supports a healthier posture: Reduces posterior-chain tightness that can pull the pelvis into misalignment and contribute to slouching.
- Improves hip mobility: Trains a safe hip hinge pattern that protects the lower back during daily movement.
Digestive & Organ Health Benefits
- Stimulates digestive organs: Gentle compression massages the liver, kidneys, pancreas, and intestines.
- Supports healthy digestion: Activates digestive fire (agni), which may help reduce bloating and sluggish digestion.
- Relieves constipation: Forward folding encourages downward-moving energy and supports elimination.
- Supports metabolic function: Regular stimulation of abdominal organs helps maintain metabolic balance.
- Aids pelvic circulation: Improves blood flow to the lower abdomen and pelvic region.
Mental & Nervous System Benefits
- Calms the nervous system: Activates the parasympathetic “rest-and-digest” response, reducing stress and anxiety.
- Reduces mental fatigue: The inward focus and steady breathing help quiet mental overload.
- Encourages emotional release: Forward folds are traditionally associated with letting go and surrender.
- Improves focus and mindfulness: Holding the pose with awareness trains present-moment attention.
- Supports better sleep: Evening practice can help prepare the body and mind for rest.
Energetic & Therapeutic Benefits
- Balances Apana Vayu: Supports grounding, elimination, and stability through downward-moving energy.
- Encourages inward energy flow: Helps shift attention from external stimulation to internal awareness.
- Prepares the body for meditation: Traditionally practiced before seated meditation due to its calming effect.
- Supports stress-related conditions: May help with mild anxiety, fatigue, and tension-related discomfort when practiced gently.
These benefits are best experienced when the pose is practiced with proper alignment and appropriate modifications.
Book a free 1-on-1 session to practice the pose with expert guidance.
How to Do Paschimottanasana (Seated Forward Bend): Step-by-Step Guide
Paschimottanasana looks simple, but the correct technique makes all the difference.
Part 1: Preparing for the Pose
If your hamstrings feel tight or your lower back rounds easily, keep a yoga strap and folded blanket nearby. Practicing on an empty stomach (2–3 hours after meals) allows the fold to feel more comfortable and supportive.
Warm-Up Poses for Paschimottanasana
- Cat–Cow Pose (Marjaryasana–Bitilasana): Gently warms the spine and prepares it for forward flexion.
- Child’s Pose (Balasana): Softly stretches the back body and calms the nervous system before folding.
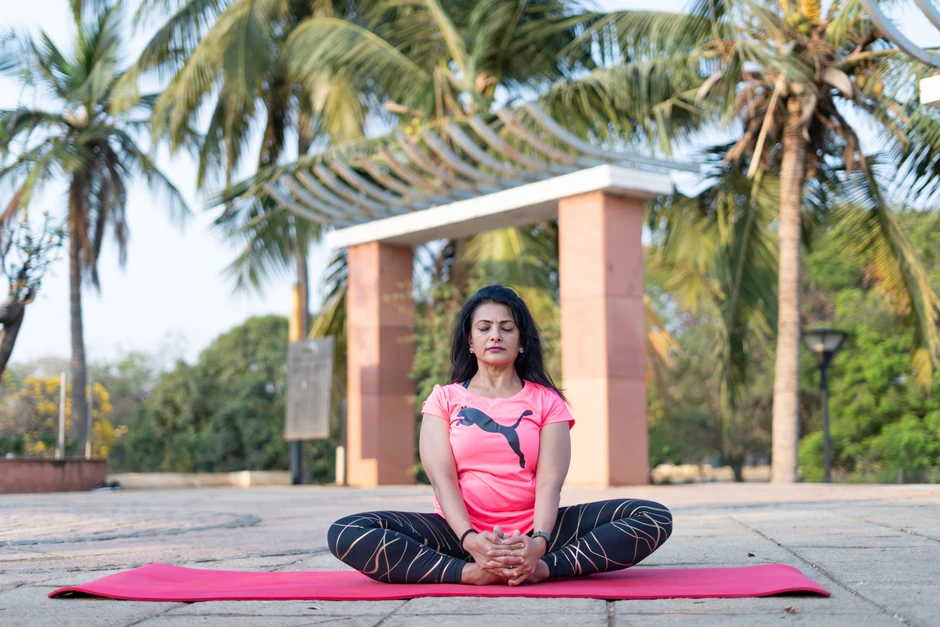
- Bound Angle Pose (Baddha Konasana): Opens the hips and inner thighs, reducing strain in the seated forward fold.
How to Do Paschimottanasana: Step-by-Step Guide
- Sit on the mat with legs extended straight in front of you. Ground evenly through your sitting bones, flex your feet, and lengthen the spine upward.
- Place your hands beside your hips and take 2–3 steady breaths to establish alignment.
- Inhale and sweep your arms overhead. Lift through the chest and create space between the ribs and hips.
- Keep the spine tall, and the shoulders relaxed away from the ears.
- Exhale and fold forward from the hip creases, not the waist. Lead with the chest rather than the head.
- Bend the knees as much as needed to keep the spine long and supported.
- Hold wherever you can without strain:
- Feet or ankles
- Shins
- A yoga strap looped around the feet
- Avoid pulling yourself forward. The arms assist lightly; the fold comes from the hips.
- With each inhale, lengthen the spine. With each exhale, soften slightly deeper only if the body allows.
- Let the head, neck, and shoulders relax. Keep the breath slow and steady.
- Stay in the pose for:
- Beginners: 30–60 seconds
- Intermediate: 1–3 minutes
- Advanced: 3–5 minutes
- There should be sensation, not pain. Ease out if the lower back or hamstrings feel strained.
- Engage the core gently. Inhale to lift the torso back up, leading with the chest.
- Lower the arms and return to Staff Pose. Pause for 2–3 breaths before moving on.
Key Alignment Cues
- Bend the knees if the spine rounds
- Fold from the hips, not the lower back
- Chest moves toward thighs, not head to knees
- Keep your shoulders relaxed and breath steady
- Use props without hesitation
Common Mistakes to Avoid
- Forcing straight legs
- Rounding aggressively through the lower back
- Pulling with the arms
- Holding the breath
- Bouncing to go deeper
Try these free group classes to improve your flexibility and perform Seated Forward Bend with ease.

Yoga for Building Strength and Flexibility

Flow into Flexibility: Beginner Vinyasa Yoga
Paschimottanasana Variations
Paschimottanasana can be adapted for every flexibility level, from complete beginners to advanced practitioners. These variations help you practice safely, target specific benefits, and progress gradually—without forcing depth.
Beginner & Supportive Modifications
1. Paschimottanasana with Bent Knees
Protects the lower back and hamstrings while allowing a safe forward fold.
- Sit in Staff Pose and bend the knees generously.
- Fold forward, resting the torso toward the thighs.
- Hold shins, ankles, or use a strap.
- Focus on spinal length, not straight legs.
2. Paschimottanasana with Strap
Makes the pose accessible when hamstrings are tight.
- Loop a strap around the balls of the feet.
- Hold the strap ends with arms relaxed.
- Inhale to lengthen the spine.
- Exhale to hinge forward without pulling.
3. Elevated Hips (Blanket Support)
Tilts the pelvis forward to reduce strain and improve alignment.
- Sit on a folded blanket or cushion.
- Extend legs forward in Staff Pose.
- Lift the spine on inhale.
- Fold forward on exhale.
4. Supported Paschimottanasana (Bolster)
Deeply calming, restorative version for stress relief.
- Place a bolster lengthwise over the legs.
- Fold forward and rest the torso on the bolster.
- Let arms relax by the sides.
- Hold for several minutes with slow breathing.
Intermediate Variations
5. Wide-Legged Seated Forward Fold (Upavistha Konasana)
Stretches hamstrings and inner thighs with less spinal compression.
- Sit with legs wide apart.
- Lengthen the spine on inhale.
- Fold forward between the legs.
- Rest hands on floor or blocks.
Advanced Variations
6. Ardha Baddha Padma Paschimottanasana
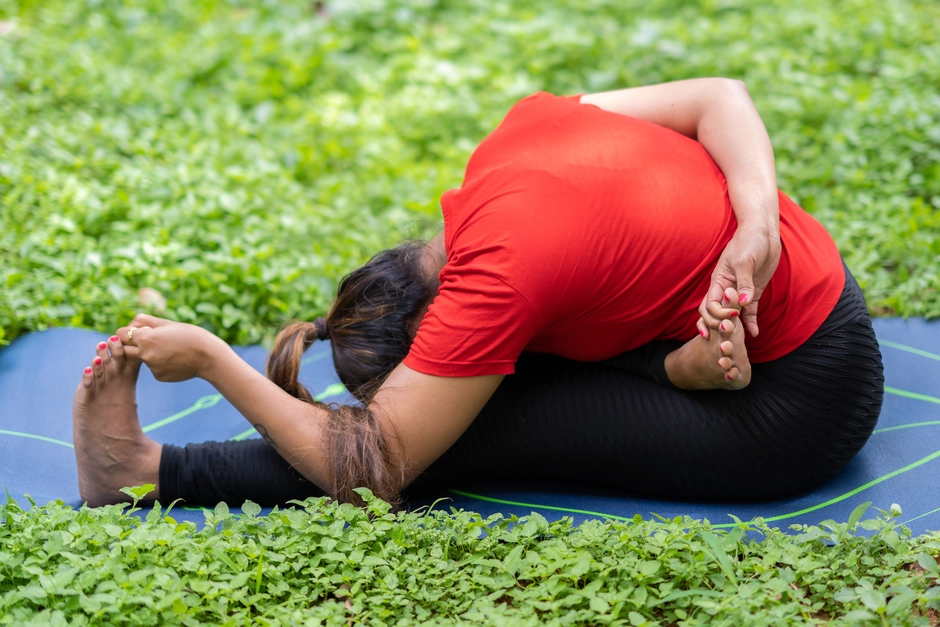
Combines hip opening with deep forward folding.
- Bend one leg into half lotus.
- Bind the arm behind the back to hold the lotus foot.
- Fold forward over the extended leg.
- Switch sides carefully.
7. Urdhva Paschimottanasana
Stretches hamstrings without spinal compression.
- Lie on your back and lift both legs upward.
- Hold feet or use a strap.
- Keep legs straight or slightly bent.
- Breathe steadily while lengthening.
8. Paschimottanasana with Arm Bind
Adds shoulder opening to the forward fold.
- Fold forward in Paschimottanasana.
- Reach arms around the legs.
- Clasp hands behind the calves.
- Maintain gentle spinal length.
Other Variations
9. Ardha Paschimottanasana (Half Forward Bend)
Builds postural strength and prepares the body for deeper folding.
- Sit upright with legs extended.
- Hinge forward halfway with a long spine.
- Place hands on shins or floor.
- Maintain length without collapsing.
10. One-Leg Seated Forward Fold (Janu Sirsasana)
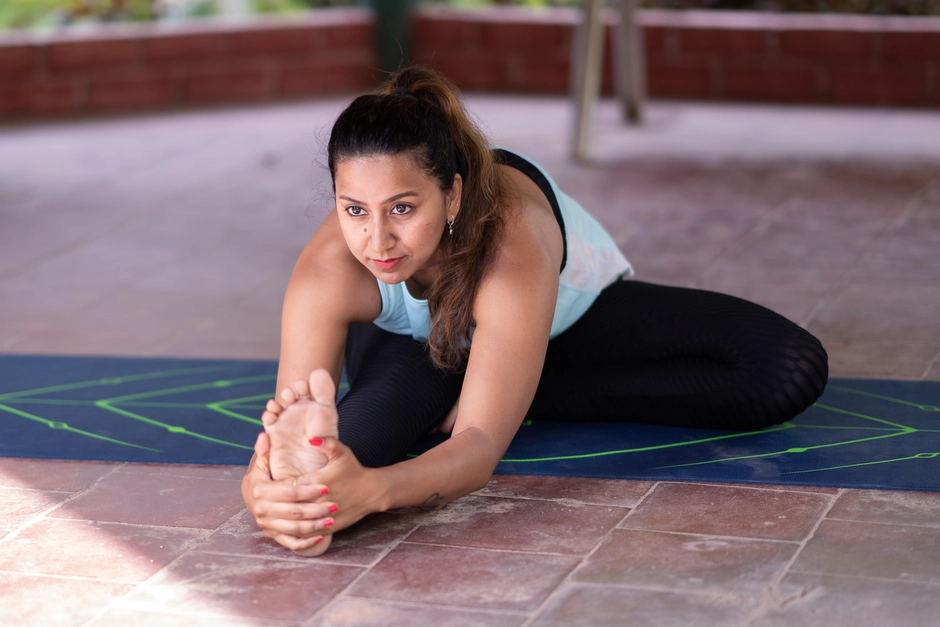
Targets one hamstring at a time, improving symmetry.
- Bend one knee, sole of foot to inner thigh.
- Inhale to lengthen the spine.
- Exhale and fold over the straight leg.
- Switch sides after holding.
Paschimottanasana: Precautions & Contraindications
Paschimottanasana is a deeply calming and beneficial pose when practiced correctly. However, because it places sustained stretch on the hamstrings, spine, and nervous system, certain conditions require modification, caution, or complete avoidance.
Avoid Paschimottanasana If You Have
- Acute or severe lower back injury: Forward folding can worsen disc-related pain or spinal inflammation.
- Herniated or slipped disc: Deep flexion may increase pressure on spinal discs.
- Recent abdominal or spinal surgery: Avoid until fully cleared by a healthcare professional.
- Acute hamstring tear or strain: Stretching too soon can delay healing.
- Severe sciatica during flare-ups: Forward folds may aggravate nerve symptoms.
In these cases, choose gentle alternatives such as supine hamstring stretches or supported Child’s Pose.
Practice with Caution & Modifications In Case Of
- Tight Hamstrings (very common): Keep knees bent, use a strap or bolster, prioritize spinal length over depth, and progress gradually over weeks or months.
- Chronic Lower Back Sensitivity: Bend knees generously, hinge from the hips, engage the core lightly, and exit immediately if discomfort increases.
- Mild Sciatica or Nerve Sensitivity: Practice shallow folds only, avoid long holds, and stop if tingling or sharp sensations appear.
- High Blood Pressure (controlled): Keep holds short (30–60 seconds), avoid long static folds, and rise slowly to prevent dizziness.
- Neck Issues: Keep the neck neutral rather than letting the head hang heavily, and come out if strain is felt.
- Knee Concerns: Maintain a soft bend in the knees, avoid locking or hyperextension, and engage the thigh muscles gently for support.
- Pregnancy: Practice with legs wider apart, avoid compressing the abdomen, discontinue deep forward folds in the third trimester, and seek prenatal yoga guidance.
Key Safety Guidelines
Do’s:
- Warm up the spine and hamstrings before folding
- Bend your knees whenever your lower back rounds
- Use props freely (strap, blanket, bolster)
- Move slowly in and out of the pose
- Breathe steadily and comfortably
Don’ts:
- Force straight legs
- Bounce or pull yourself deeper
- Hold the breath
- Ignore pain or nerve sensations
- Rush progress or compare flexibility
Exit the pose if you experience:
- Sharp pain in the lower back or hamstrings
- Shooting pain, numbness, or tingling down the legs
- Dizziness or nausea
- Difficulty breathing
If symptoms persist, consult a qualified healthcare professional.
For a safe and effective practice, book a free 1-on-1 session today!
Related Yoga Poses
Here are some related yoga poses that can deepen the benefits of Seated Forward Bend.
1. Janu Sirsasana (Head-to-Knee Pose)
Stretches one hamstring at a time, improving symmetry and flexibility.
- Sit with one leg extended and the other foot on the inner thigh.
- Inhale to lengthen the spine.
- Exhale and fold over the straight leg.
- Switch sides after holding.
2. Uttanasana (Standing Forward Fold)
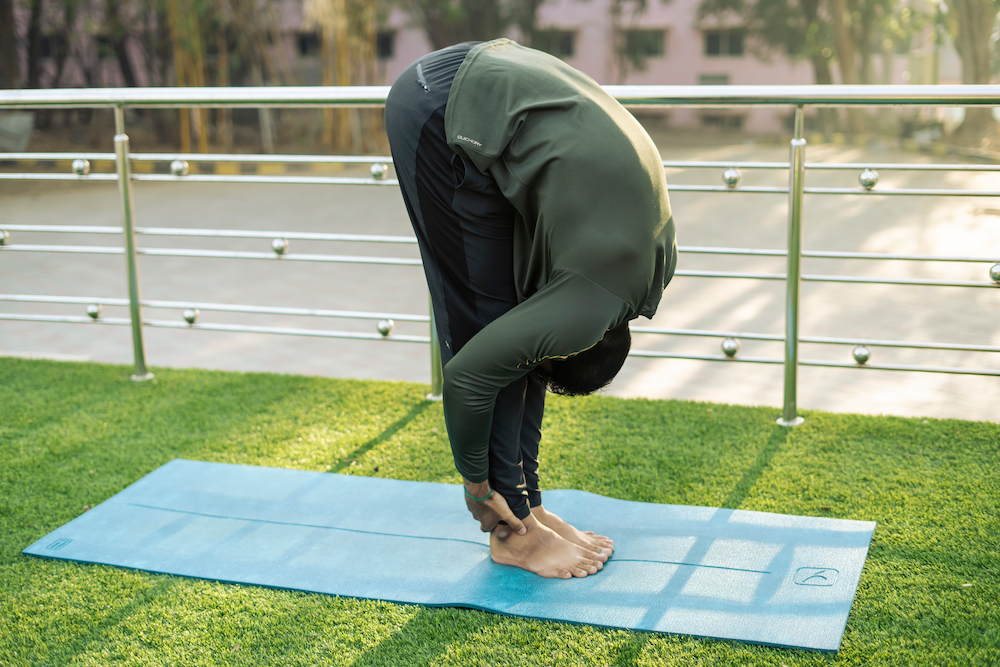
Lengthens the posterior chain and complements seated forward bending.
- Stand tall with feet hip-width apart.
- Hinge forward from the hips.
- Bend knees if needed to protect the back.
- Let the head and arms relax.
3. Ardha Uttanasana (Standing Half Forward Bend)
Builds spinal strength and reinforces safe folding mechanics.
- From standing or Uttanasana, lift the torso halfway.
- Place hands on shins or blocks.
- Keep spine long and chest open.
- Gaze slightly forward.
4. Ardha Matsyendrasana (Seated Spinal Twist)
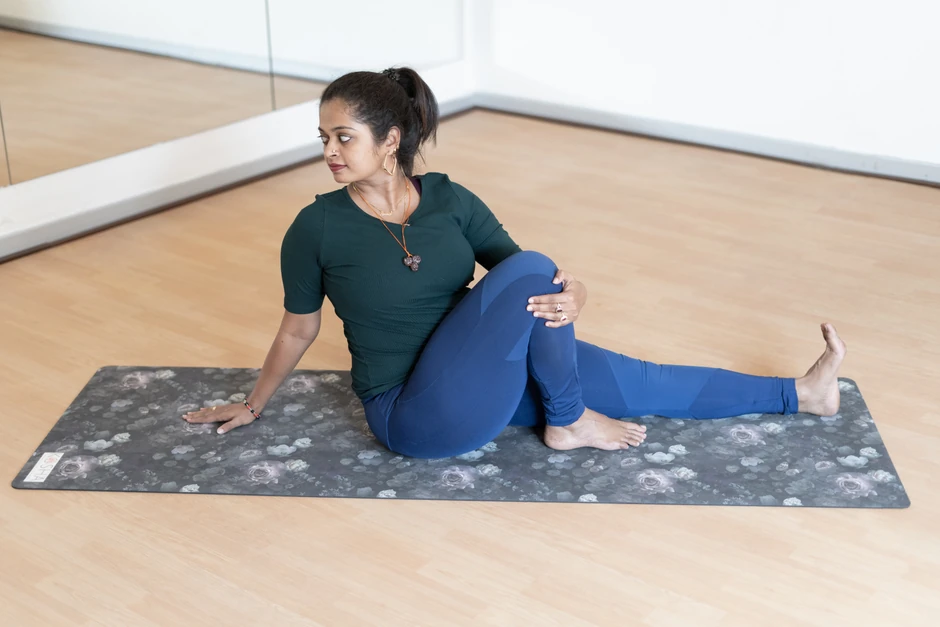
Releases spinal tension after forward bending.
- Sit tall with one knee bent over the opposite leg.
- Inhale to lengthen the spine.
- Exhale and twist gently toward the bent knee.
- Repeat on the other side.
Enjoy a Free 1-on-1 Session with a Coach!
Receive personalized guidance tailored to your unique fitness goals, live with a dedicated coach—no credit card required.
Frequently Asked Questions
Paschimottanasana improves hamstring flexibility, lengthens the spine, and releases lower-back tension. It also stimulates digestive organs, reduces stress, and promotes mental calmness. When practiced regularly, it helps counter the effects of prolonged sitting and supports better posture.
Yes, Paschimottanasana is beginner-friendly when practiced with bent knees and props. Using a strap or sitting on a folded blanket allows beginners to maintain spinal length safely. Straight legs are not required to gain the benefits of the pose.
For a beginner-friendly practice, book a free 1-on-1 session today!
Hamstring tightness is extremely common due to prolonged sitting, limited stretching, and lifestyle habits. Tight hamstrings restrict forward folding and can pull on the lower back. Practicing with bent knees and consistency over time helps improve flexibility safely.
Gentle Paschimottanasana can help relieve tension-related lower back discomfort when done correctly. However, it should be avoided during acute pain, disc issues, or recent injury. Always hinge from the hips, bend the knees, and stop if pain increases.
Paschimottanasana is a seated forward bend, while Uttanasana is a standing forward fold. Both stretch the posterior chain, but Paschimottanasana is more grounding, easier on balance, and better suited for longer, calming holds.
Common mistakes include forcing straight legs, rounding the lower back, pulling aggressively with the arms, and holding the breath. Keeping the knees bent and prioritizing spinal length helps avoid strain and injury.


.webp)
%20(7).jpg)
