What is Gomukhasana (Cow Face Pose)?
Gomukhasana is an ancient seated Hatha Yoga asana, widely known for its upper body relaxation and pelvis opening benefits. This seated posture allows you to align your back, stretch your upper body, and increase flexibility in your legs.
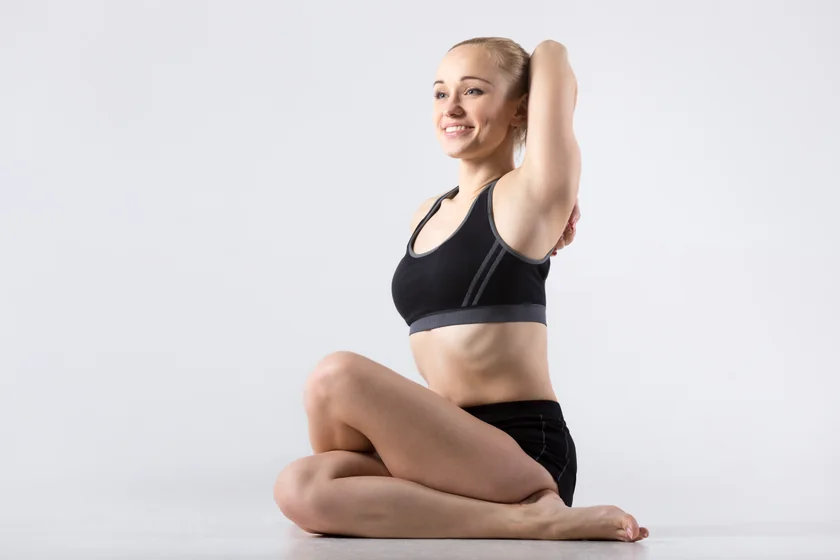
In the Cow's Face posture, both the legs are clasped in a way that resembles a cow's face, and the arms at the back are held in a formation that resembles a cow's ears.
Overview & Etymology
The name Gomukhasana is a combination of a few Sanskrit words, like - Go means "Cow," Mukha means "Face," and Asana means "Pose."
The Darshana Upanishad first explained this ancient pose; it was written in the 4th century describing classical yogic stages and Kundalini concepts.
In India, a cow is worshiped as a sacred animal, Kamadhenu. Kamadhenu seems like a cow, and she is the mother of all cows.
According to Hindu Mythology, "Kamadhenu," is the daughter of Daksha (creator of the earth). Vedas also pour light on the facts, like the four legs of Kamadhenu symbolize the four main Vedas.
Kamadhenu's shoulders are a symbol of Agni (god of fire), its horns symbolize the gods, and she's the nurturer of the divine. All Hindu gods reside within this sacred animal soul.
Sanskrit Name: गौमुखासन Pronunciation: go-moo-KAHS-anna
Pose Type: Seated Hip Opener Also known as: Cow Face Pose
Strengthens: Lower Body and Upper Back
Stretches: Spine, Shoulder, Arms, Pelvis, and Ankles
Health Benefits of Gomukhasana
Strengthens the hip joints.
Strengthens the arms and spine.
Reduces chronic pain around the knees and lower back.
With regular practice, this pose can reduce Sciatica pain.
Increases blood circulation around the pelvis and upper body.
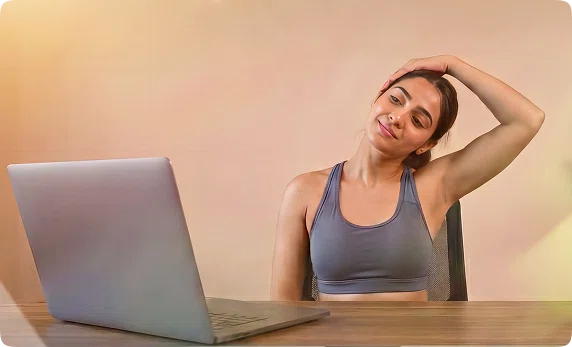
Improves neck and spine alignment, which also improves posture.
Performing meditation in this pose for long durations can help reduce stress and anxiety.
When to Avoid Performing Gomukhasana
Avoid if you have severe knee joint or hip joint pain.
Avoid this pose if you have chronic neck or spine pain.
Avoid this asana after spine, back, neck, or pelvis surgery.
If you are a sciatica patient, do not cross your legs in this pose because it can increase pressure around the sciatica nerve.
How to do Gomukhasana (Cow Face Pose)
Gomukhasana is a therapeutic yoga asana that can help you relax your spine, shoulders, and pelvis. The practice of Gomukhasana is divided into four different phases. Let's explore them one by one.
Part 1 - Preparatory Poses for Gomukhasana
The opening of the chest, shoulders, spine, and glutes is crucial before starting the Cow Face pose. Below is a list of warm-up yoga asanas that will help you warm up.
1. Surya Namaskar (Sun Salutations) - This yoga flow is perfect for activating all the essential muscles and body parts for Gomukhasana.
.jpg")
Just 5 to 10 rounds of Surya namaskar can increase blood circulation in your shoulders, neck, spine, pelvis, and ankles.
2. Sukhasana (Easy Pose) - This posture is also known as the foundation of all seated yoga asanas. This easy pose helps beginner yogis gain confidence in sitting with their legs crossed, which further strengthens the knee and ankle joints.
.jpg")
Practicing this pose for 5 to 10 minutes can help build stability in the vertebral column, pelvis, and legs due to the internal rotation of the glutes.
3. Baddha Konasana (Cobbler's Pose) - Moving from the Sukhasana pose to Cobbler's pose will help you activate your inner thigh muscles.
.jpg")
To move into this pose, simply change the position of your crossed legs and bend them, touching your feet together in Namaste formation. Hold this pose for five minutes. You can also lean forward and hold the pose for five more minutes to deepen the stretch in your glutes and thighs.
Part 2: Step-by-Step Instructions to Perform Gomukhasana
Here are the following steps for practicing the Cow Face pose:
Step 1: In the center of your yoga mat, sit upright with your head, neck, and spine balanced evenly.
Step 2: Start with Seated Staff Pose. Keep your legs stretched out in a straight line.
Step 3: Bend both your legs from your knees. Now, move your right leg over your left thigh and rest your right thigh on top of it.
Step 4: Your knees will now be stacked on top of one another, and both feet should be on opposite sides, equal distance from the hips.
Step 5: Now, focus on breathing deeply for a few seconds. Inhale deep, and stretch your right arm up, bending it from the elbow, and bringing your right hand behind your back.
Step 6: Now, bend your left arm from your elbow and extend it behind your back from the side of your left oblique.
Step 7: Exhale and deeply inhale again as both your hands clasp each other.
Step 8: Straighten your spine, interlock both your hands, open your chest, engage your pelvis and close both your eyes as you hold your breath here for a few seconds.
Step 9: Exhale and slowly release your clasped hands from behind your back.
Step10: Inhale, exhale again, release your legs from the stacked posture, and sit back into the staff pose.
Breath Awareness:
Inhale steadily while engaging the muscles.
Exhale deeply while releasing the posture.
Performance Duration for Beginners: Hold this pose for 30 to 60 seconds.
Performance Duration for Advanced: Hold this pose for 1 to 5 minutes.
Part 3: Things to Keep in Mind
It’s important to keep a few things in mind before starting the Gomukhasana practice:
Be mindful of your alignment: In this pose, alignment is everything. If you cannot align your neck, spine, and tailbone in one straight line, it will be hard for you to open and relax the body.
Don't over-push: If you don't feel flexible enough to clasp your hands behind your back or cross your legs, there is no need to force this pose on your body. Only flex as much as your body allows you to.
Part 4: Relaxing Poses After Gomukhasana
Below is a list of some easy, relaxing yoga stretches that you can practice after Gomukhasana:
1. Paschimottanasana (Seated Forward Bend Pose): Post-practice, start your relaxation routine from the Staff pose. Now, stretch both the arms over your head in the air and lean down onto your legs.
.jpg")
As you lean forward, keep your core tight and flex both your arms straight in front of you. Hold this pose for a few minutes until your spine is completely relaxed.
2. Pawanmuktasana (Wind-Releasing Pose): Now, lie down on the mat with your back touching the ground and bend your legs.
.jpg")
Lift your neck and try to hug both your legs with your arms. Hold this pose for a few minutes and allow your tailbone to release any tension.
3. Balasana (The Child’s Pose): Inhale and move into a table-top position, slowly stretching both arms forward. Now, exhale and extend your upper body forward as you place your torso between your legs and sit back.
.jpg")
Hold this position here until your spine, shoulder, and arms feel relaxed, and release this pose.
Gomukhasana Variations to Consider
Below are a few Cow Face pose variations for all types of yoga practitioners. You can choose any variation you feel comfortable adding to your current yoga journey.
1. Ardha Gomukhasana (Half Cow Face Pose): As the name suggests, this is not the full Cow Face posture. This variation will help prepare you for the final pose.
Half Cow Face pose can be practiced by yogis of all levels since it’s helping in learning how to build strength in seated yoga asanas.
Instead of bending both legs like in the Cow Face pose, bend only one leg. You can also bend forward with your arms extending forward to feel a deep stretch in your lower back, spine, and legs.
.jpg")
2. Shoelace Pose: If you struggle with the arms formation behind your back in the Cow Face pose, try this variation instead.
.jpg")
It’s a seated posture resembling the Cow Face pose with stacked legs, but both your arms are resting at your side, holding your feet.
3. Supta Gomukhasana (Reclined Cow Face Pose):
If you wish to take your Gomukhasana practice even deeper, try this reclined variation. Simply lie down on your back on the yoga mat and get into the Shoelace pose.
.jpg")
This variation will help you get a deeper flexion in your glutes and thighs, making the blood circulate thoroughly and improving your lower body movement.

Enjoy a Free 1-on-1 Session with a Coach!
Receive personalized guidance tailored to your unique fitness goals, live with a dedicated coach—no credit card required.
Frequently Asked Questions about Gomukhasana
The Cow Face pose activates the dormant muscles in your upper back, armpits, and chest, and increases blood circulation around the shoulders and spine. Gomukhasana is most well-known for improving your sitting posture.
The following are steps for practicing Gomukhasana pose:
- Sit in the center of your yoga mat. Make sure that your spine is upright.
- Bend your right leg and place your left leg over it.
- Your legs should stack on top of each other on your thighs.
- Now lift your right arm, bend it from the elbow, and bring it behind your back.
- From below, bend your left arm behind your back and clasp both your hands together.
- Interlock your fingers and legs as you sit straight.
- Hold this pose for 1 to 5 minutes.
Gomukhasana helps work various muscles around the upper body and pelvis. For example, glutes, ankles, thighs, triceps, chest, shoulder blades, and spine, are all stretched very deeply in the Cow Face pose.
Surya Namaskar (Sun Salutation), Sukhasana (Easy Pose), Baddha Konasana (Cobbler's Pose), and Garudasana (Standing Eagle Pose) are different Gomukhasana preparatory poses that help activate the muscles in your body for a smoother practice.
People with neck, spine, back, or pelvis injuries, or who have recently undergone surgery should avoid doing Gomukhasana. Also, if you are a patient with ulcers, spondylitis, or piles, this yoga pose is not advisable.
The name “Cow Face pose,” is the literal translation of the combined Sanskrit words “Gomukhasana.” In this pose, the crossed legs resemble the shape of a cow’s mouth, the torso symbolizes the cow’s nose, and the arms interlocked at the back resemble the ears of a cow.
Related Articles on Padmasana

Yin vs Restorative Yoga: What’s the Difference?
Yin vs Restorative Yoga explained. Compare intensity, hold times, props, and benefits. Learn the key differences and choose the right slow yoga style for you.
.webp)
Detox Yoga Sequence: Refresh and Renew After Holiday Indulgence
Refresh and renew after holiday indulgence with this 12-pose detox yoga sequence. Gentle twists and mindful stretches for digestion, circulation, and energy.
%20(7).webp)
Yoga for Gut Health: How This Ancient Practice Heals Your Gut-Brain Connection
Discover how yoga improves gut health through the gut-brain connection. Learn 8 poses to balance microbiomes, reduce inflammation, and heal your digestive system.