What is Upavistha Konasana (Wide-Angle Seated Forward Bend)?
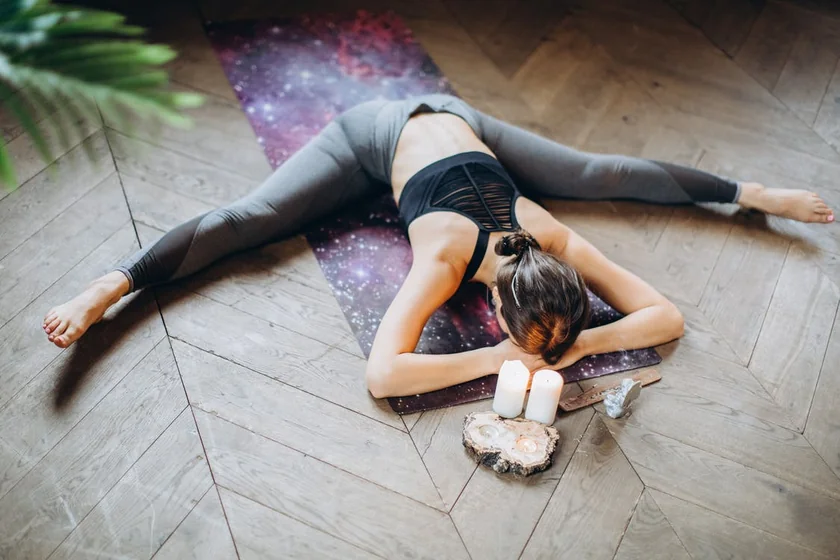
Upavistha Konasana, or Wide-Angle Seated Forward Bend, is an excellent preparatory pose for deeper forward folds, twists, and wide-legged poses.
It is also known as Seated Straddle pose in a few yoga texts. This pose is an excellent seated hip opener that encourages flexibility and strength in the legs as well as the glutes.
In this pose, your upper body is bent forward. This way, your spine lengthens from the neck to the tailbone.
While performing this pose, you will feel a rush of soothing vitality throughout your body as if every cell is activating in your body.
Overview & Etymology
The name Upavistha Konasana is a combination of Sanskrit words. Upavistha means "Open," Kona means "Angle," and Asana means "Posture" or "Seat."
It's hard to find any description of this yoga asana in ancient Hatha Yoga texts. But we have encountered similar references of this posture in Swami Vishnudevananda's 1960 book, Complete Illustrated Book of Yoga, as Hand-to-Foot Pose or Hastapadasana.
Later in 1966, Iyengar described this pose in detail in his book "Light on Yoga: Yoga Dipika" under a different name.
Today, this posture is used as a foundational yoga pose in many Ashtanga Yoga classes.
Sanskrit Name: उपविष्टकोणासन Pronunciation: oo-pah-VEESH-tah cone-AHS-ah-nah
Pose Type: Seated Hip Opener Also known as: Wide-Angle Seated Forward Bend
Strengthens: Lower Back, Spinal Column, and Legs
Stretches: Spine, Shoulders, Hamstrings, and Glutes
Health Benefits of Upavistha Konasana
Reduces anxiety and stress.
Helps build mindfulness.
Improves seated and standing postures.
Increases range of joint mobility in the legs.
Stretch, strengthen, and lengthen the body.
Increases the flow of Prana and relieves tension in the body.
Stimulates the function of digestive and reproductive organs.
Promotes therapeutic healing effects for low back pain and arthritis.
Activates the solar plexus, sacral, and root chakra for hormonal balance.
When to Avoid Performing Upavistha Konasana?
Avoid if you have spondylitis.
Avoid if you have a slipped disc.
Avoid if you have inflammatory arthritis.
Avoid if you have severe lower back pain.
Avoid if you have a recent injury or surgery.
Avoid bending forward completely if you are pregnant.
Avoid if you feel unable to breathe as you bend forward.
How to do Upavistha Konasana (Wide-Angle Seated Forward Bend)?
Upavistha Konasana is very helpful for building strength in the legs and relieving back lower back pain. This posture is divided into the following four different phases.
Part 1 - Preparatory Poses for Upavistha Konasana
To begin, start with some simple leg and lower back stretches to add mobility to dormant muscles. You can begin with a dynamic yoga flow sequence like sun salutations and then move to the following hip openers for a deeper activation of the legs:
1. Dandasana (Staff Pose) - The Upavistha Konasana belongs to the seated yoga pose category. In this pose, it’s important to find pelvic stability and spine strength in order to sit upright in the staff pose.

Close your eyes and sit in Dandasana for 2 to 5 minutes. The longer you hold this staff-like alignment, the stronger your spine will be for your upcoming wide-angle stance.
2. Baddha Konasana or (Bound Angle Pose) - From the staff pose, move into Baddha Konasana. Here, bend your legs and touch your feet in Namaste formation. Hold both feet with your palms and keep your knees close to your yoga mat.
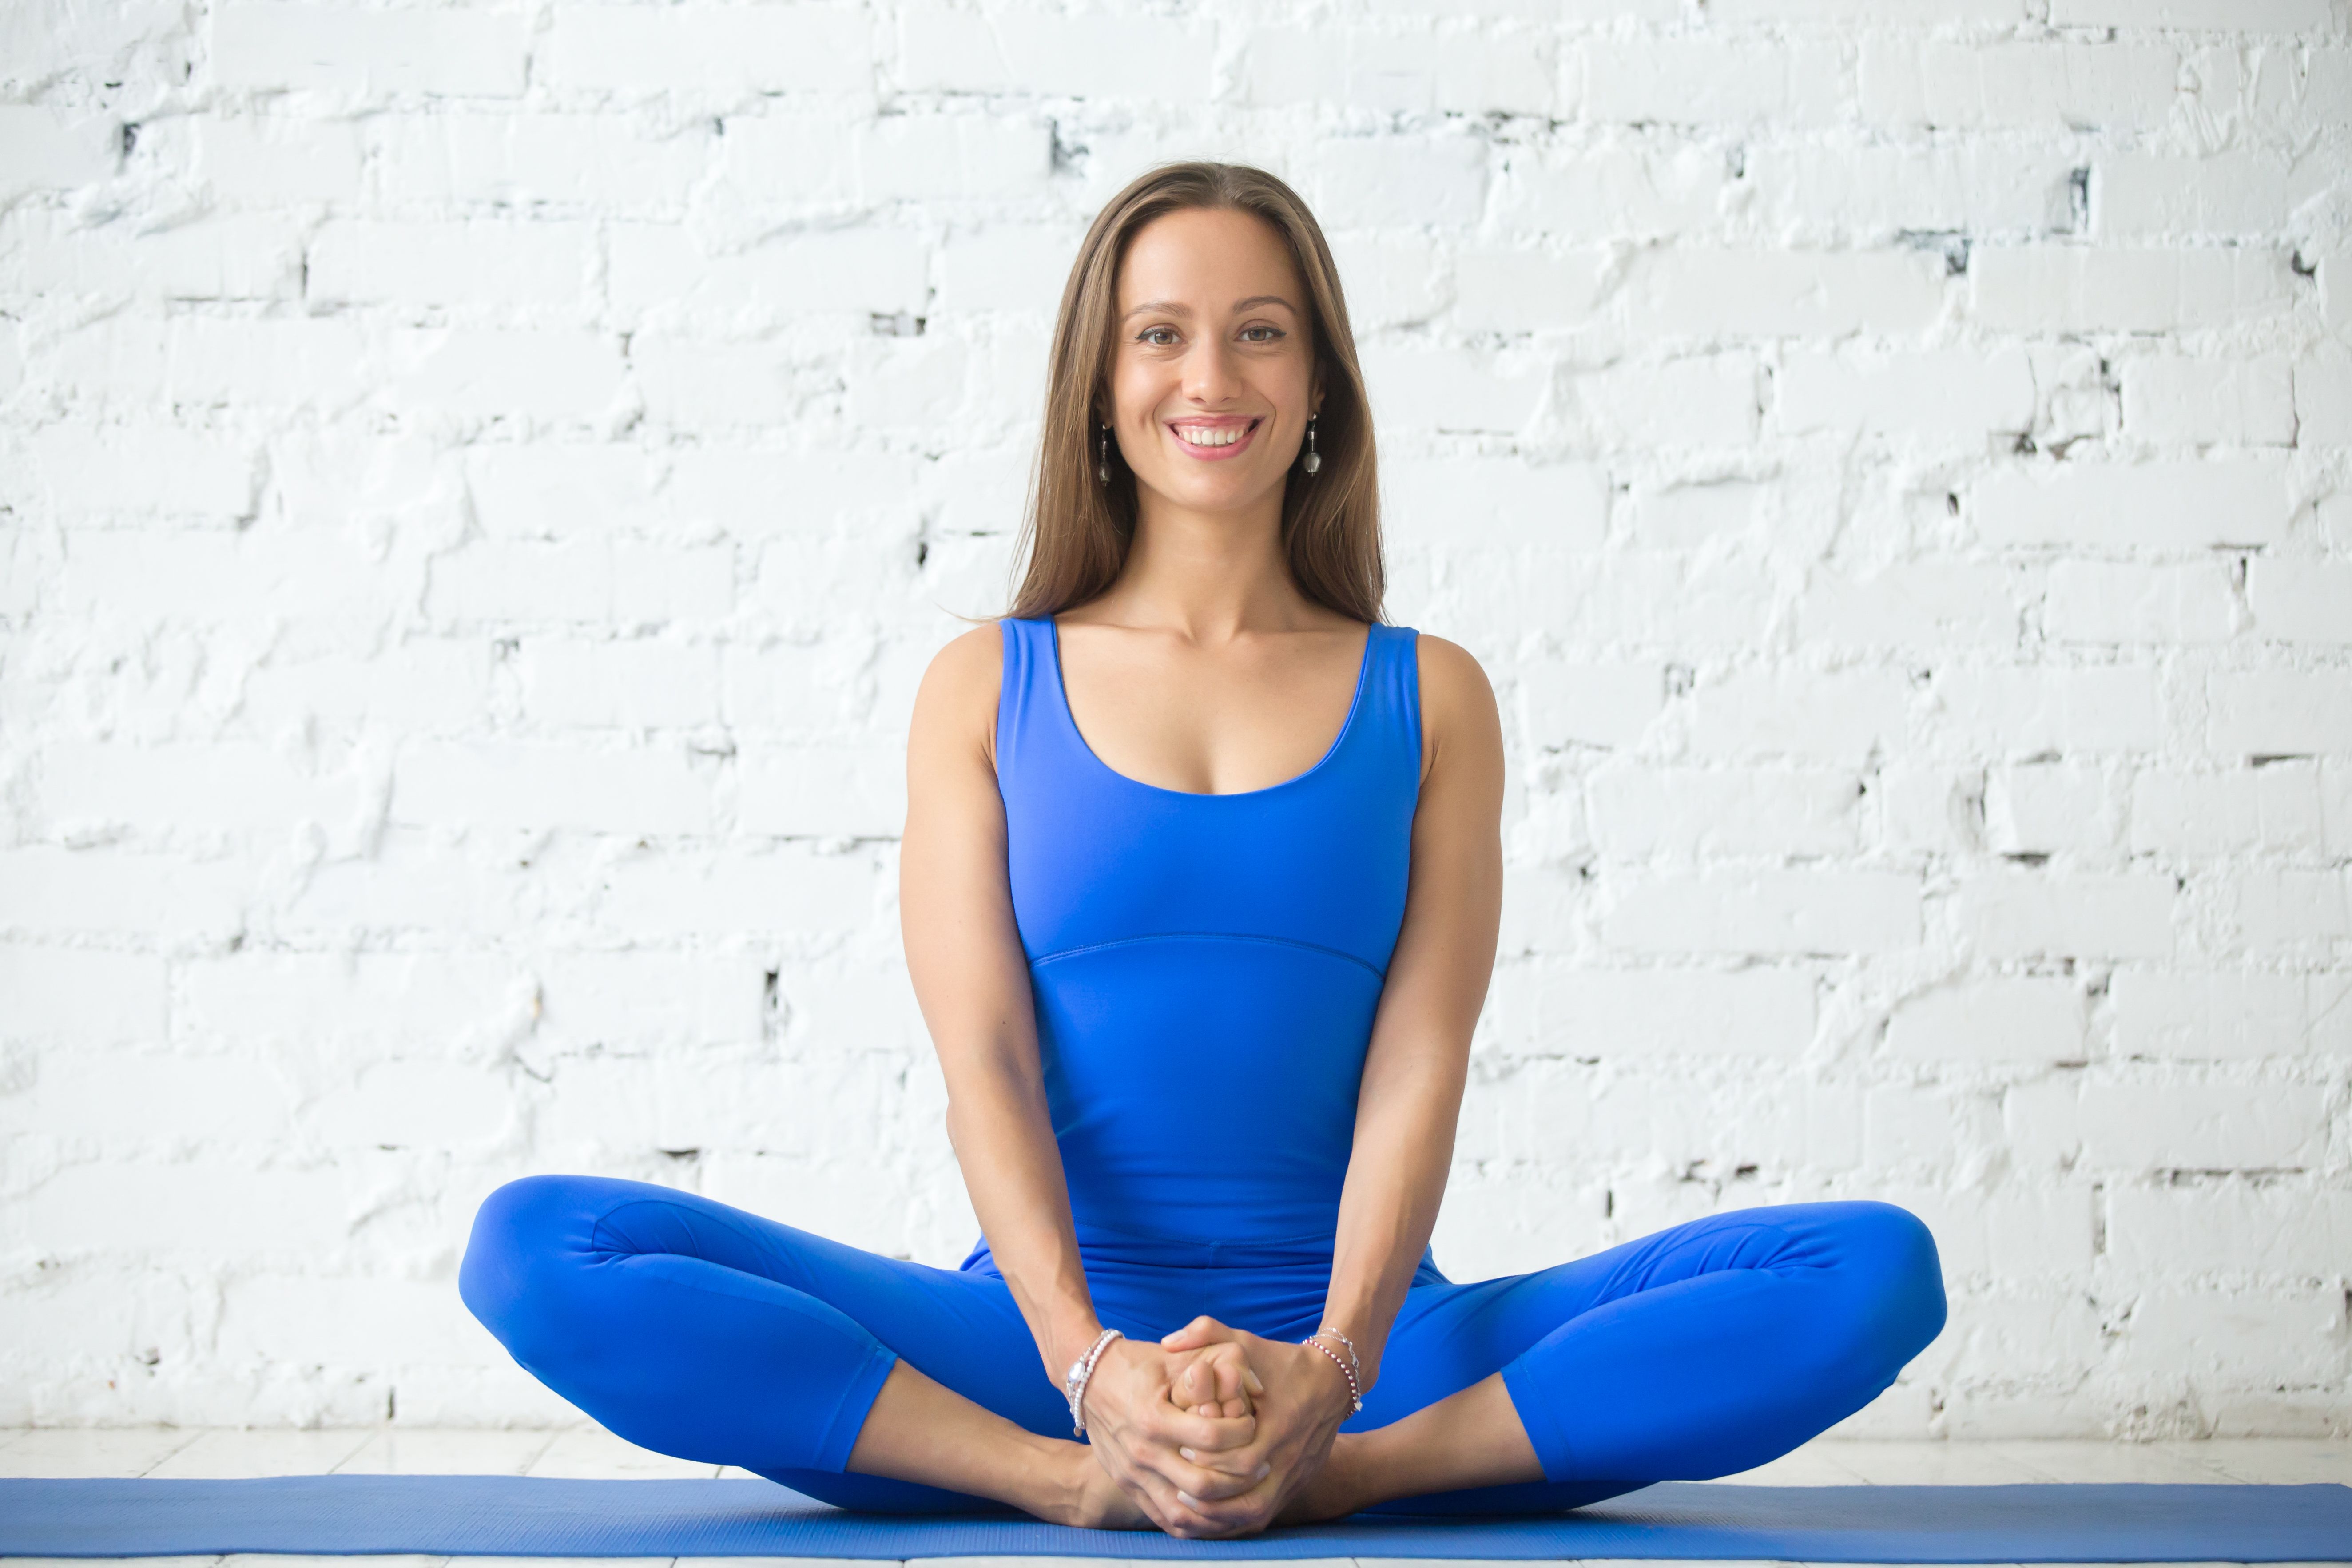
Inhale, then exhale and close your eyes as you maintain this pose. You will feel a slight stretch in your thighs. You can hold this pose for 2 to 5 minutes.
3. Baddha Konasana Uttanasana (Bound Angle Forward Bend Pose) - If you're unable to feel your legs stretching in upright Baddha Konasana, try bending your upper body forward for a deeper stretch.

You can also place your head on the ground as you bend forward. Hold this pose for a couple of minutes. Ensure that you exhale while coming down, and that your knees are close to the mat.
Part 2: Step-by-Step Instructions to Perform Upavistha Konasana
The following are steps to practice the Wide-Angle Seated Forward Bend:
Step 1- Start with Staff pose and sit upright on top of your pelvic bones.
Step 2- Sit with your legs extended and your arms relaxed at your sides in the Staff pose. Inhale and exhale for a few seconds here.
Step 3- Now, spread your legs slowly, as wide as possible, and place your hands flat on the mat.
Step 4- Inhale deep, and lengthen your spine all the way up to the crown of your head. Exhale, bend at your waist, and press down through the backs of your legs.
Step 5- Walk your hands forward as far as you can go. Keep your back straight and your spine parallel to the ground.
Step 6- Hold this position for a few deep breaths and then gently exit the pose by getting up in the staff pose.
Breath Awareness:
Inhale as you lengthen your spine and flex your legs wide.
Exhale as you bend your upper body forward.
Performance Duration for Beginners: Hold Upavistha Konasana for 1 minute.
Performance Duration for Advanced: Hold Upavistha Konasana for 5 to 10 minutes.
Part 3: Things to Keep in Mind
Alignment is essential for practicing every yoga asana, and here are a few posture tips for beginners before starting the Upavistha Konasana practice:
Do not overstretch your legs: Yes, it's true that the more you try to stretch your legs wide, the more flexible and strong you will become.
But, overstretching as a beginner without the necessary hip and leg mobility can cause muscle tears in your abductors and hip flexors. Only stretch to a level that helps you grow without overdoing it.
You don’t need to lean down all the way: If your hip flexors and tail bone are not strong, you might have difficulty leaning forward. Don’t rush into bending your upper body forward.
You can try bending your upper body halfway until it's not painful. With time, you’ll build flexibility in your back, and then if you feel comfortable, you can lean forward to the ground.
Part 4: Relaxing Poses After Upavistha Konasana
Wide-Angle Seated Forward Bend can cause a lot of fatigue, as well as stress on your thighs, core, and back. That’s why it’s essential to perform the following relax poses after you’ve practiced Upavistha Konasana:
1. Paschimottanasana (Seated Forward Bend): As you end your Upavistha Konasana practice on Staff pose, continue the seated forward bend from there.
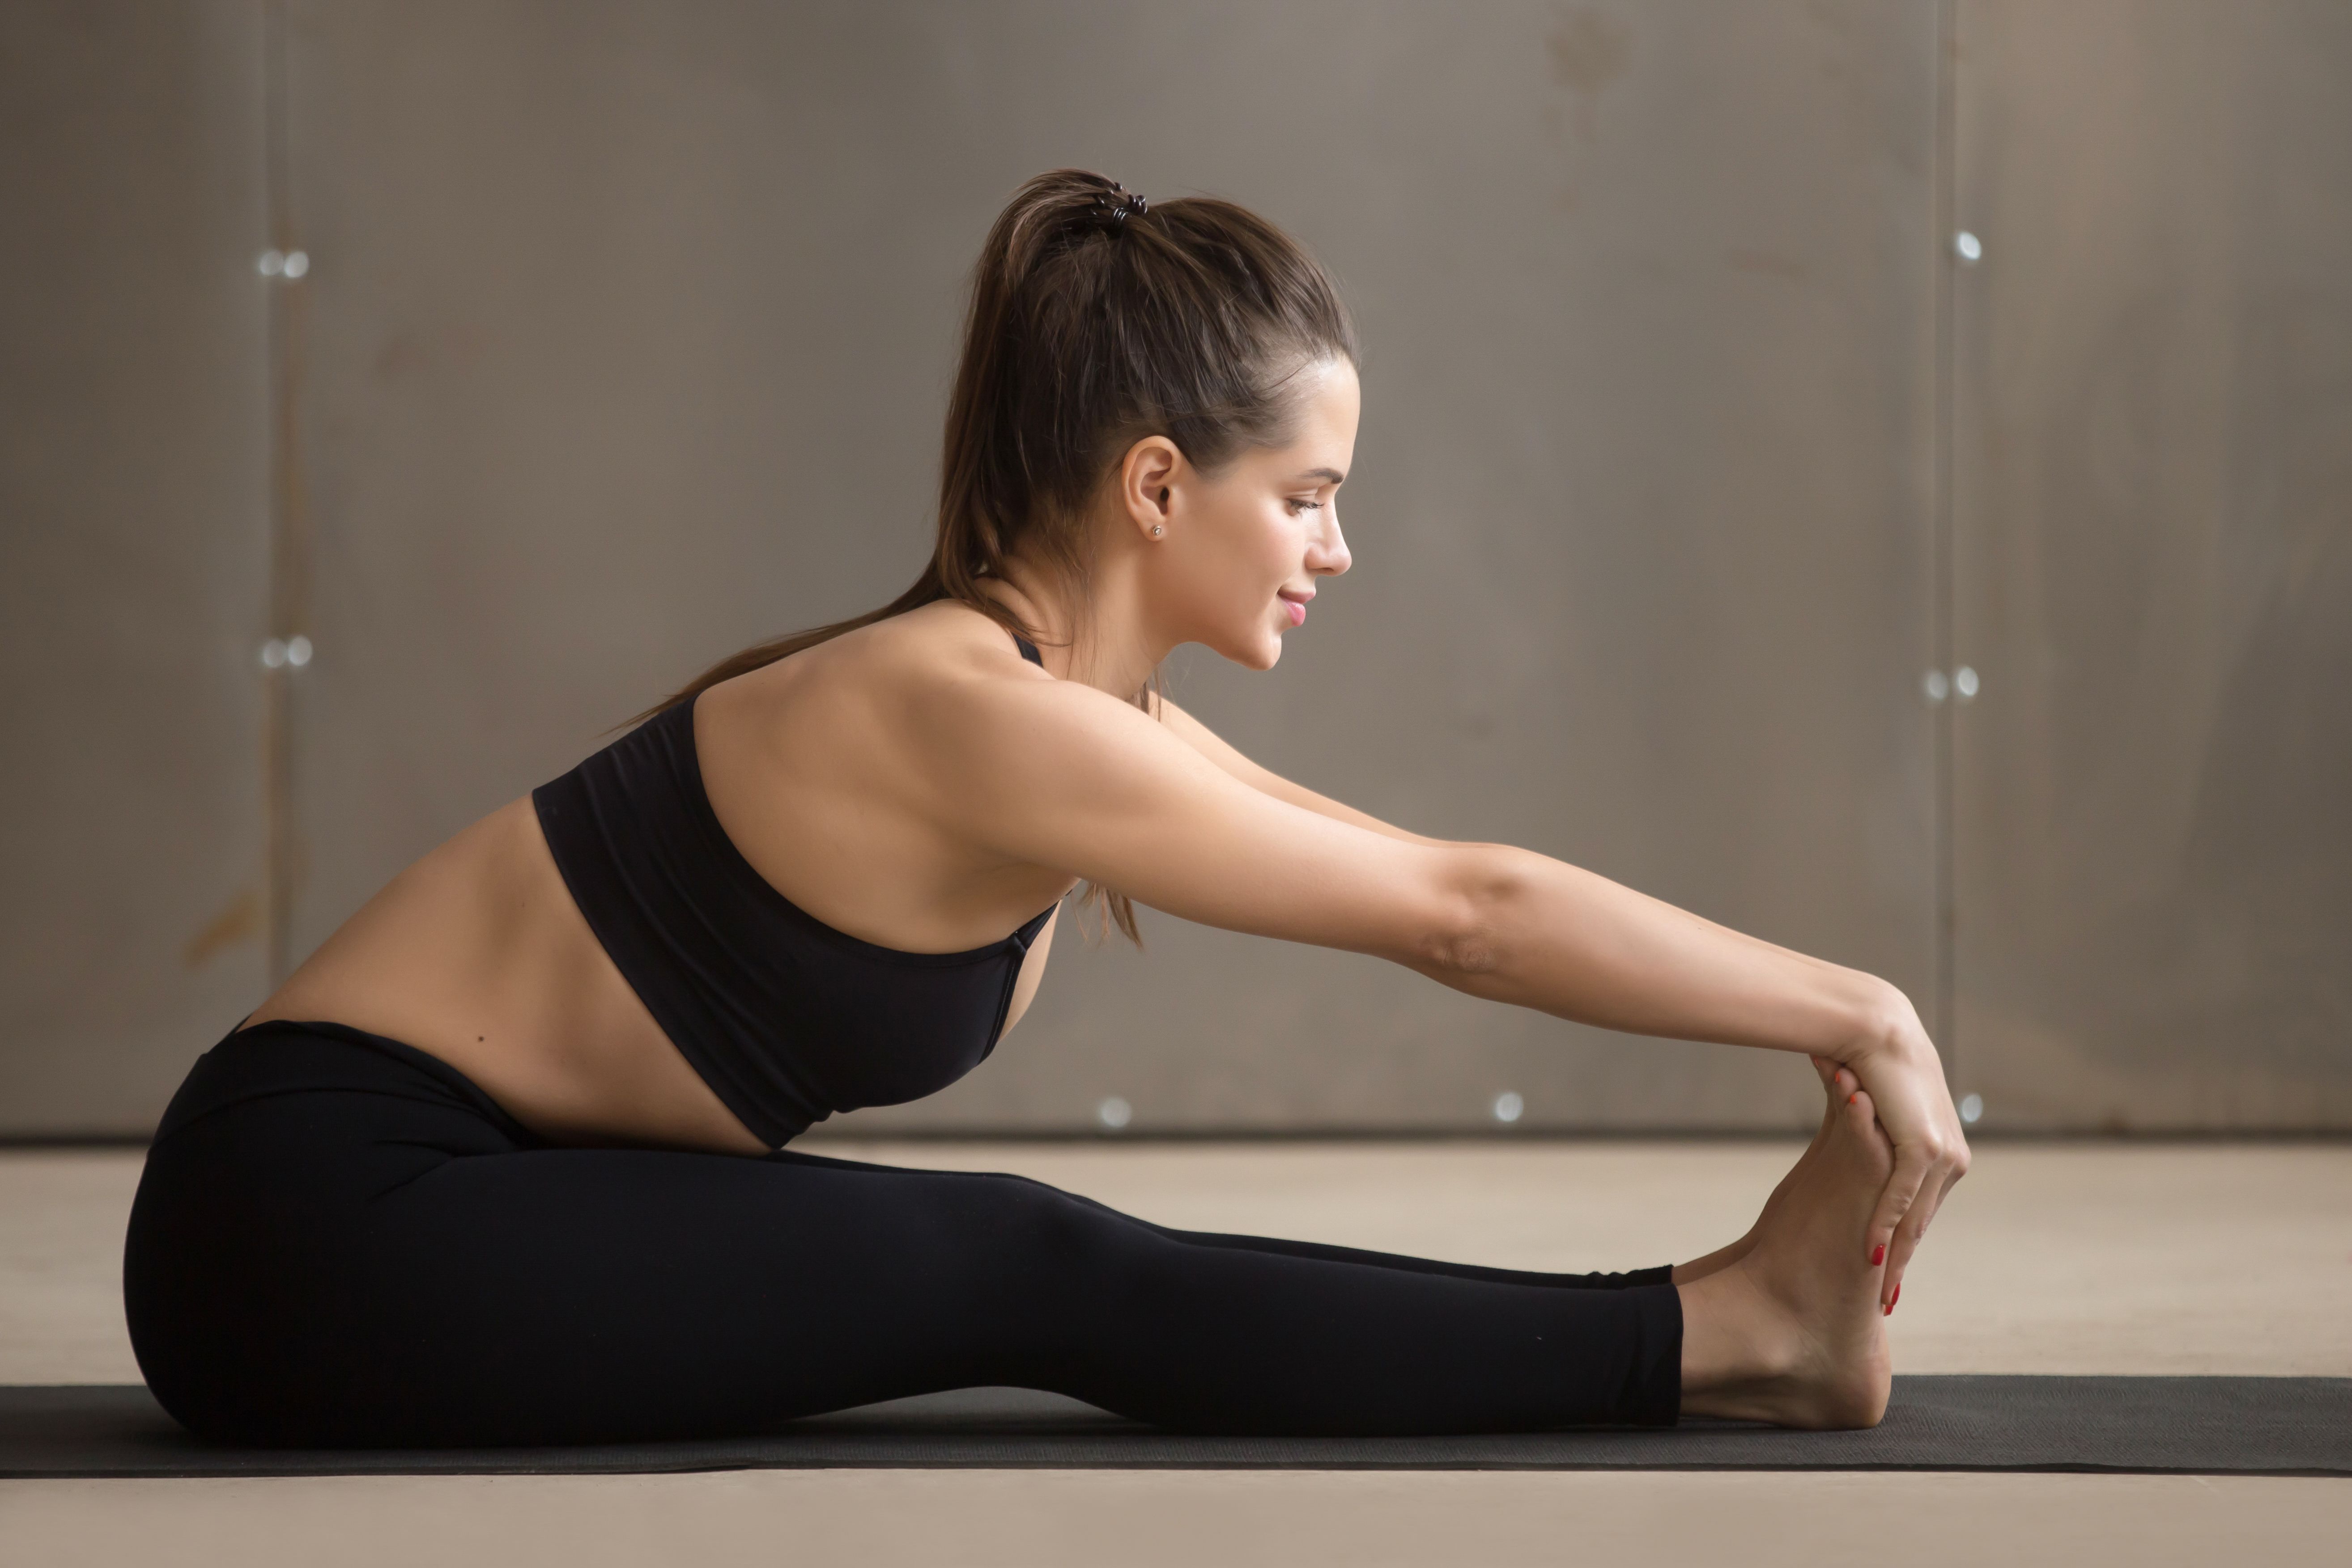
From Dandasana, inhale deep and raise both arms overhead. Now, bend forward and exhale as you rest your head on your knees. Hold this pose until you feel the tension release in your low back and glutes.
2. Balasana (Child's Pose):If your upper body and low back are still too tight, get into the Child's pose. Start seated on top of your knees and bend your upper body toward the mat.
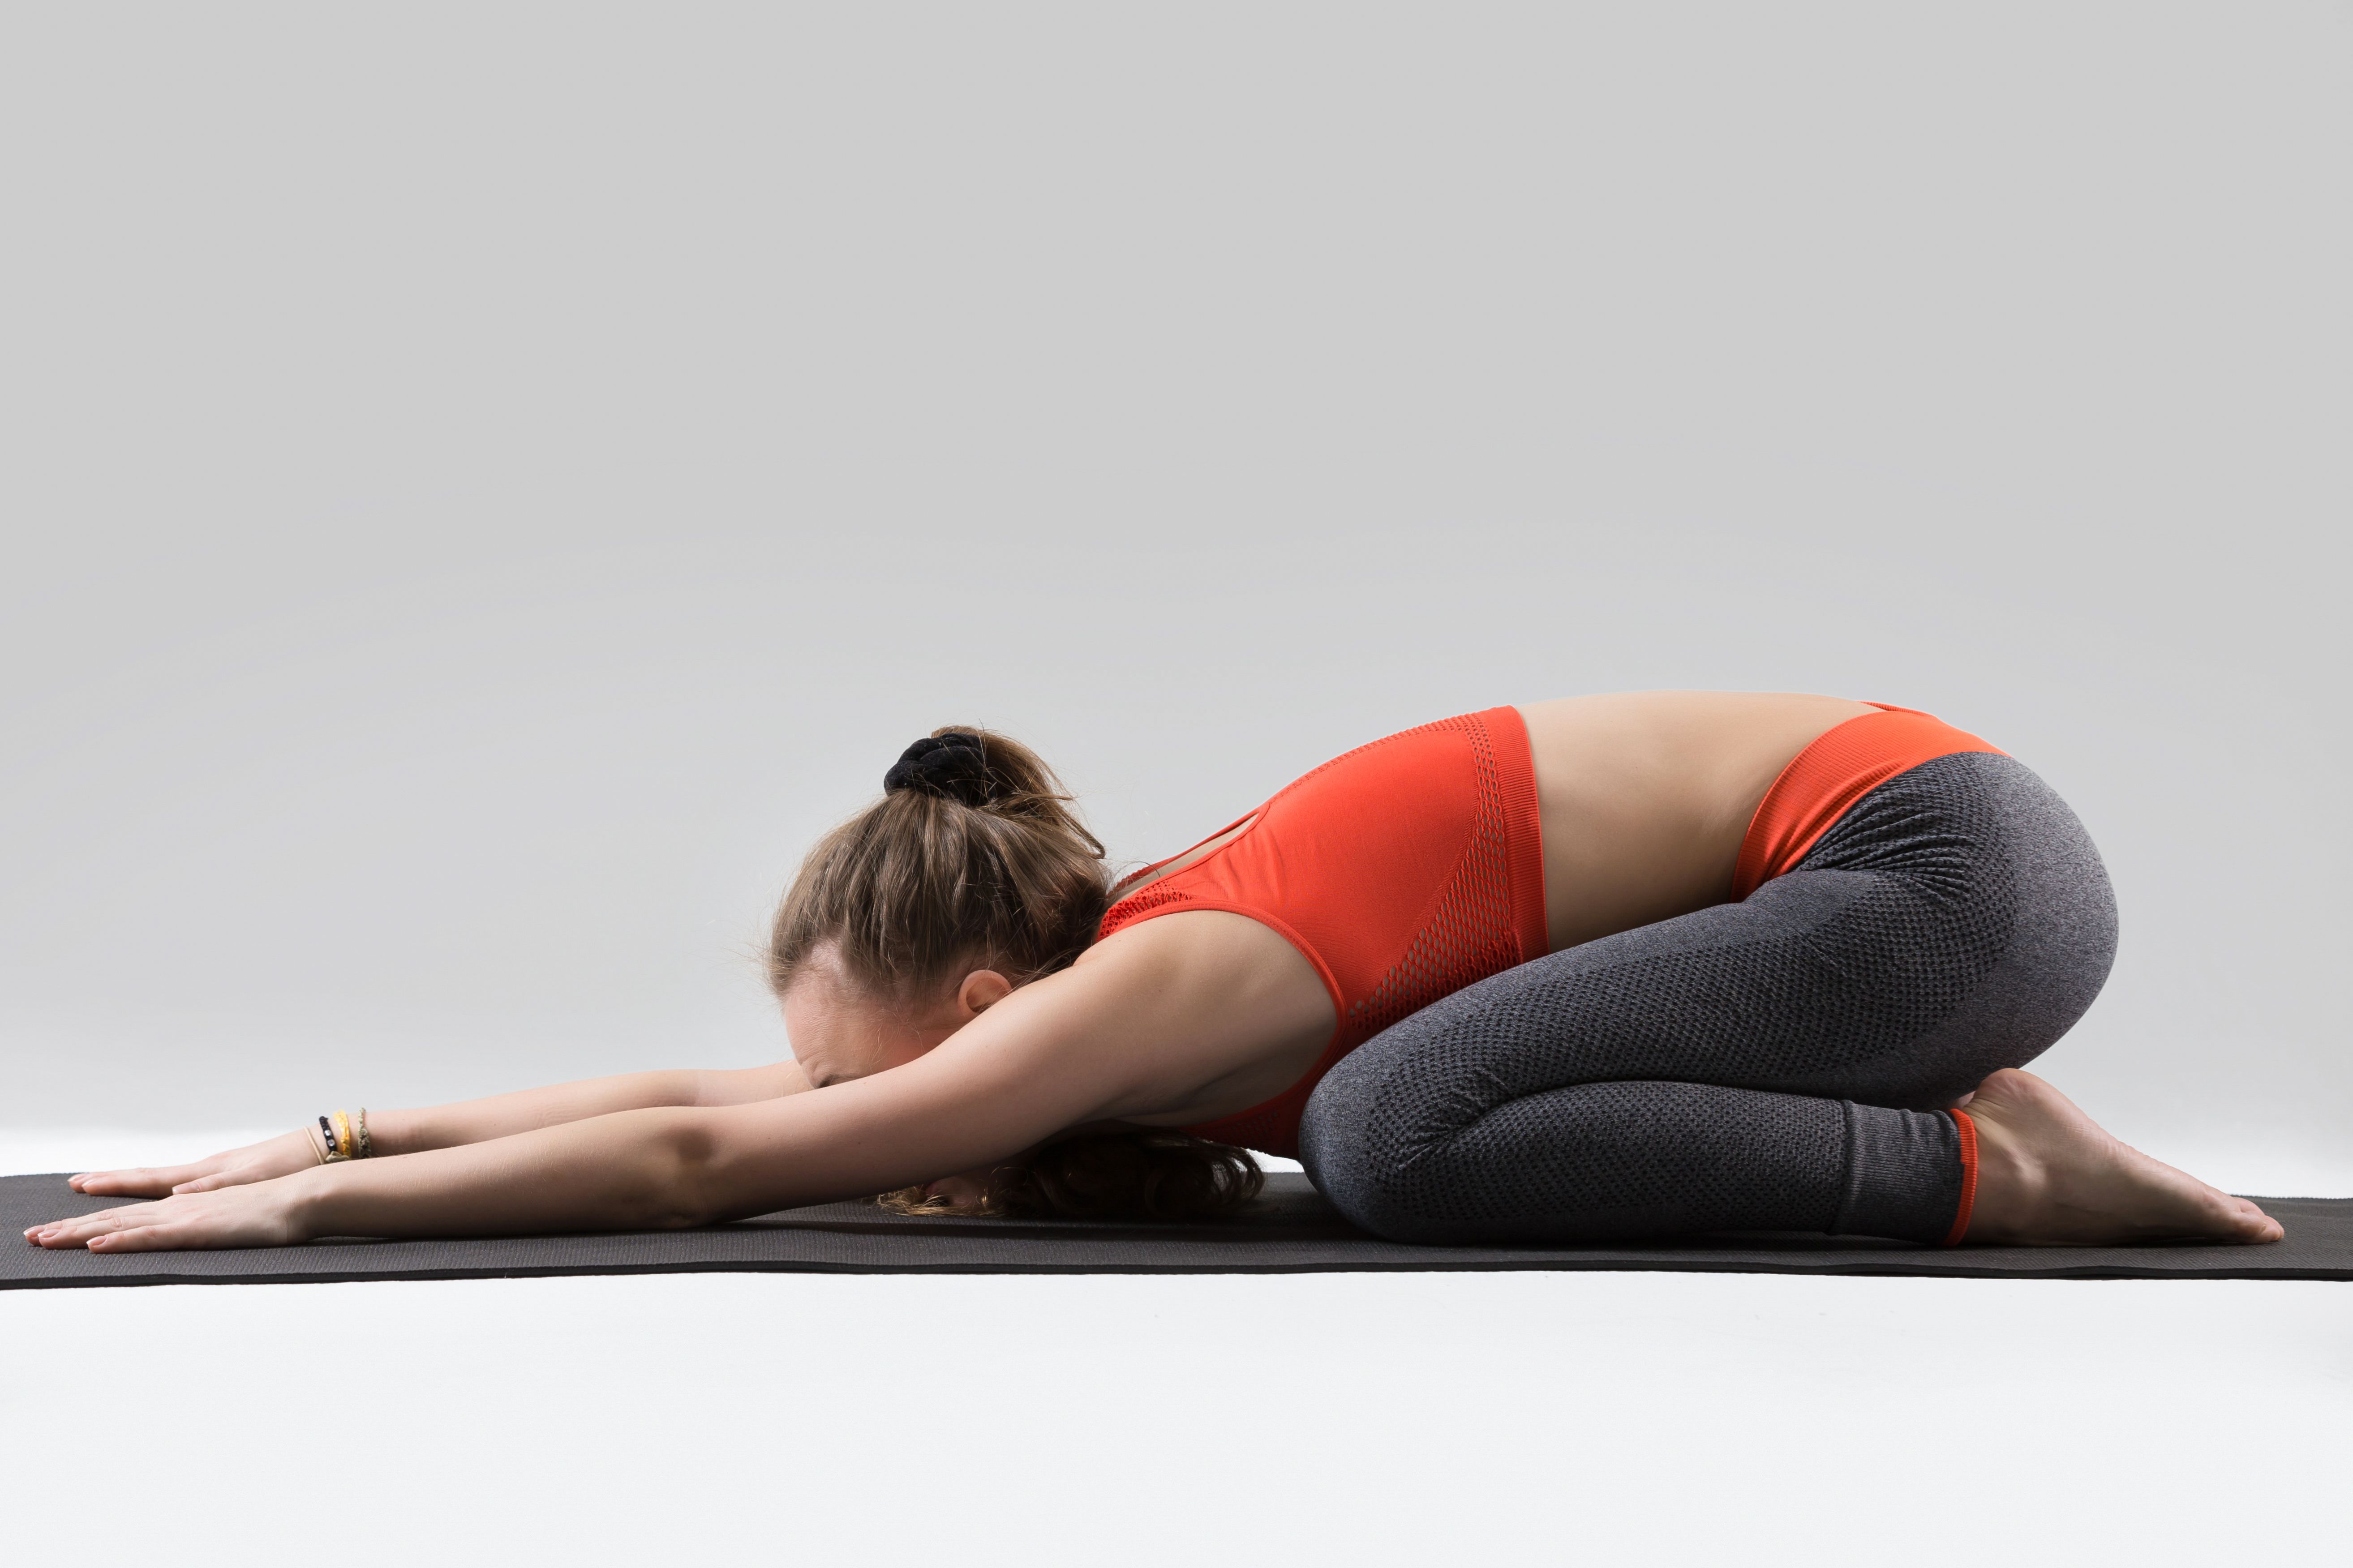
Flex your arms and shoulders in front of you while resting your forehead on the mat. Keep exhaling deeply while you hold this pose with your head down for 3-5 minutes.
3. Ananda Balasana (Happy Baby Pose): If you want to relax your pelvic bones, thighs, and low back even more, try the Happy Baby pose.
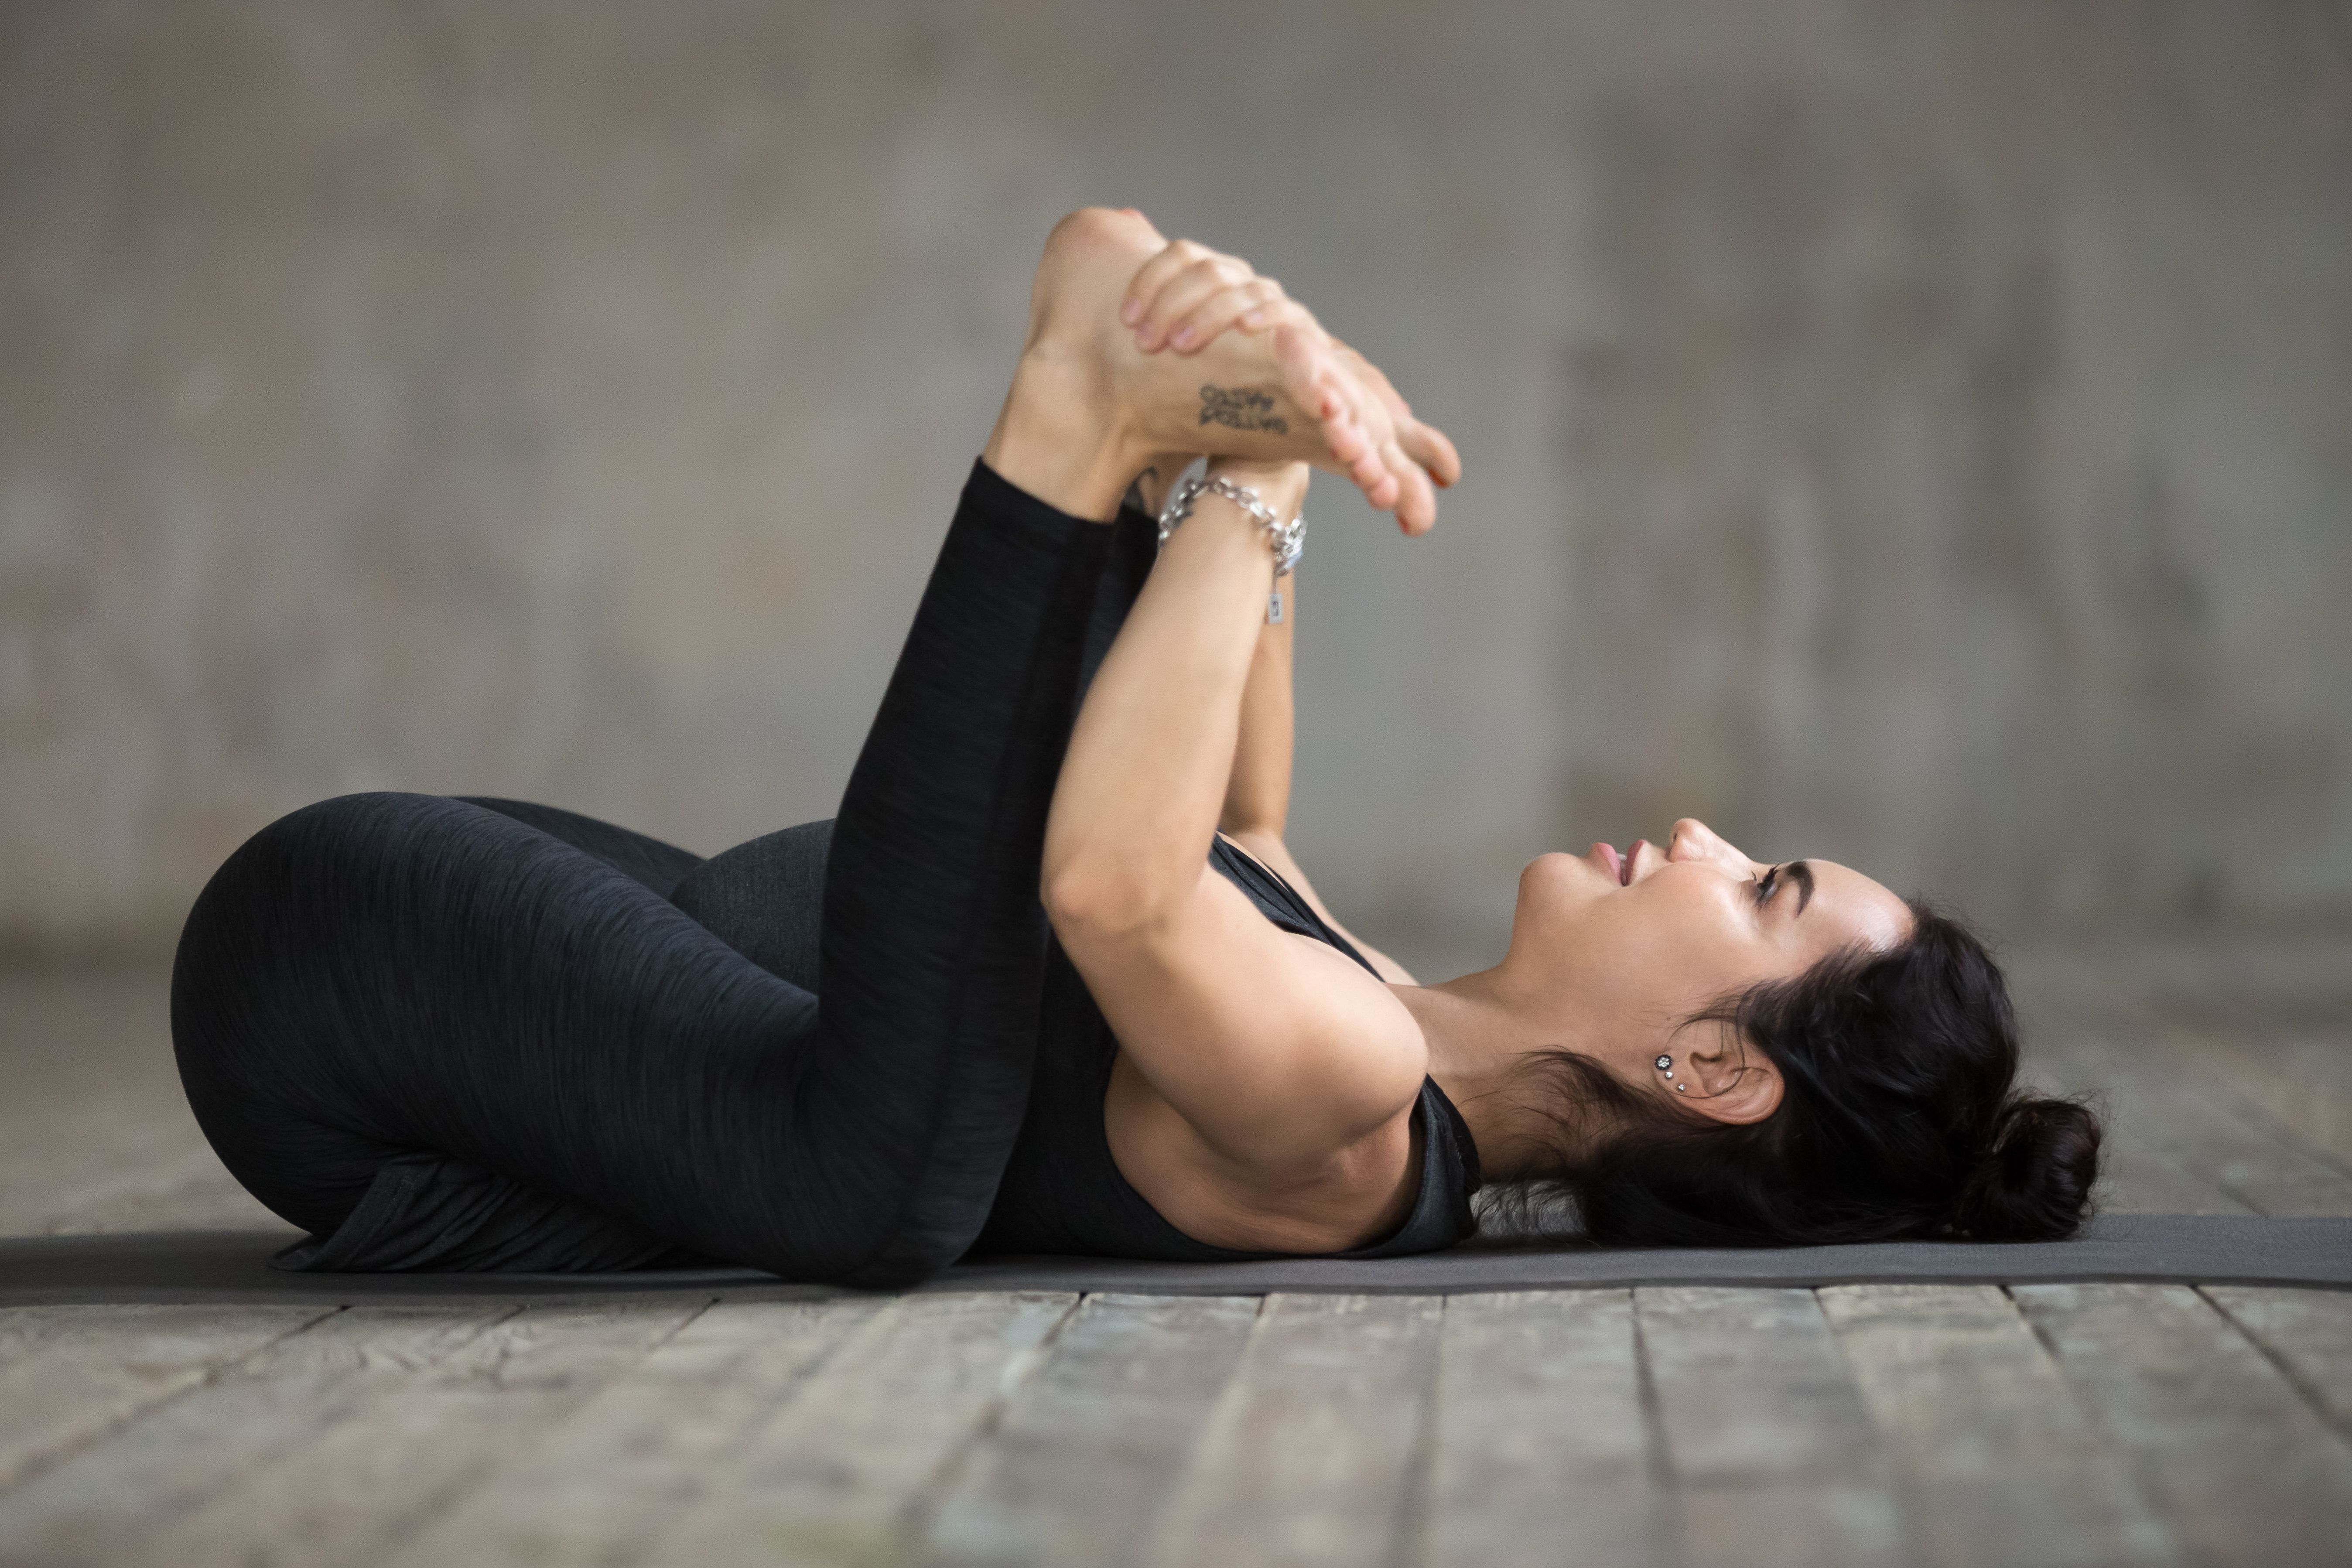
Lie on your back and grab your feet with your hands like a newborn baby. Exhale and close your eyes as you get into this pose. Keep breathing deeply and try to relax any left-over stress points lingering in your body.
Upavistha Konasana Variations to Consider
Based on your physical flexibility and mental awareness, you can try the following Wide-Angle Seated Forward Bend posture variations:
1. Wide-Angle Seated Pose Neck Drop Variation: This is an intermediate-level posture variation for those who want to relax their neck and spine after a long workday.
Extend both of your legs wide and carefully drop your neck at the back. Don't hold this pose for more than 30 to 60 seconds because it places your neck in a vulnerable position.
2. Parivrtta Janu Sirsasana (Revolved Head to Knee Pose): The word Parivrtta means revolved, Janu means knee, and Sirsasana means head.
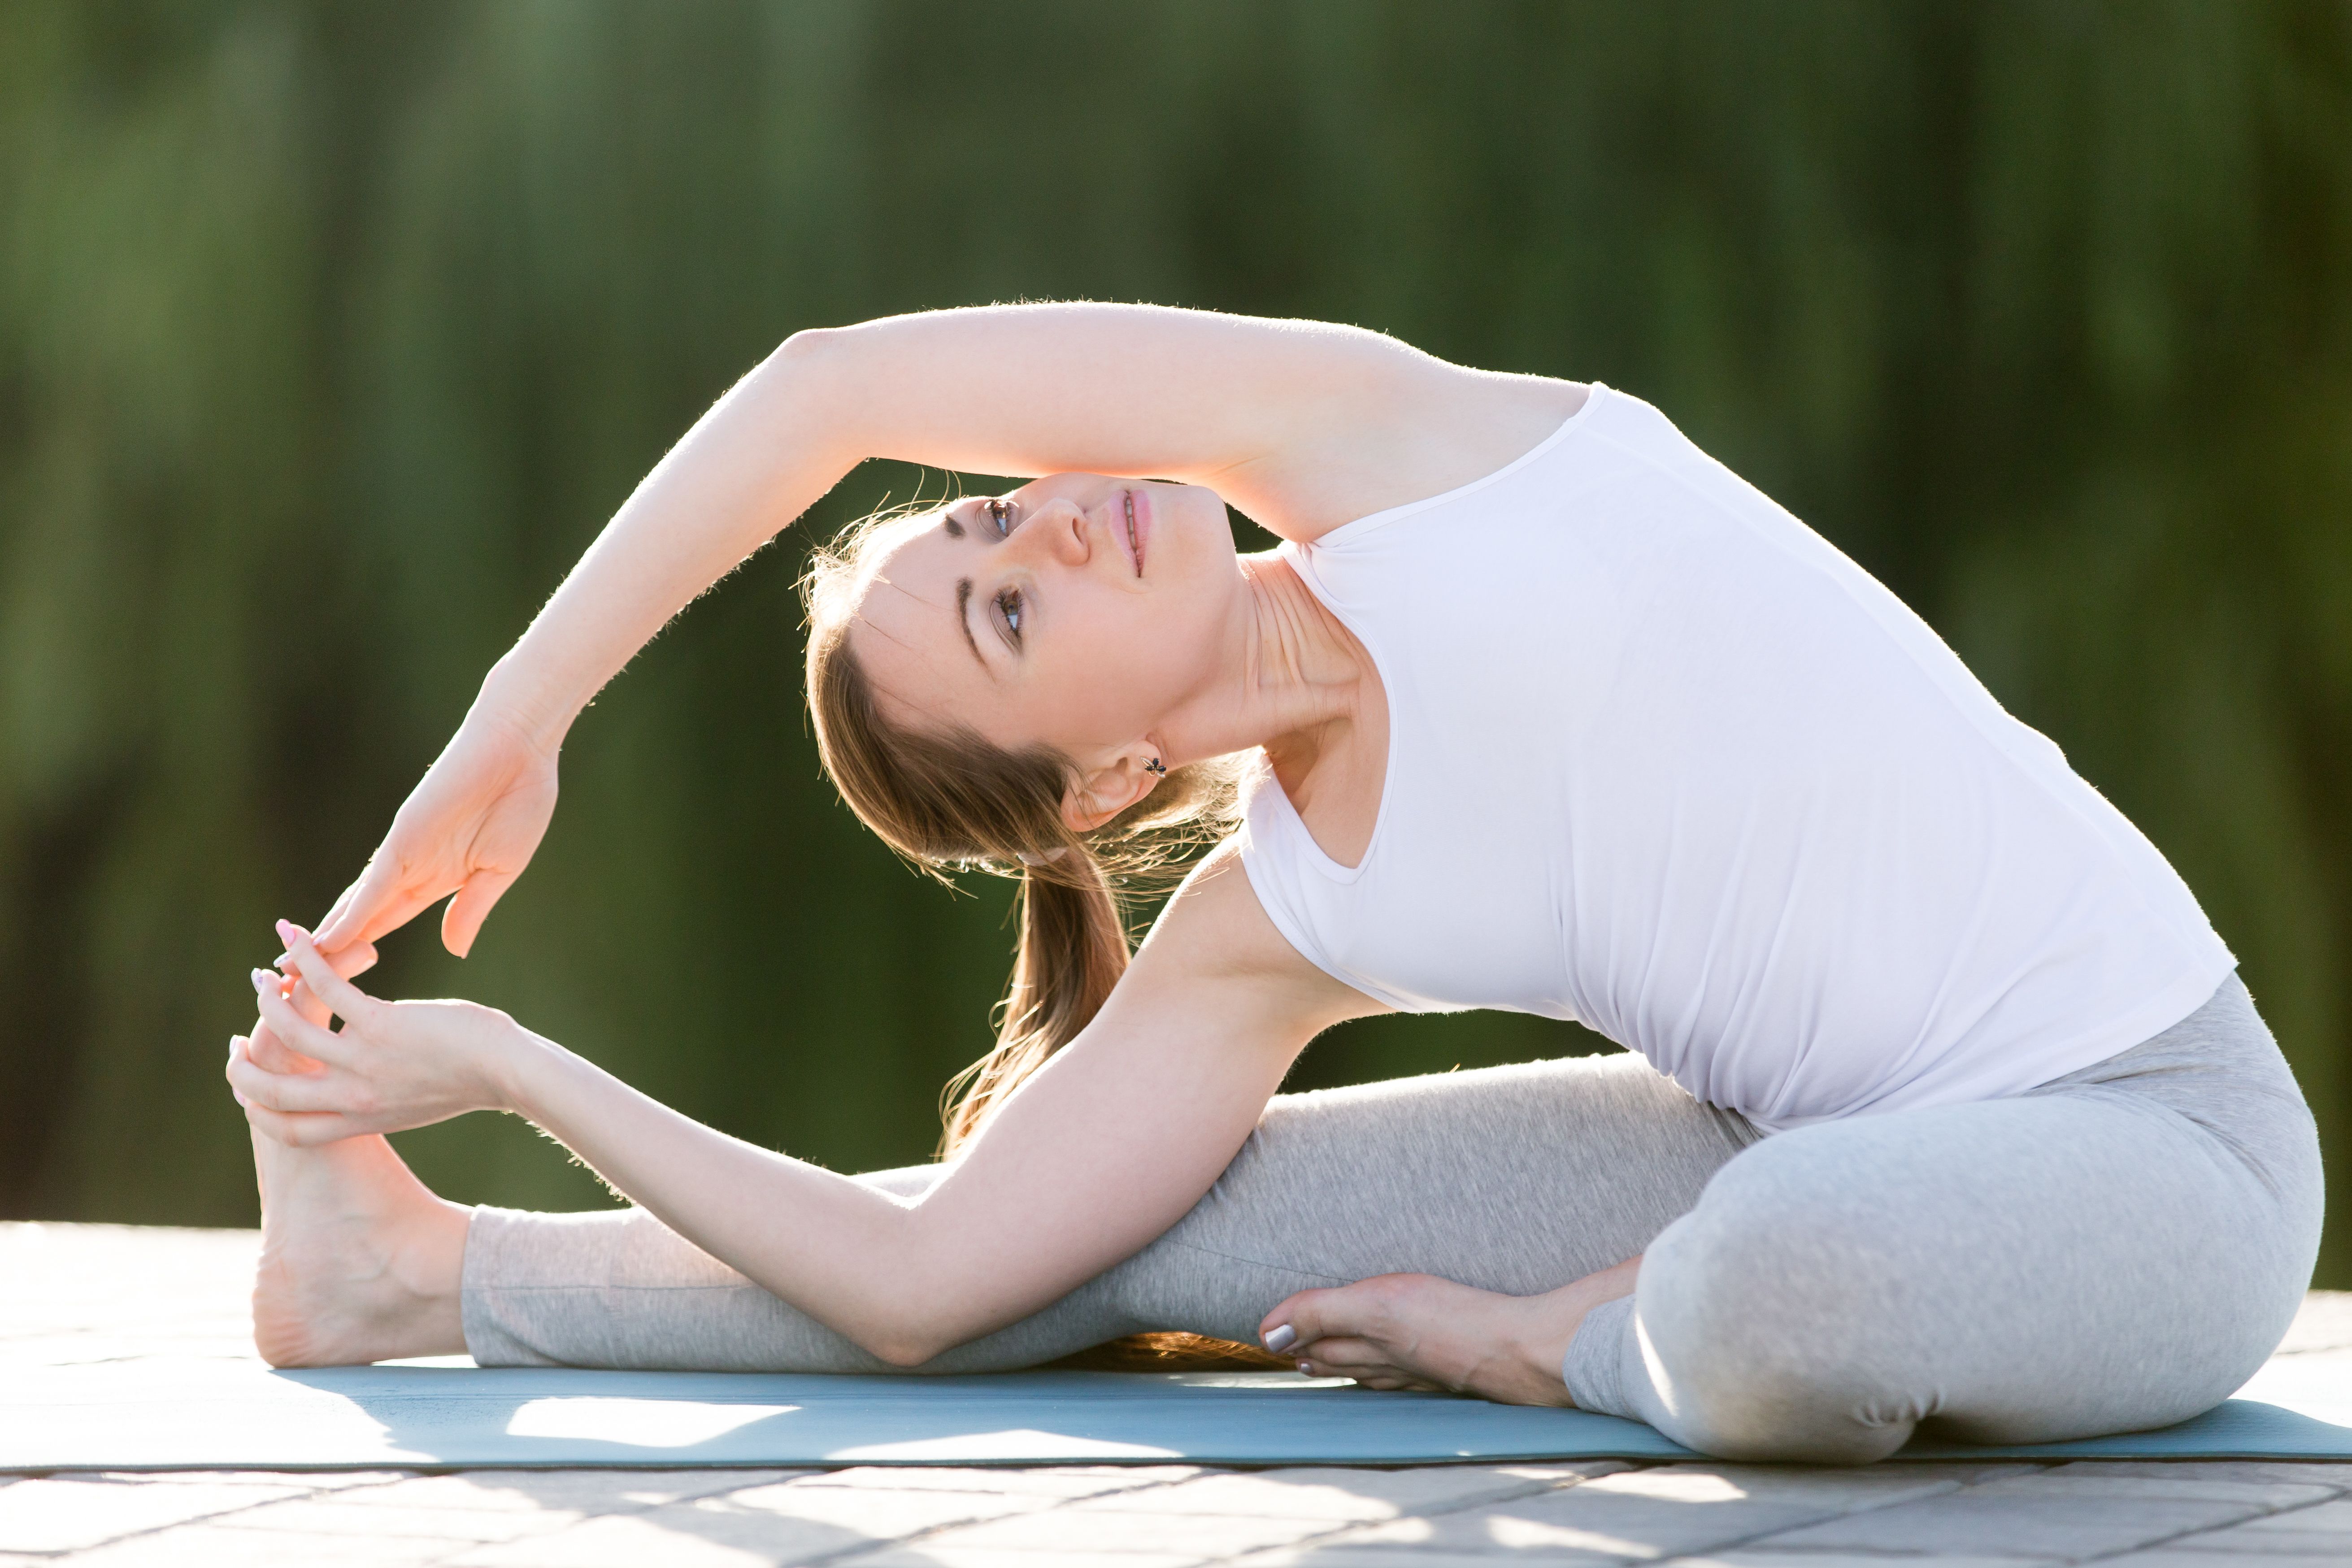
This is an advanced variation of Upavistha Konasana, where you flex deeply onto one side with one leg bent. In this posture you’ll revolve your ribs to one side and stretch your arms overhead until your head touches your knee.
3. Parivrtta Upavistha Konasana (Revolved Seated Angle Pose): This is a successor pose for Parivrtta Janu Sirsasana. All you need to adjust is your leg placement.
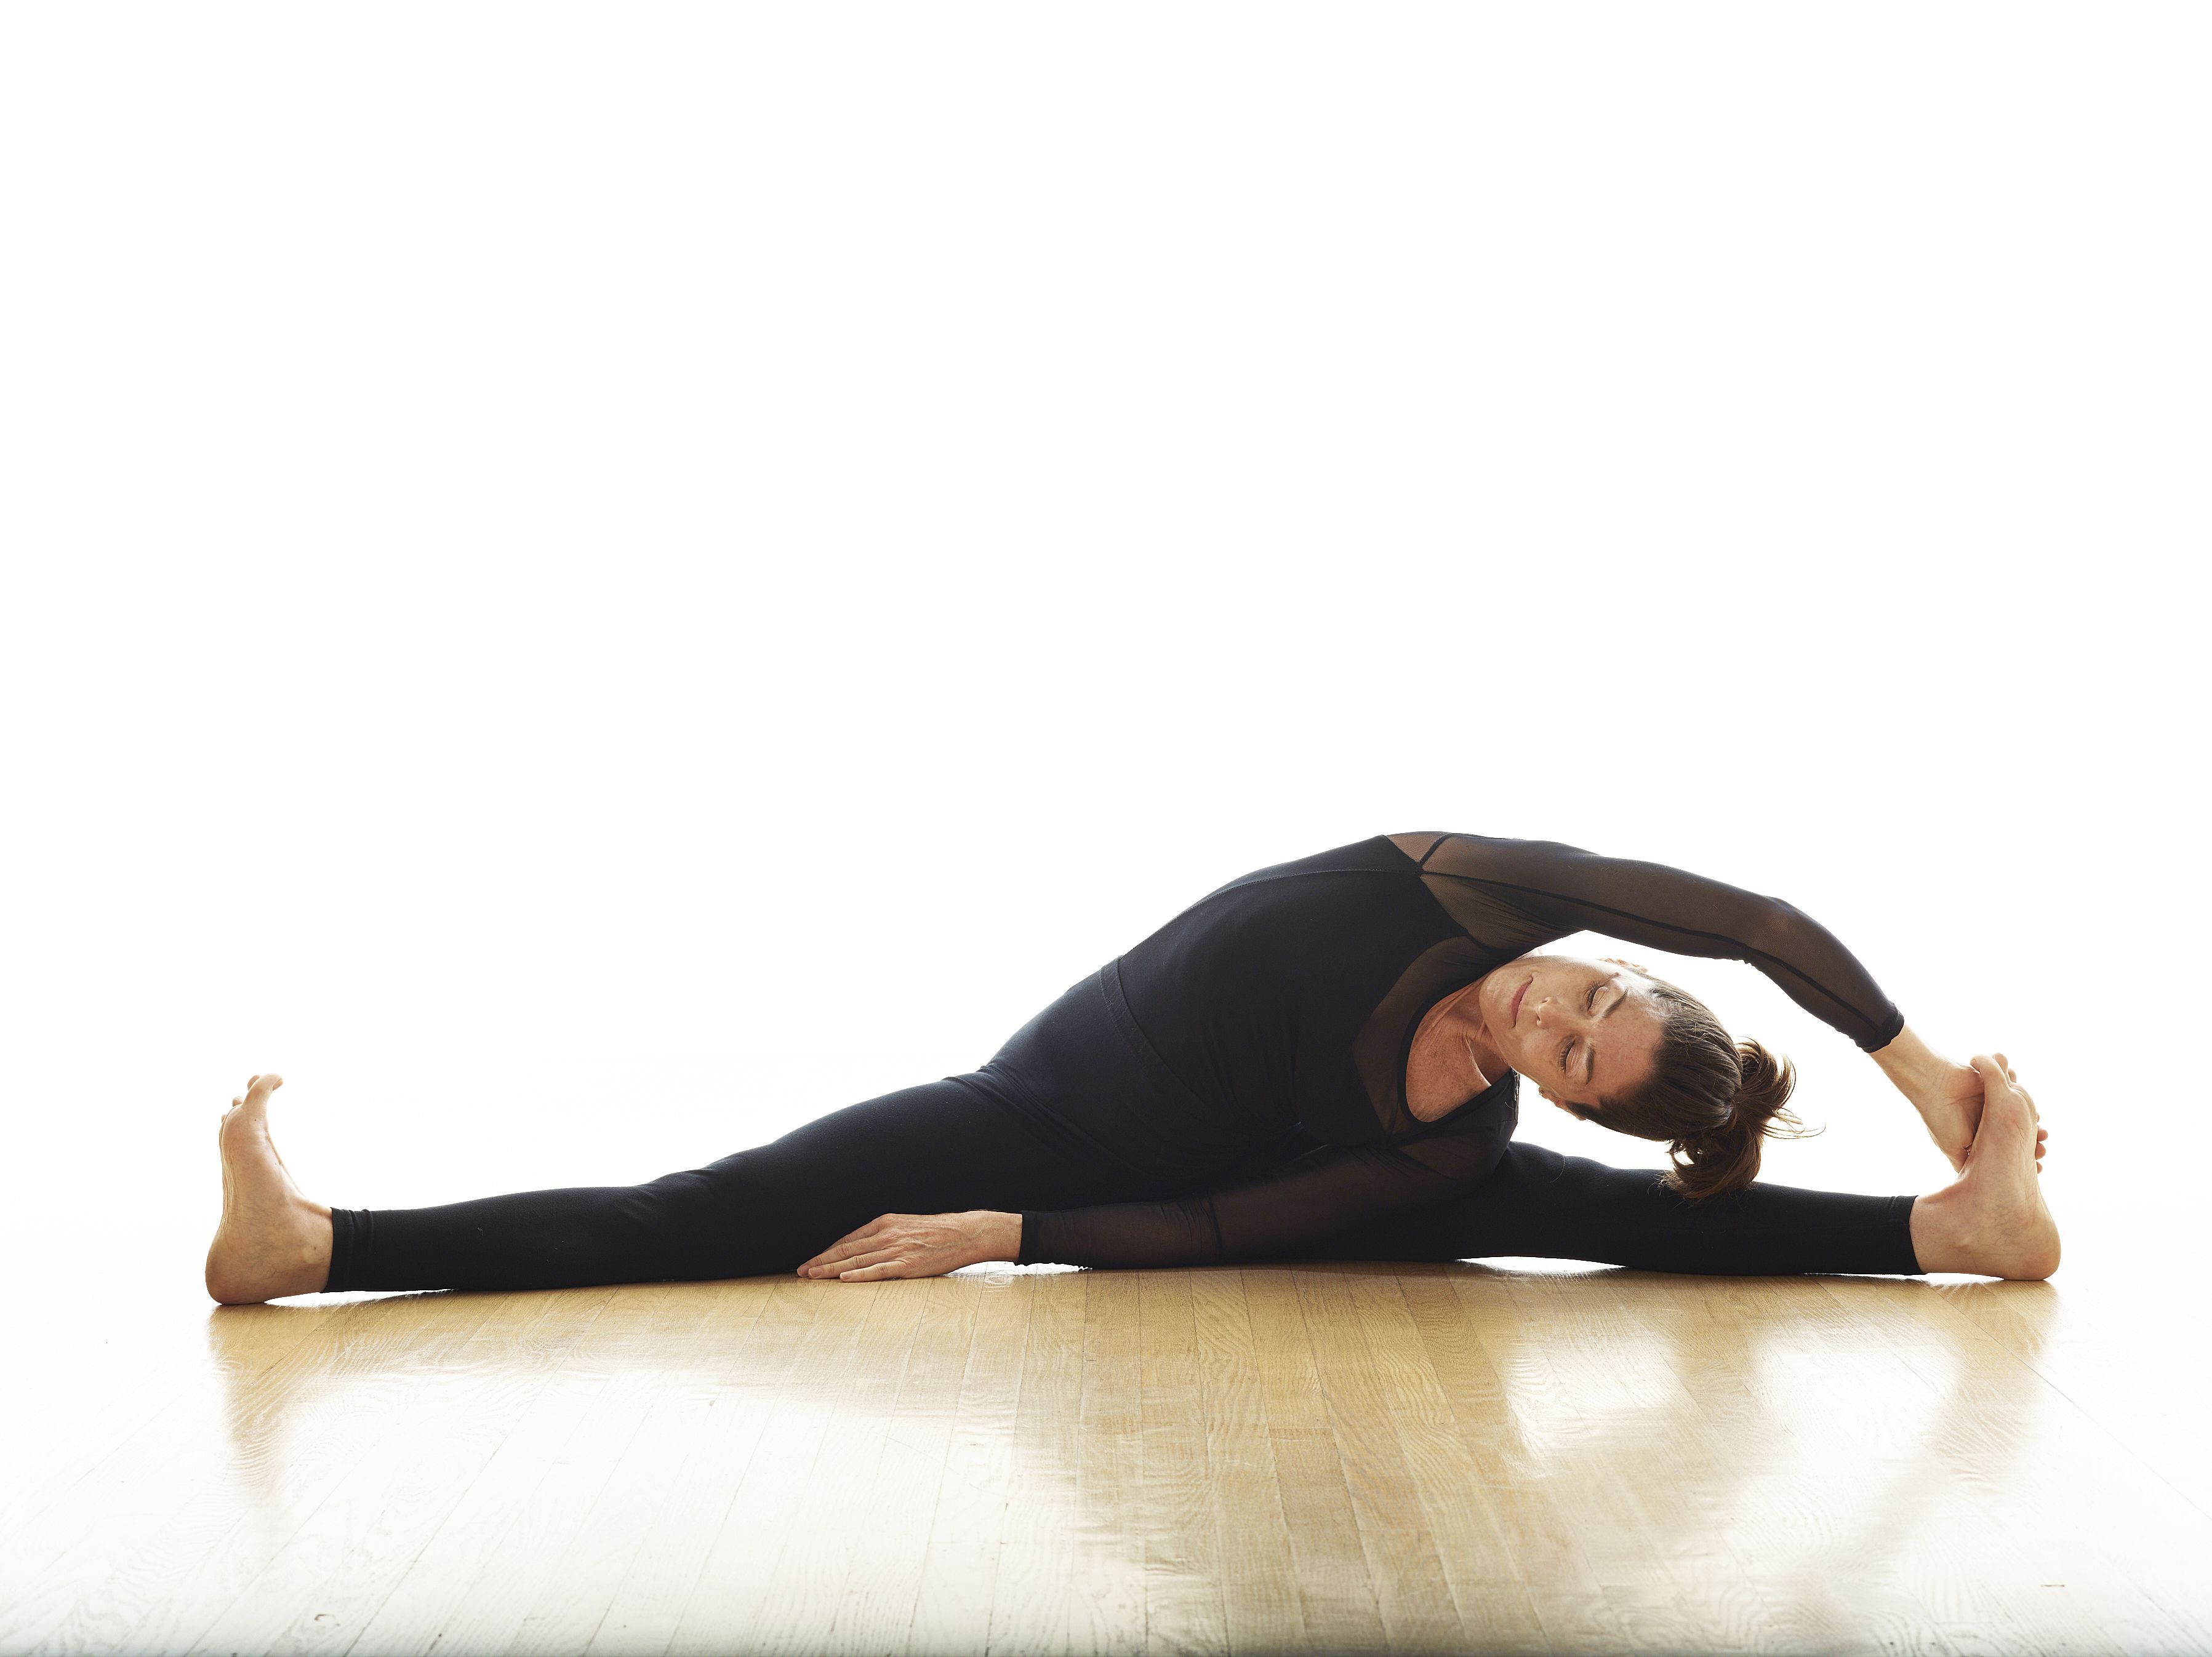
In the previous pose, one leg was bent. Now, keep both of your legs wide open while revolving your upper body and bending down on one side. Hold this pose only when you feel comfortable and do not overstretch.
Enjoy a Free 1-on-1 Session with a Coach!
Receive personalized guidance tailored to your unique fitness goals, live with a dedicated coach—no credit card required.
Frequently Asked Questions about Upavistha Konasana
The following are some of the benefits of Upavistha Konasana:
- It helps to relax the mind.
- Improves knee and hip joint mobility.
- Improves digestion and sexual health.
- Stretches the spine and shoulders.
- Stretches the hamstrings and glutes.
- Strengthens the legs, ankles, hamstrings, and spine.
- Burns excess fat around the thighs and core.
- Stimulates the flow of Prana and aids in physical relaxation.
The following are some poses you can do to prepare for Upavistha Konasana:
- Uttanasana or Standing Forward Bend
- Paschimottanasana or Seated Forward Bend
- Baddha Konasana or Bound Angle Pose
- Parivrtta Janu Sirsasana or Revolved Head to Knee Pose
Parivrtta Upavishta Konasana Iyengar is an advanced version of Upavistha Konasana. This pose helps you stretch the deep muscles around your obliques, shoulders, hamstrings, and glutes. Plus, this variation can quickly give you a boost of energy. It's an excellent stretch to open your hips, abductors, and chest muscles.
To perform Parsva Upavishta Konasana, follow the these steps:
1. Start from Staff pose and get into Baddha Konasana.
2. Concentrate on your breath while practicing Baddha Konasana.
3. Inhale deep and flex your legs sideways, only as much as you feel comfortable
4. Hold the flexion of your legs and keep your focus on your breathing.
5. Now, inhale and steadily rotate your bottom ribs as you flex your arms to one side.
6. Exhale when you reach down and rest in the pose until everything feels comfortable.
7. Release the pose and relax. Repeat the same on the other side.
To do Upavistha Konasana for beginners, all you need are some posture modifications to perform this pose. Here are two ways you can modify Upavistha Konasana for beginners:
1. If flexing your legs is not possible, try building more flexibility in your legs with Baddha Konasana.
2. If bending forward is not entirely possible, try using bolsters in front for upper body support.



.webp)
%20(7).jpg)
