What is Ashtanga Namaskara (Eight-Limbed Pose)?

Ashtanga Namaskara is a yoga flow pose from Surya Namaskar. It is also known as Eight-Limbed Pose or Chest-Knee-Chin Pose.
Ashtanga Namaskara is a beginner-friendly variation for the Four-Limbed Staff Pose during Surya Namaskar flow. In this posture, your body is balanced on only eight parts of your body – your palms, feet, knees, chest, and chin.
The grounding gesture of this pose is as if you are paying homage to the sun and showing gratitude for providing energy on this planet.
Overview & Etymology
In Sanskrit, "Ashta" means Eight, "Anga" means Body Parts or Limbs, and "Namaskara" means Greeting or Bowing Down at someone with respect.
This asana was unknown, so there is no trace of it in ancient Hatha Yoga Texts. It was initially practiced by Pant Pratinidhis (a prominent administration family who used to serve the Kings of the Maratha Empire) in 1929. At that time, this pose was not considered a yoga pose.
Later, Sri Tirumalai Krishnamacharya's student K. Pattabhi Jois founded the Astanga Yoga system and started to teach this pose to his pupils.
Sanskrit Name: अष्टाङ्ग नमस्कार Pronunciation: osh-TONG-ah nahm-ah-SKAR-ah
Pose Type: Transition Pose Also known as: Eight-Limbed Staff Pose or Caterpillar Pose
Strengthens: Arms, Shoulders, Core, Chest, Back, and Chin
Stretches: Back, Chest, and Spine
Health Benefits of Ashtanga Namaskara
Relieves backaches.
Helps calm the mind.
Helps open the chest muscles.
Enhances your sitting and standing posture.
Improves strength in your arms and tones your triceps.
It is a beginner-friendly pose for arm strengthening.
Improves mobility and flexibility in your back muscles.
Increases body awareness.
Engaging your core helps to stimulate the Manipura Chakra and digestive system.
When to Avoid Performing Ashtanga Namaskara
Avoid if you have migraines.
Avoid if you have high-blood pressure issues.
Avoid if you had a severe injury.
Avoid if you are recovering from surgery.
Avoid if you have inflammatory elbow or knee arthritis.
Avoid if you are recovering from a slipped disc or spondylolisthesis
Avoid during pregnancy, especially if you have sore feet or chronic back pain.
How to do Ashtanga Namaskara (Eight-Limbed Pose)
We have divided the eight-limbed yoga pose practice into four phases: preparation, steps, posture tips, and counter postures.
These detailed phases will help you understand Ashtanga Namaskara pose better and enjoy its significant health benefits.
Part 1 - Preparatory Poses for Ashtanga Namaskara
The Eight-Limbed yoga pose is a practice from Sun Salutation flow. Below listed are a few yoga asanas that are done before Ashtanga Namaskara to activate the spine, arms, legs, and core muscles:
1. Adho Mukha Svanasana (Downward-Facing Dog Pose) - Bend into a Standing Forward Fold, place your hands on the ground, and walk your four limbs through, creating a triangular space within your hands and feet.
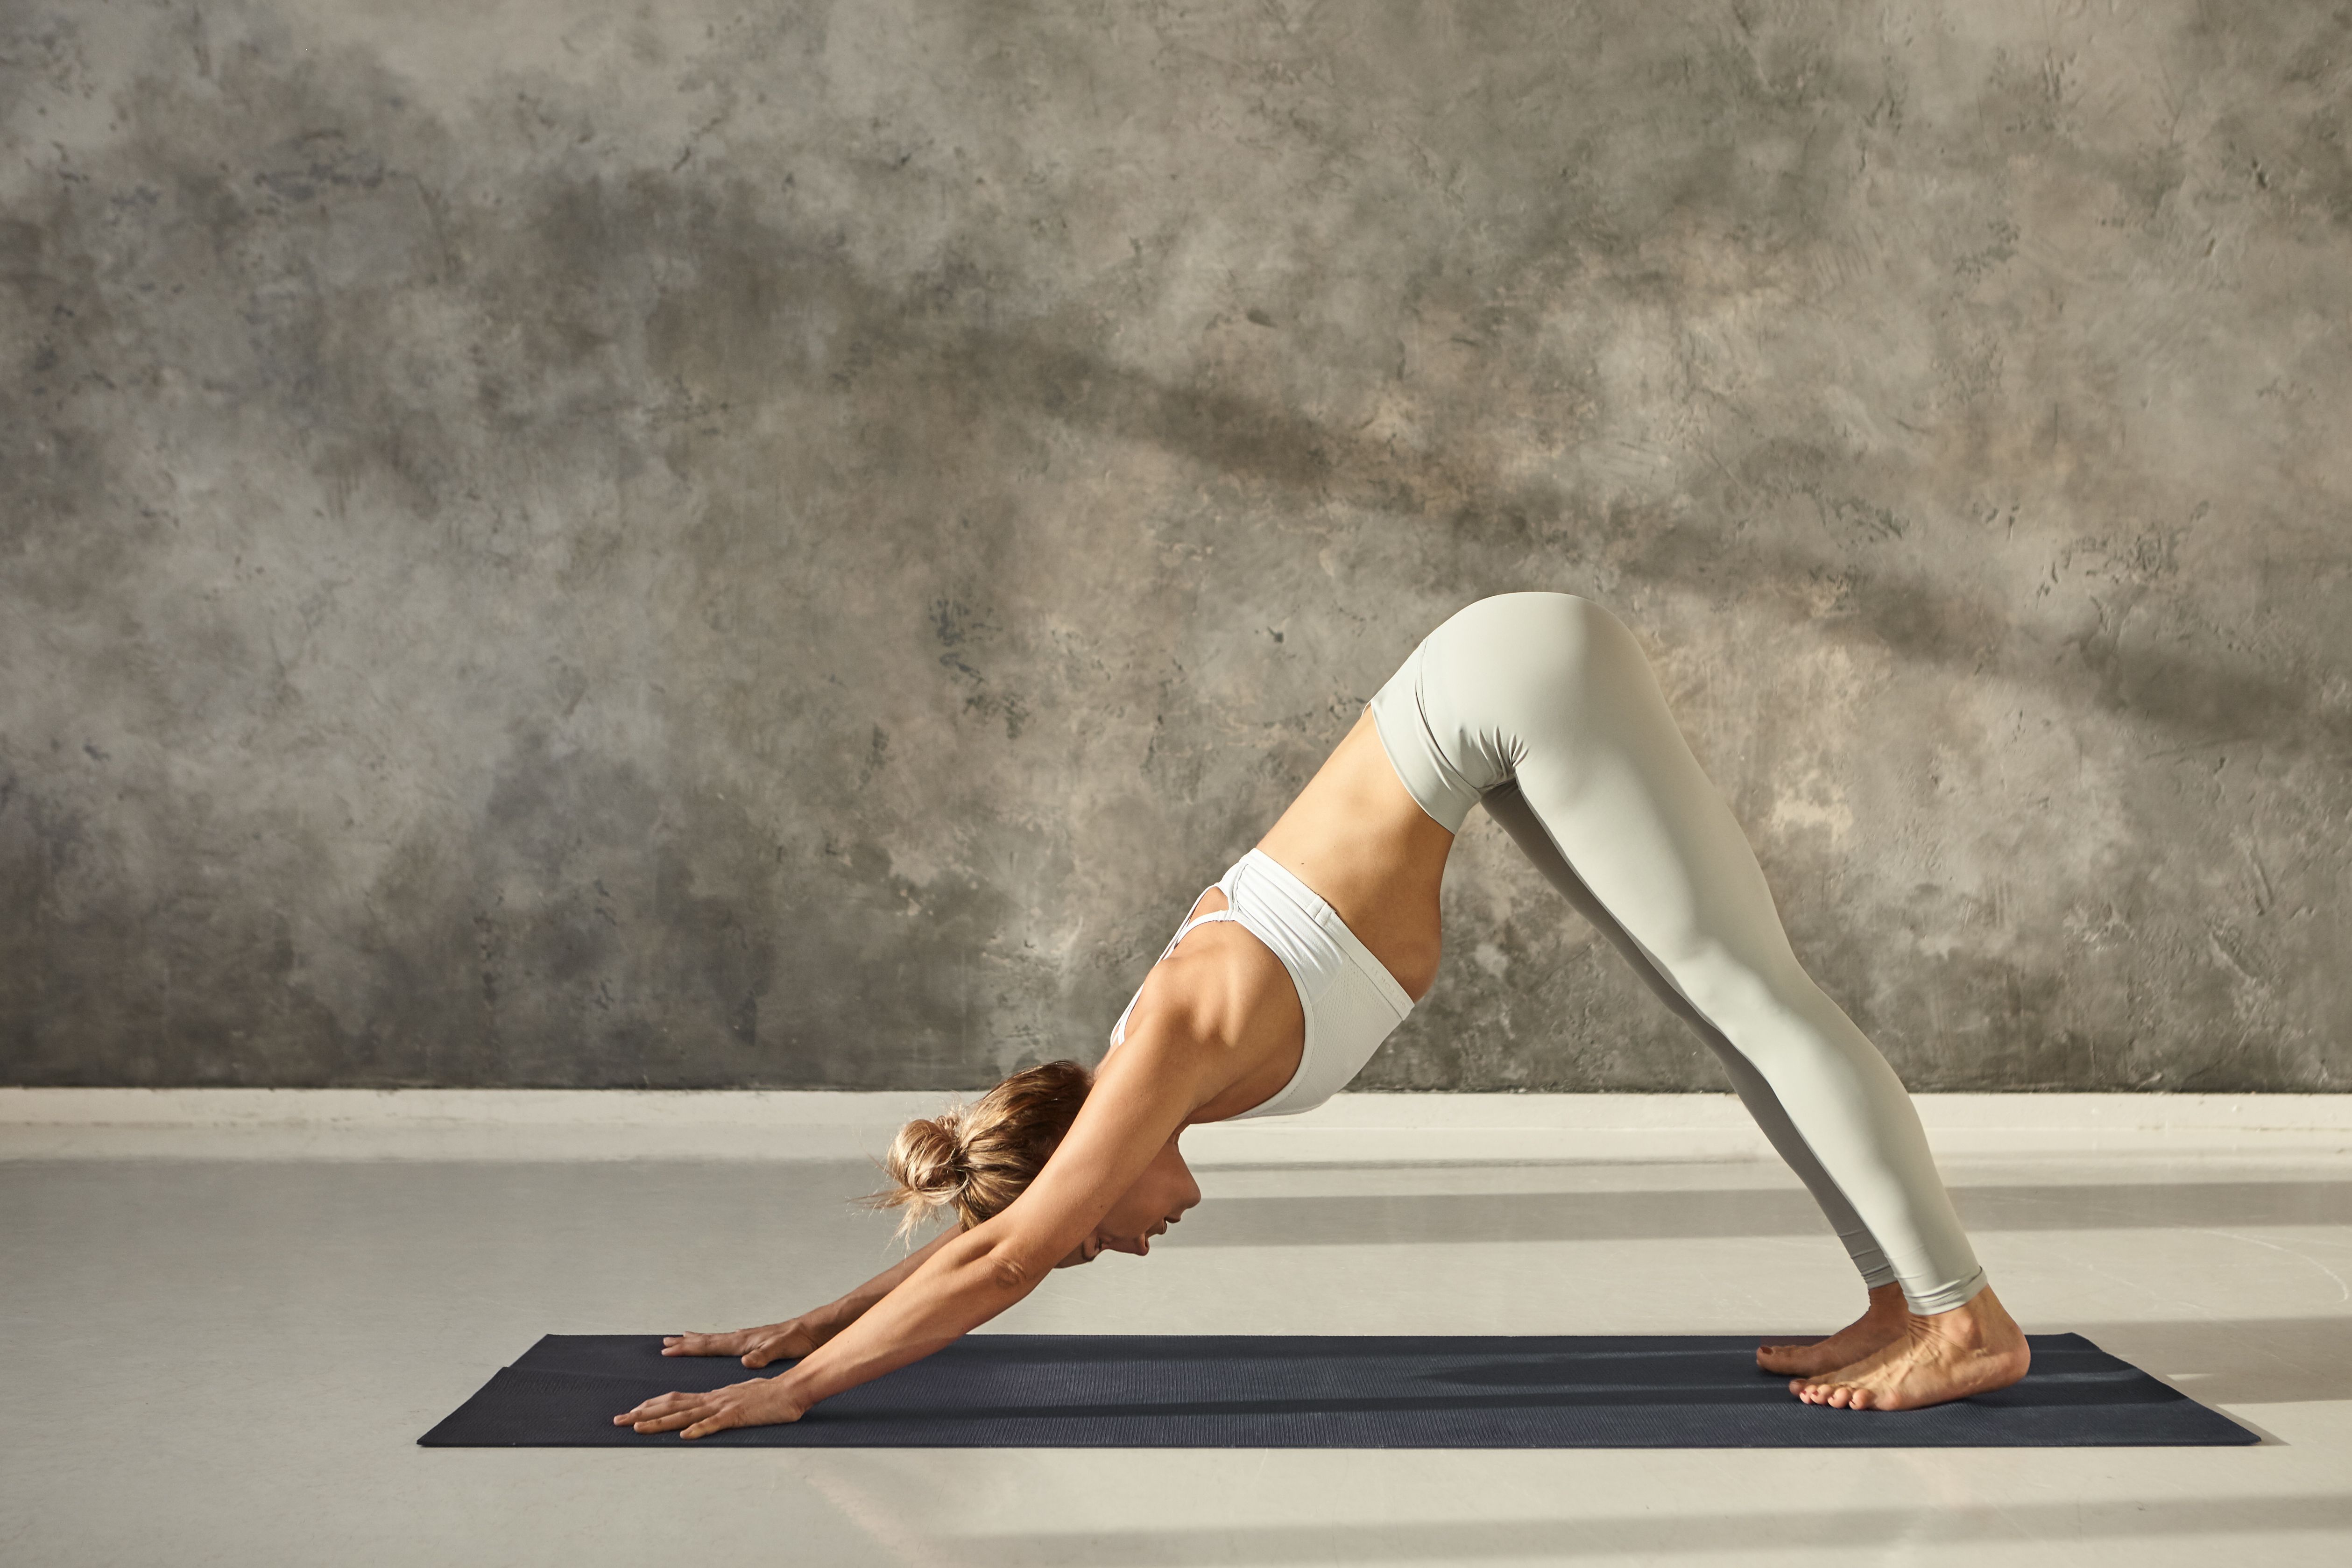
Keep your core tight, feet flat on the ground, and flex your spine like a dog stretches its body while yawning. Hold this pose here for a few seconds, and then get into the next pose.
2. Utthita Chaturanga Dandasana (High Plank Pose) - Move your spine in a neutral pose by holding your body on a high plank for a few seconds.
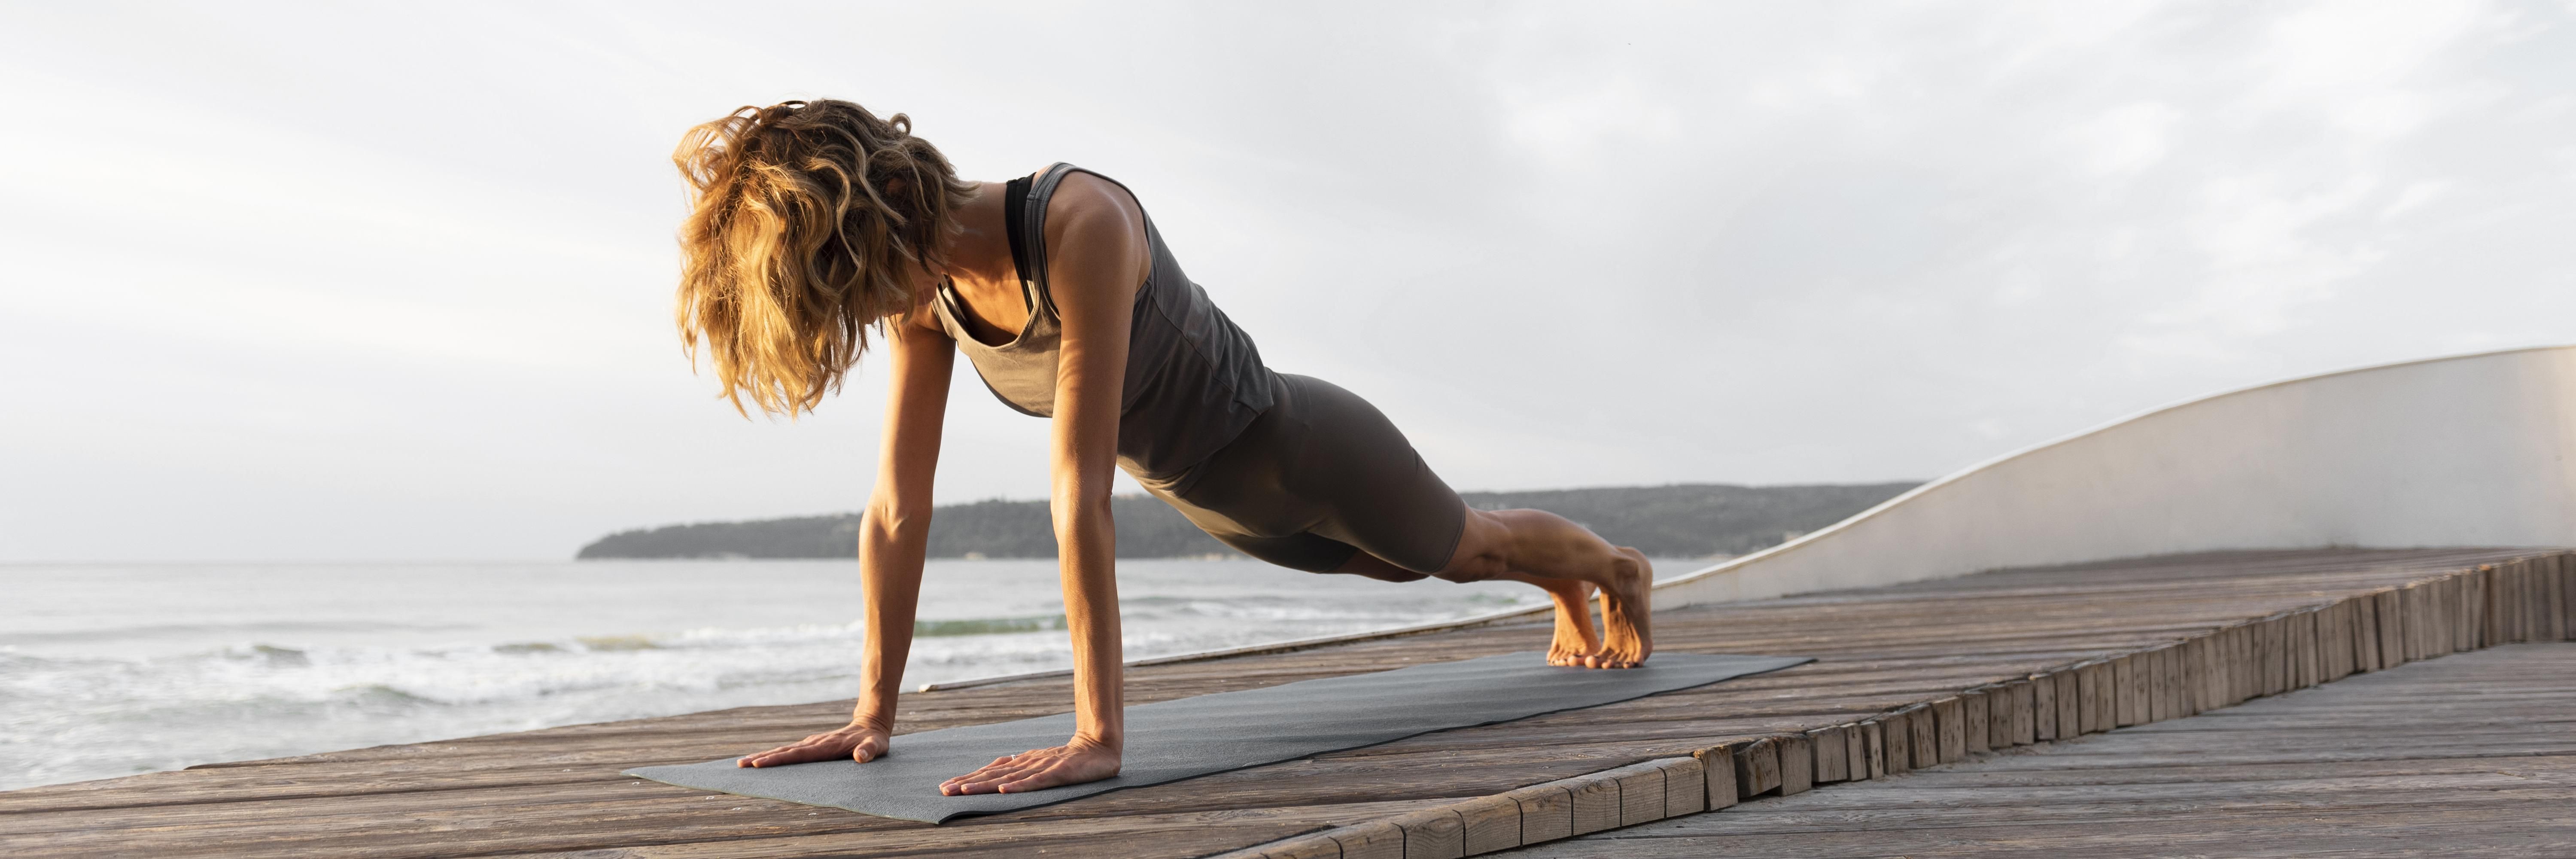
Keep your glutes, tailbone, neck, and head in one straight line. Make sure your core muscles are super engaged, and your gaze is between your palms.
Part 2: Step-by-Step Instructions to Perform Ashtanga Namaskara
The following are the steps to get into the Ashtanga Namaskara or Caterpillar Pose:
Step 1- Begin with a high plank pose or a tabletop position.
Step 2- From the starting position, inhale and gently drop your elbows and knees onto the ground.
Step 3- Lower your chest and chin, and completely get in touch with all your eight limbs on the ground.
Step 4- Make sure you are breathing gently and your core is engaged as you balance your body weight on your eight touchpoints. Hold this pose here.
Step 5- If you are only practicing the Ashtanga Namaskara alone, then inhale as you lift your chest gently from the ground and get into Thunderbolt Pose.
Or, if this pose is a part of sun salutation flow, then follow it up with a low cobra or full cobra pose.
Breath Awareness:
Inhale while dropping your elbows, knees, chest, and chin on the ground.
Exhale as you release the pose or transition into the next pose.
Performance Duration for Beginners: Hold the Ashtanga Namaskara for 30-60 seconds.
Performance Duration for Advanced: Hold the Ashtanga Namaskara for 1 to 3 minutes.
Part 3: Things to Keep in Mind
If you are performing this modified yoga asana for the very first time, try to keep the following tips in mind:
Keep your core engaged: The name Ashtanga Namaskara translates into Eight-Limbed Pose in English, which literally means you have to balance this pose on eight body parts.
For a strong and stable Ashtanga Namaskara hold, you need a strong foundation – that emerges from a tight core in alignment with focused breathwork.
Part 4: Relaxing Poses After Ashtanga Namaskara
Below is a list of counter-postures that you can relax in after performing the Eight-Limbed Pose:
1. Uttana Shishosana (Extended Puppy Pose) - Continue the caterpillar stance and flex your upper back by extending your arms in front. You can also ground your legs flat on the mat to extend your tailbone and feel a deeper stretch in your chest.
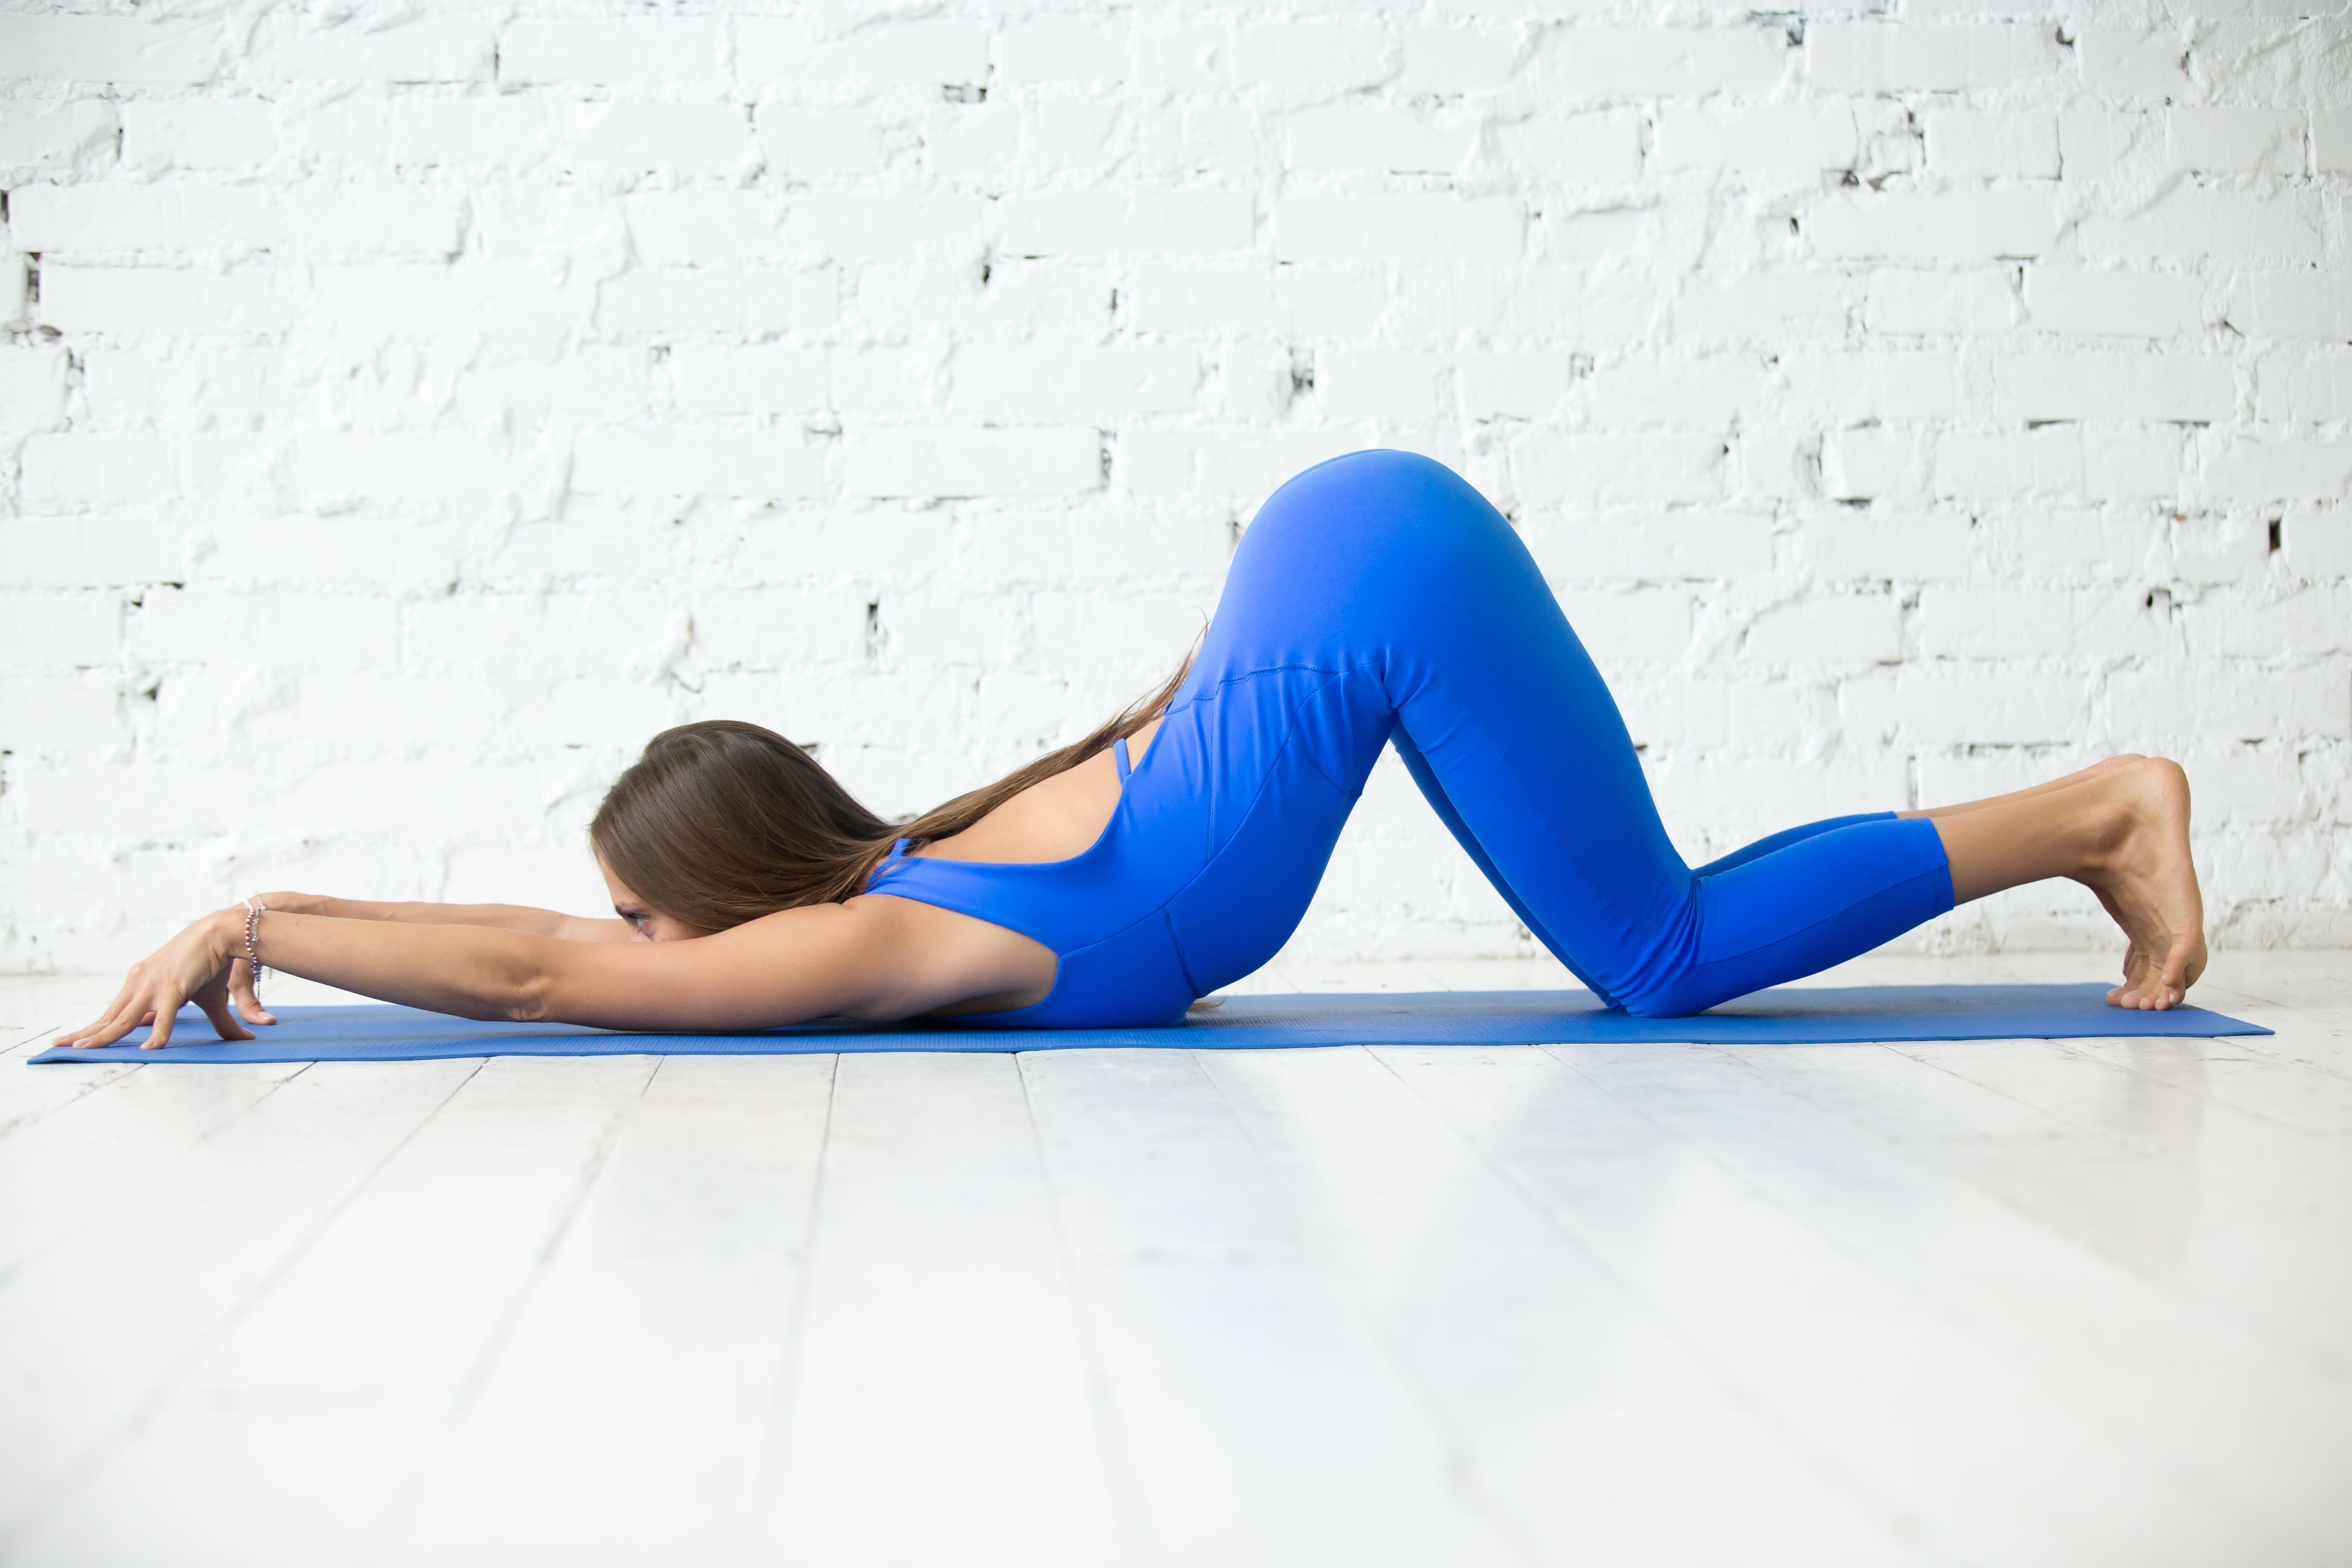
Hold this pose for as long as you feel comfortable, and then gently release the pose by sitting back into a Child's pose.
2. Bhujangasana (Cobra Pose) - This pose comes after the Eight-Limb Pose in the Surya Namaskar flow. Simply counter-flex your spine and push your core muscles deep into the ground to execute the cobra stance.
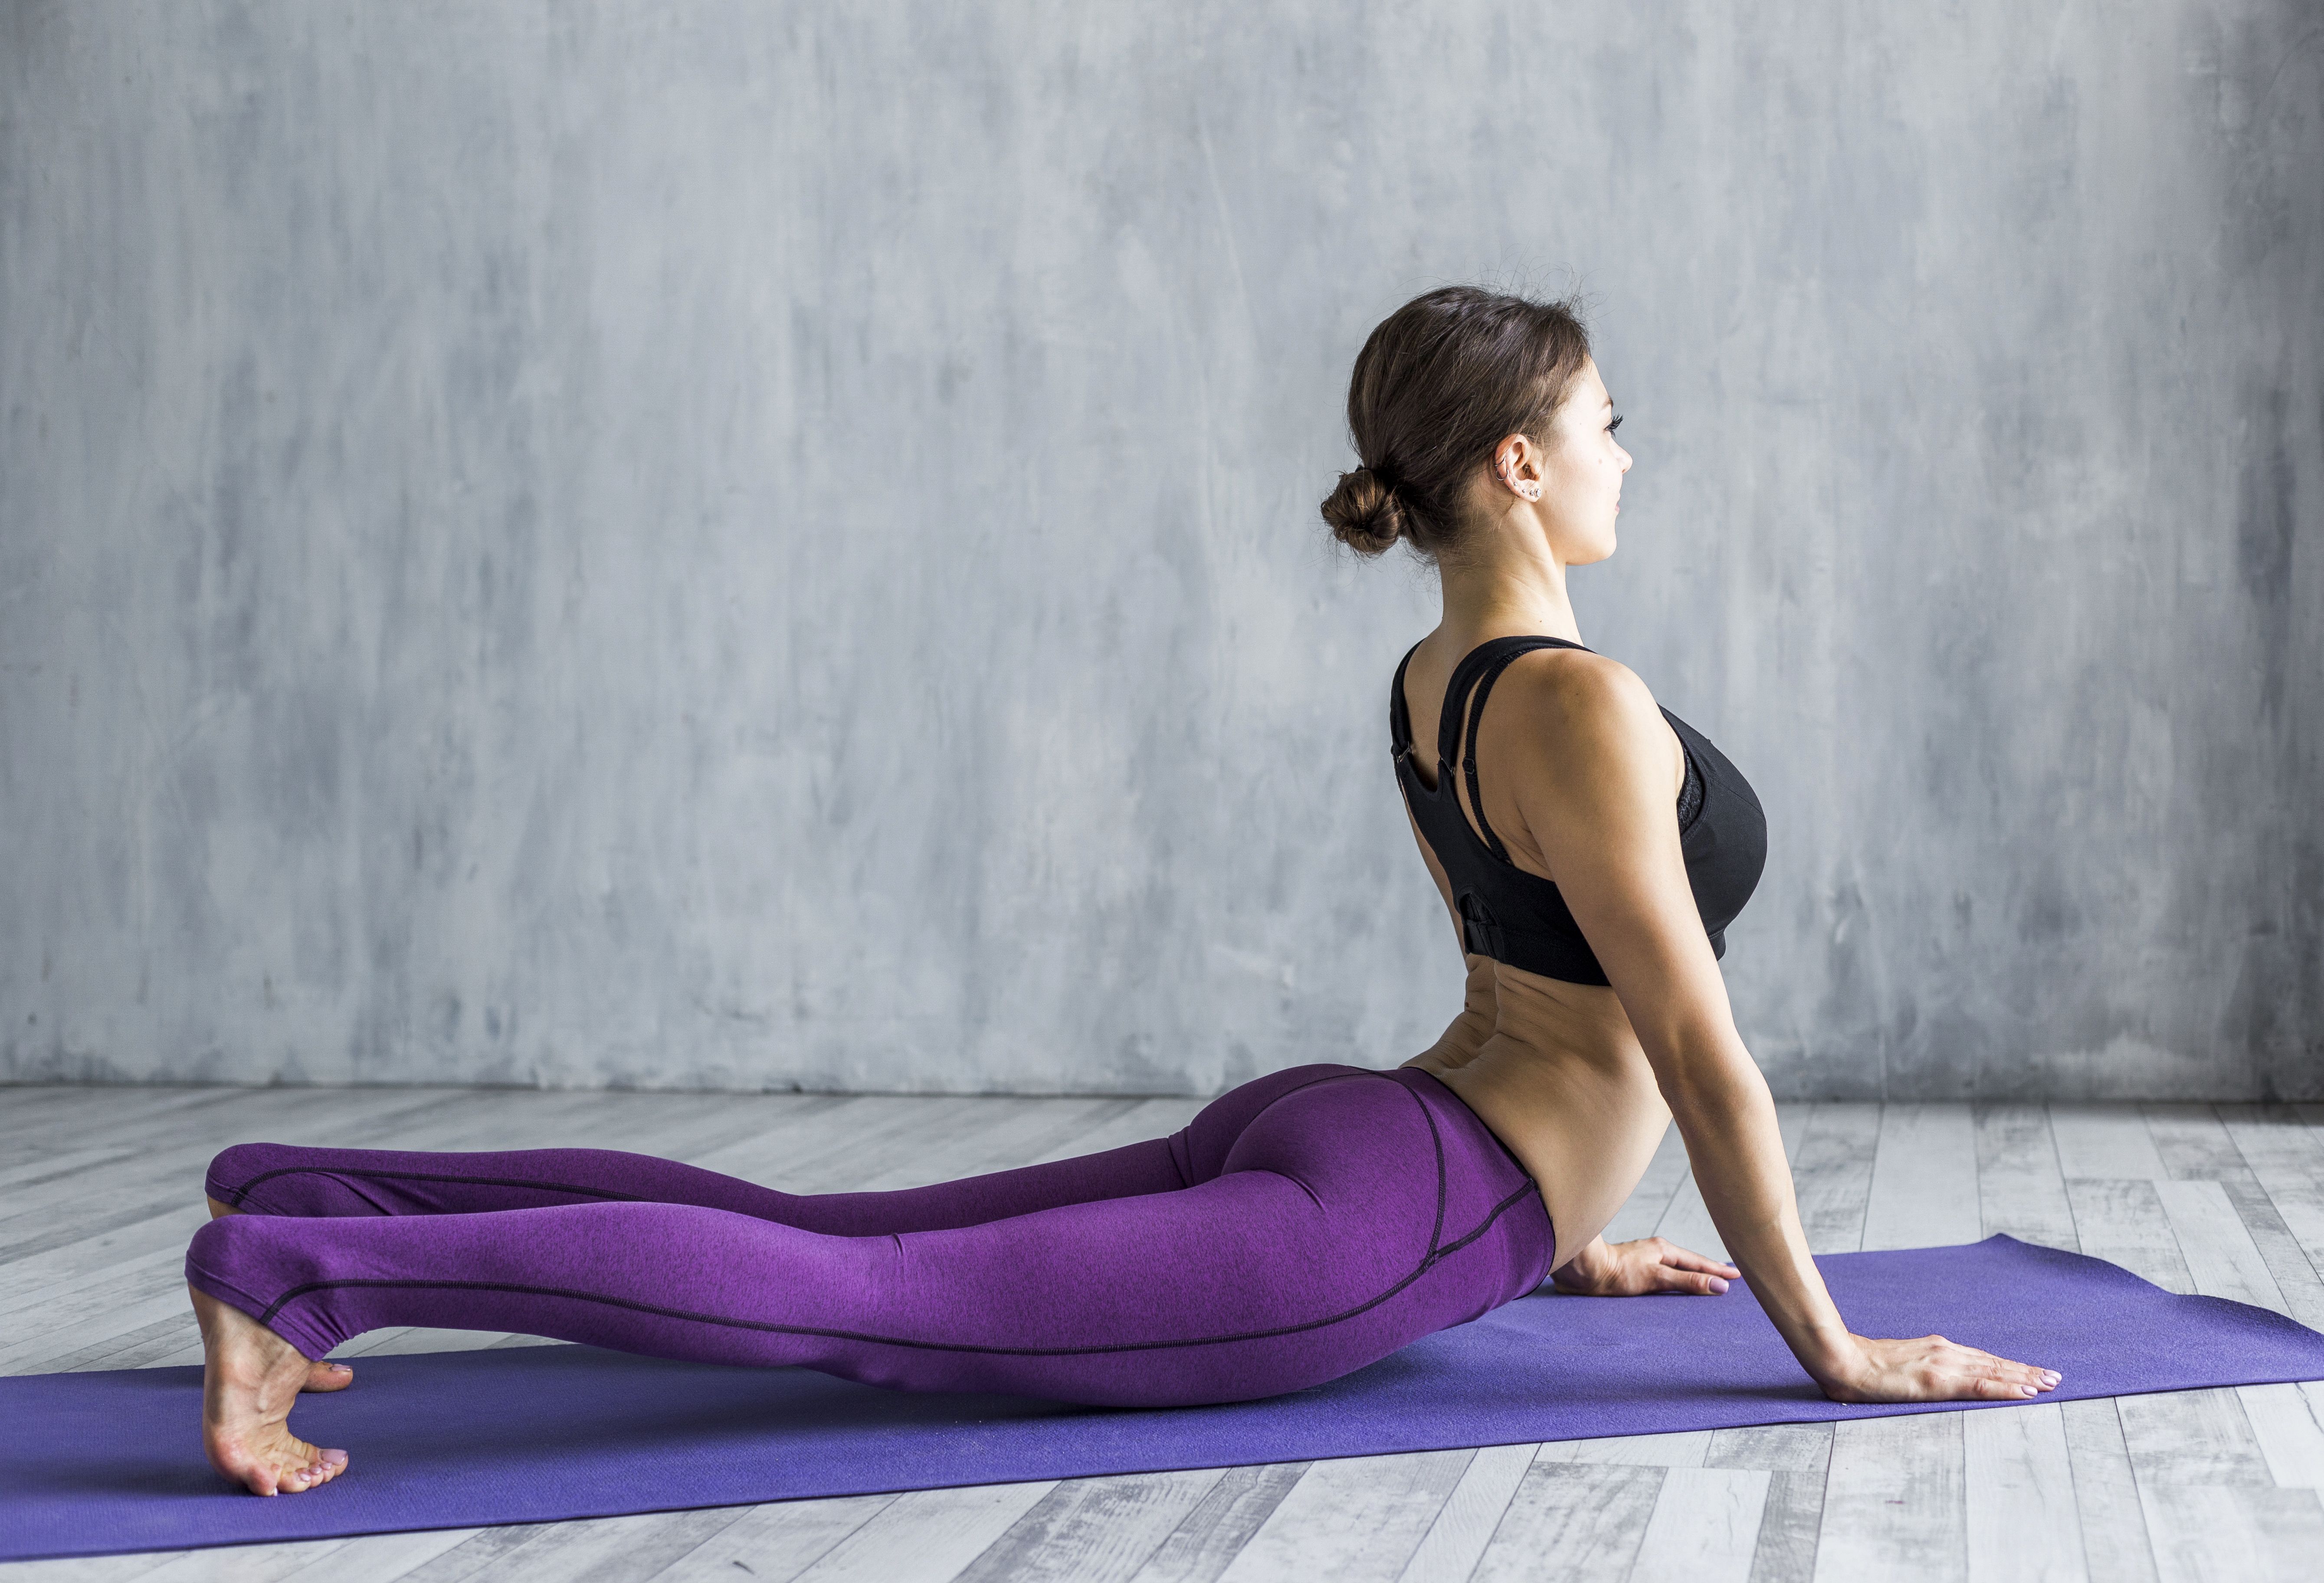
Hold this posture like a raised hood of a cobra snake for a few seconds and allow your tailbone, shoulders, and chest muscles to release all the tension.
3. Advasana (Reverse Corpse Pose) - This pose can be done after the whole Sun Salutation flow, or it is best done when you are practicing the Eight-Limbed Pose alone. Simply exhale as you release your balance from all your eight limbs and loosen your core muscles.
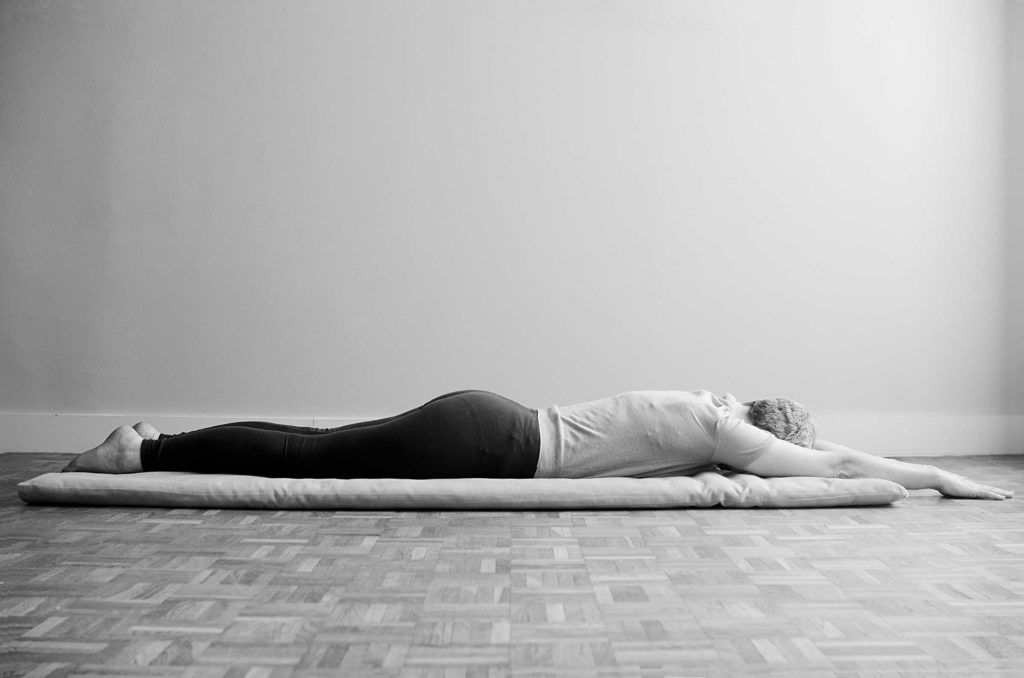
Drop your body completely flat onto the mat and relax here. You can focus on your breath for a few minutes until all the stress is released from your spine.
Ashtanga Namaskara Variations to Consider
If you feel ready to challenge your body further in the Eight-Limbed Pose, then try the below intermediate level variations to feel stronger in your practice:
1. One-Legged Eight-Limbed Pose (Bent Knee Variation): If you want to challenge your core stability in the Eight-Limbed Pose, continue the main pose by lifting either leg up.

When you lift your leg up, keep your knee bent and hold your leg up for a few seconds. Release the leg after some time and repeat the same on the other side.
2. One-Legged Eight-Limbed Pose (Straight Leg Variation): Continue the last variation, just make sure your lifted leg is engaged, straight, and your toe is pointing towards the ceiling.
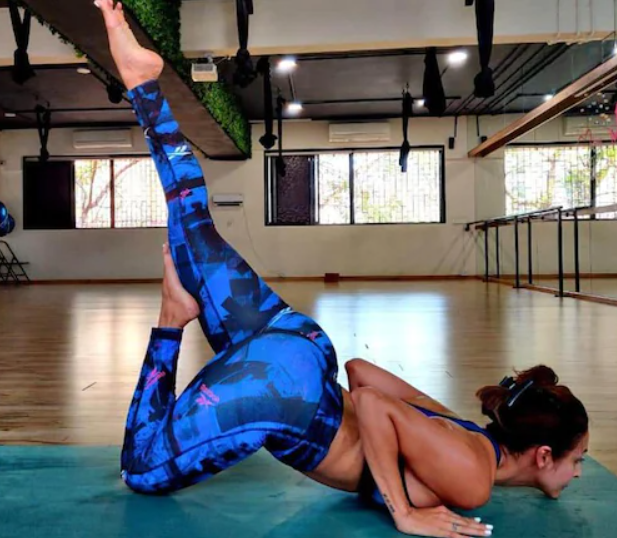
Hold this pose for a few seconds, then release and repeat on the other leg. Over time, you will feel more stability and strength in your core with this practice.
Enjoy a Free 1-on-1 Session with a Coach!
Receive personalized guidance tailored to your unique fitness goals, live with a dedicated coach—no credit card required.
Frequently Asked Questions about Ashtanga Namaskara
Ashtanga Surya Namaskar is a part of Ashtanga and Vinyasa Yoga, which involves a series of fast-flowing asanas that transition smoothly between each pose. In this yoga flow, the yogi salutes or greets the sun and bows down, offering gratitude for providing energy on earth.
There are two popular types of Ashtanga Surya Namaskar flow variations in yoga: Ashtanga Surya Namaskar A and B.
Ashtanga Surya Namaskar A is a beginner-friendly 12-asana flowing sequence, whereas Ashtanga Surya Namaskar B is a 19-asana flowing sequence which advanced yogis can perform.
Yes, beginners can perform Ashtanga Surya Namaskara. They can choose Ashtanga Surya Namaskara-A, which contains 12 moves. A few poses – like Bhujangasana and Chaturangasana – can be challenging for beginners in this flow, so be sure to modify your posture when needed.
This flow will activate your whole body and prepare you for practicing more yoga postures. For best results while performing Ashtanga Surya Namaskara, try focusing on your breathing patterns as you transition from one pose to another.
The following are some health benefits of Ashtanga Namaskara:
1. It improves your posture.
2. This pose can stimulate Navel Chakra healing.
3. It helps reduce back pain and strengthens your arms.
4. Engaging the core muscles in this pose helps ease digestion.
5. It helps build body awareness and a conscious connection between all eight limbs.
Ashtanga Namaskara leg variations are ways to challenge your body and feel stronger or more flexible. The following are a few that you can try in your practice:
1. Get into the Ashtanga Namaskara pose, and then try lifting one leg while keeping the knee bent. This way, you will feel a slight tension around your core muscles. Hold the pose for a few seconds, and then repeat on the other side.
2. Continue the previous variation, and then straighten your lifted leg. Make sure your toes are pointing and your core is super engaged. Hold and then repeat on the other side. This will help you strengthen your legs, arms, and core muscles.
In an Ashtanga Namaskar, there are eight body parts on which your whole body maintains its balance. The balancing points are two hands, two feet, two knees, one chest, and one chin. Only these eight parts should be touching the ground as you balance.


.webp)
%20(7).jpg)
