What is Natarajasana (Dancer Pose)?

Natarajasana is a balancing and attention-centering standing yoga asana. This standing backbend enhances your focus and equilibrium. It strengthens the legs, glutes, ankles, knees, and chest, which aids in the development of grace in the body.
It also encourages inner peace and mindfulness of the changing world around us. According to Hindu mythology, Nataraja, commonly known as "Lord Shiva," is the king or father, or Lord of the Indian Classical Dance.
Overview & Etymology
Overview
'The Sanskrit word, 'Nataraja' refers to a demigod from Hindu mythology, 'Lord Shiva' in his cosmic dancer form, and 'Asana,' means 'Posture' or Seat.'
This stance can be seen in the Eastern Gopuram, Nataraja Temple, Chidambaram, in 13th–18th century Bharatnatyam dance statues; about 20 various asanas are depicted here.
According to yoga expert Elliott Goldberg, Natarajasana is not referenced in any medieval hatha yoga source, nor is it depicted in artistic portrayals of yoga such as the Mahamandir or the Sritattvanidhi.
Goldberg says that T. Krishnamacharya introduced this pose, along with numerous others, into modern yoga in the early twentieth century, and it was taken up by his students, including B. K. S. Iyengar, who made the pose a signature of modern yoga.
Sanskrit Name: नटराजासन Pronunciation: Not-ah-raj-ahs-anna
Pose Type: Backbend & Standing Balance Also known as: Dancer Pose or Lord of the Dance Pose
Strengthens: Legs, Ankles, Core & Back
Stretches: Shoulder, Chest, Thigh, Thorax, Abdomen, & Back
Health Benefits of Natarajasana
Improves core balance.
Activates thyroid glands.
Aids in weight loss and obesity.
Reduces tension, stress, and anxiety.
Improves concentration and mental awareness.
Improves the strength and flexibility of your legs, back, core, and arms.
Enhances hormonal functions of kidneys, pancreas, and reproductive organs.
When to Avoid Performing Natarajasana
- Avoid during pregnancy.
Avoid during menstruation.
Avoid if you have knee arthritis.
Avoid if experiencing body pain.
Avoid this practice if you are new to yoga.
Avoid if you have had a recent injury or surgery.
How to do Natarajasana (Dancer Pose)
Nataraja's dance is known as the Ananda Tandava, which translates to "dance of pleasure." Lord Shiva is depicted in this dance form in a circular frame, representing the cosmic fire responsible for both creation and change.
Here are the following four stages of getting on board with your Natarajasana practice.
Part 1 - Preparatory Poses for Natarajasana
Since the Dancer Pose is a balancing pose, it is necessary to warm up the body with simple balancing yoga poses that help strengthens one's core and legs. Before entering into Natarajasana, the following preparatory yoga poses should be practiced:
1. Salabhasana (Locust Pose) - Relax the body by lying down on your stomach, stretching the spine, and taking a few deep breaths. Inhale and tighten the entire body from the hips to the toes by bringing the feet together.
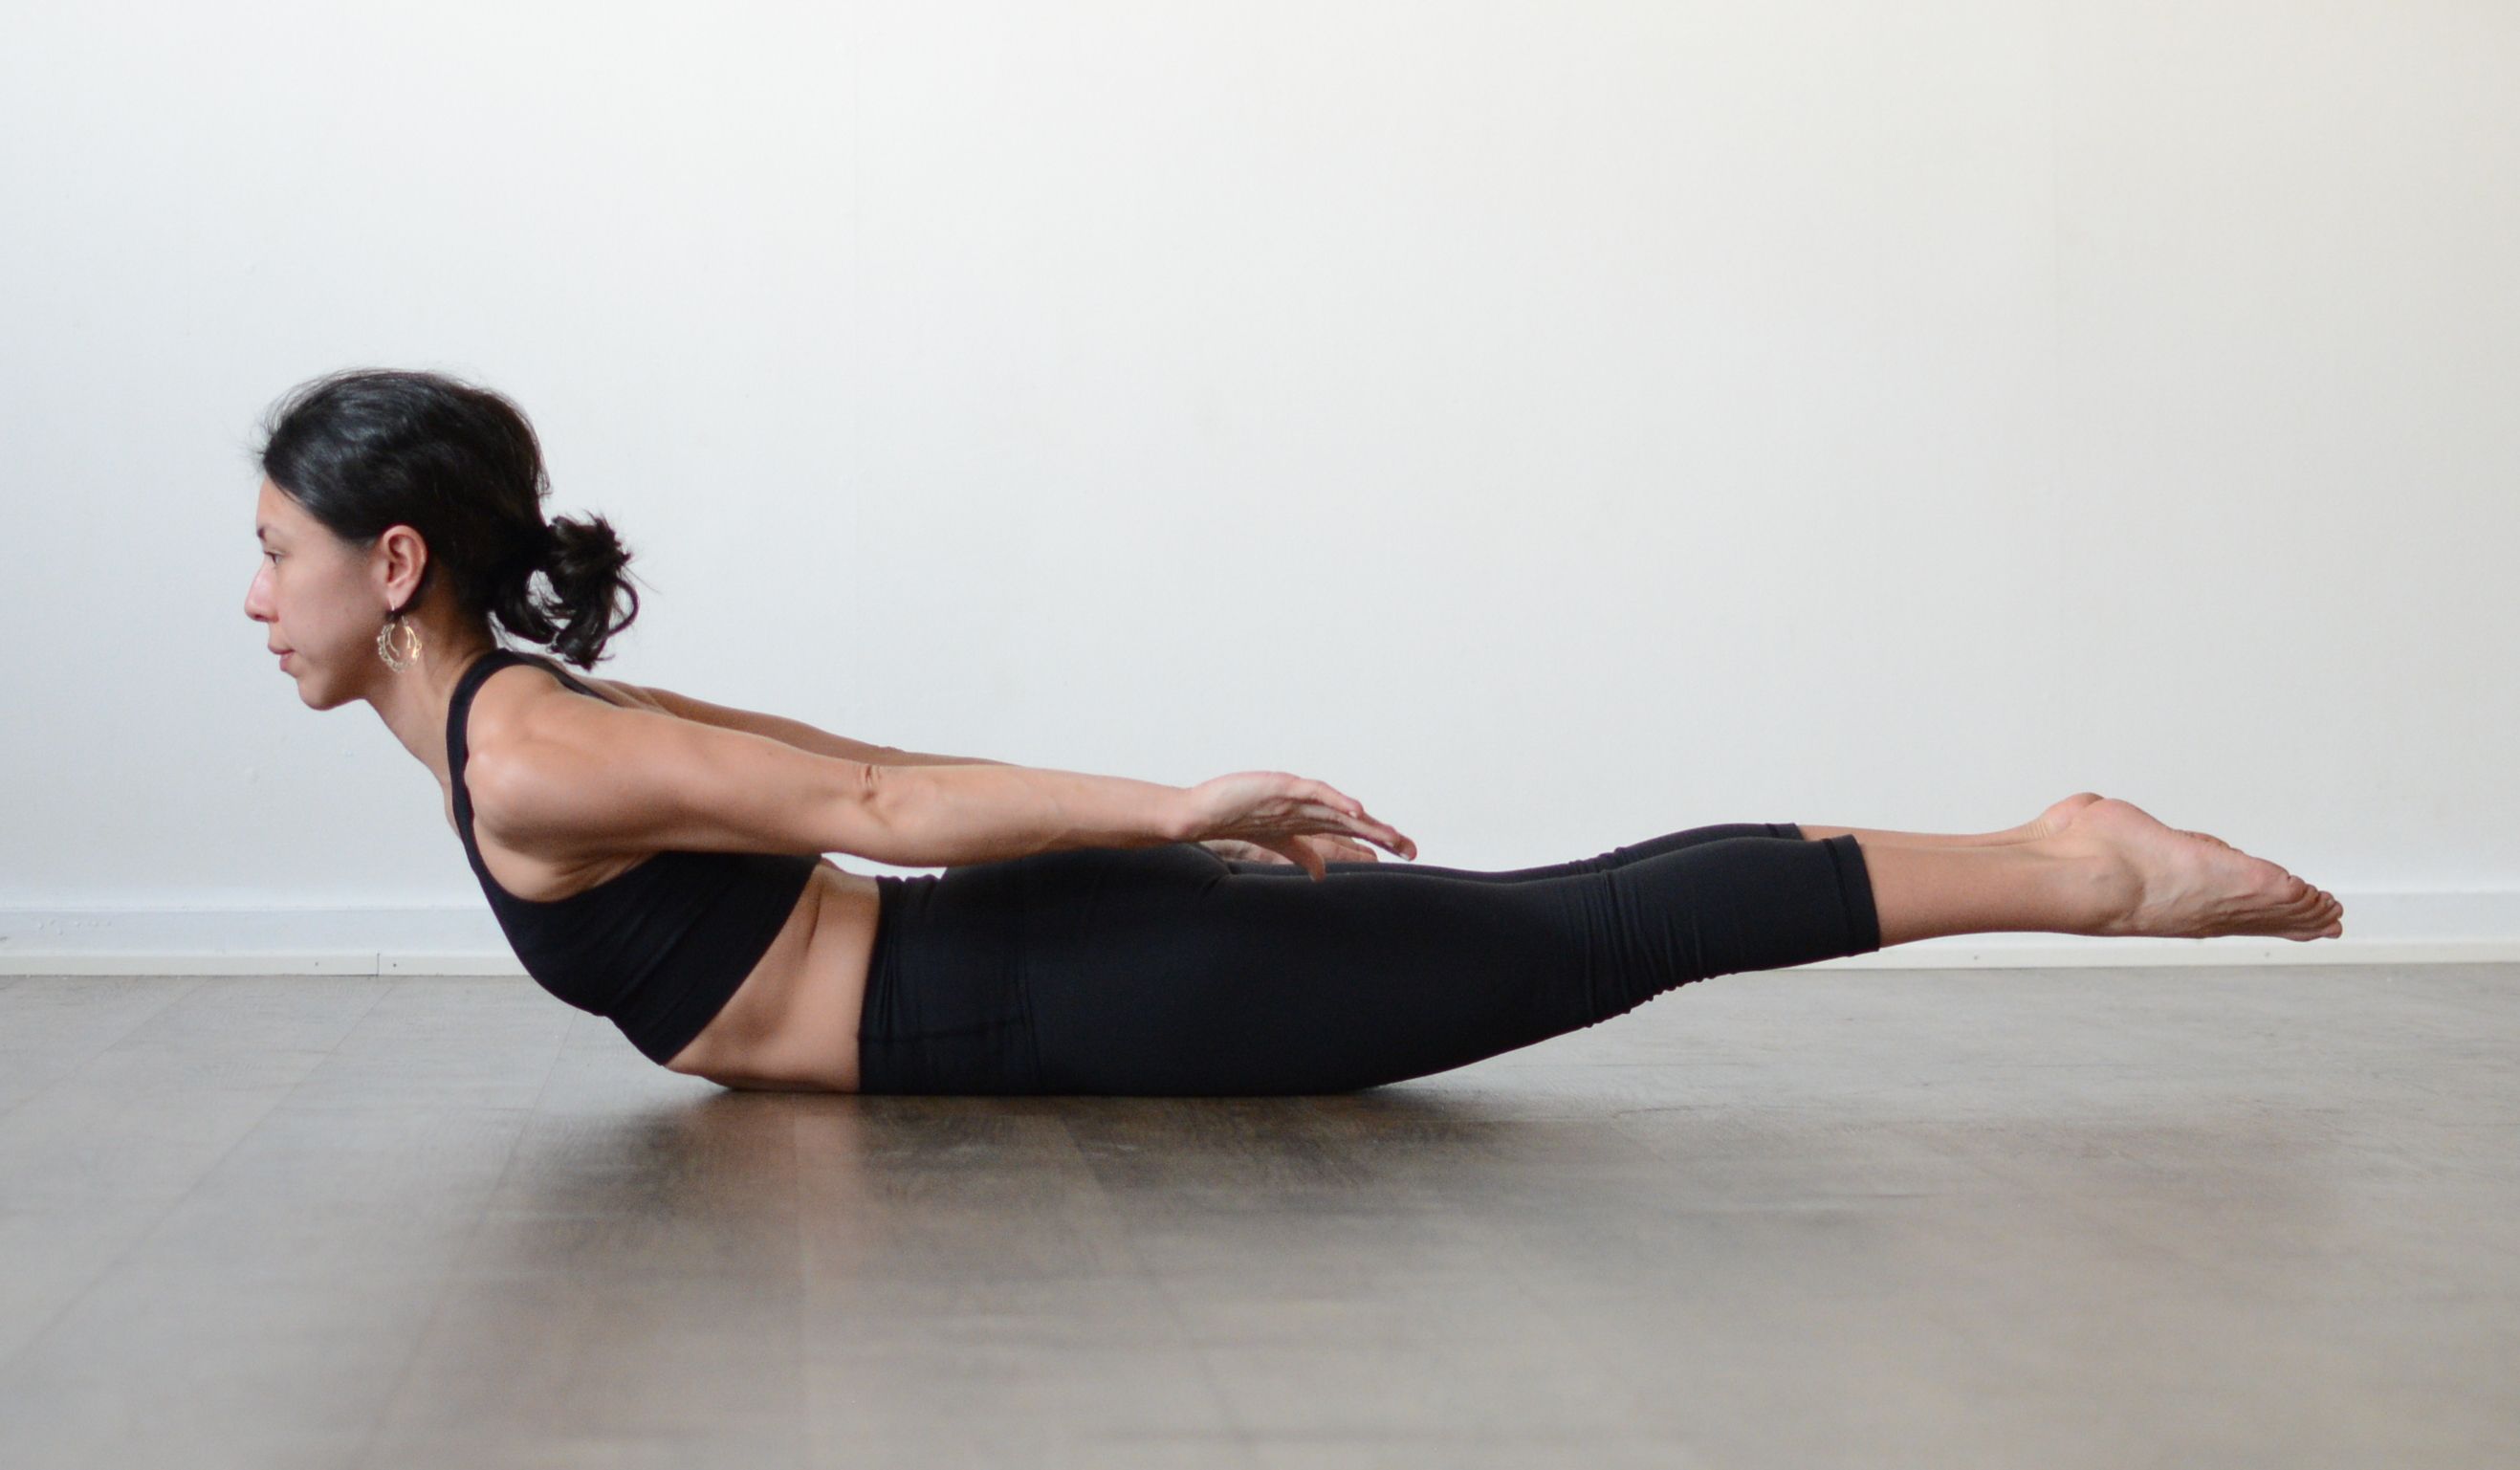
This stretch strengthens the lower back and entire leg, preparing it for Natarajasana. The deeper one will stretch with the legs going upwards, the higher will be the strength in one’s lower back, core, and legs.
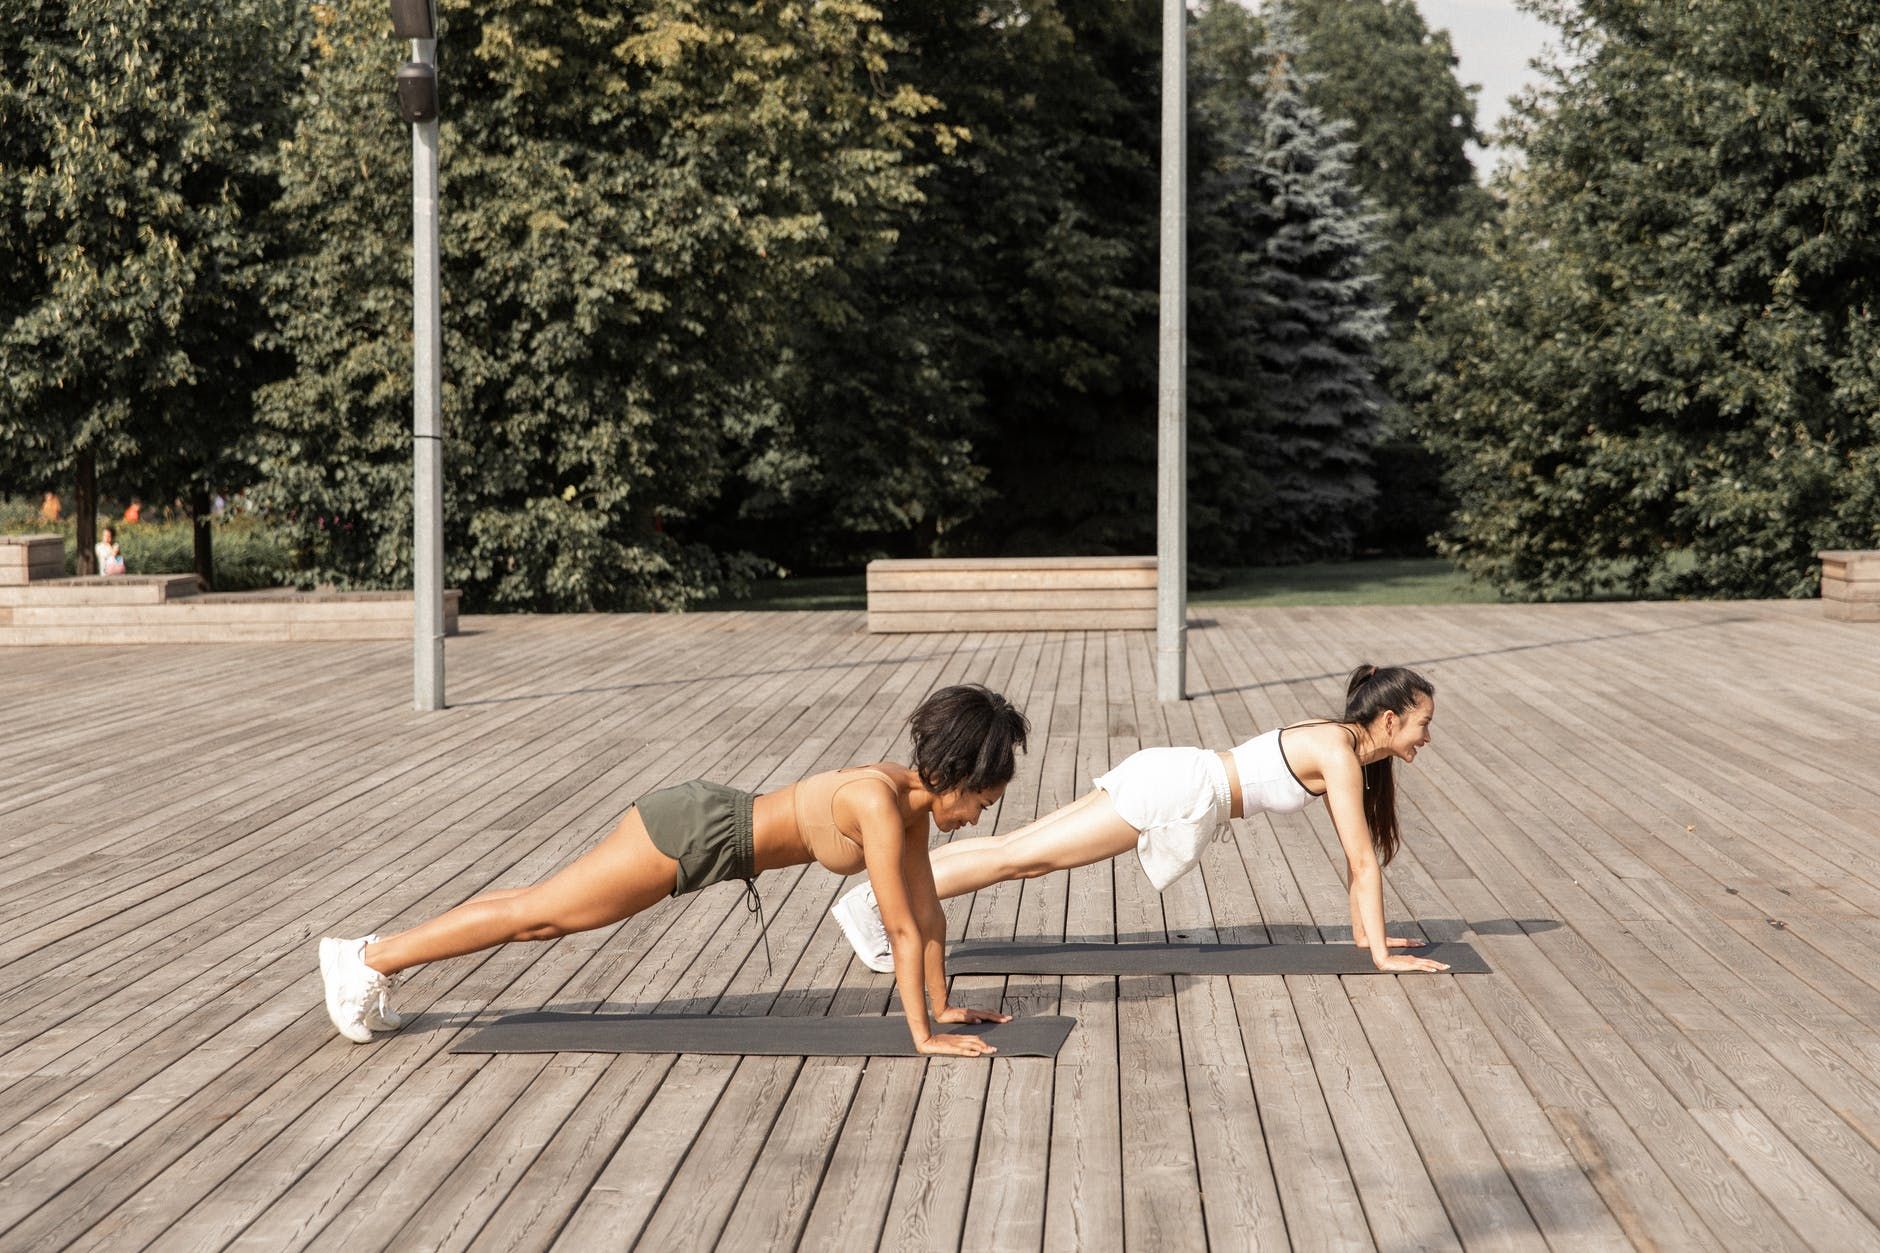
2. Phalakasana (Plank Pose) - The body is held in a plank-like position, engaged and long, as the name implies. The core muscles and shoulders are heavily emphasized in Plank Pose. This pose is mostly for people who want to improve their arm, shoulder, and core strength to perform more challenging balancing yoga poses.
3. Dhanurasana (Bow Pose) - The lower back and hamstrings are opened better in this pose, with the legs curled upwards while laying on the abdomen. This position will provide good support while practicing Natarajasana because it deeply stretches the lower back, hamstrings, and abdomen.

Try to increase your endurance here in this pose and dive deeper with regular bow pose practice.
4. Eka Pada Rajakapotasana (One-Legged King Pigeon Pose) - This pose belongs to the challenging poses category and the hip opener category. Your entire body continues to receive the necessary stretch by twisting the sides of the hip, bending the back at a short distance, opening the chest, pressing the thighs towards the floor, balancing the body to one side of the hip and thighs, arms stretched backward and holding the toes, and neck is flexed beautifully while dropping backwards.
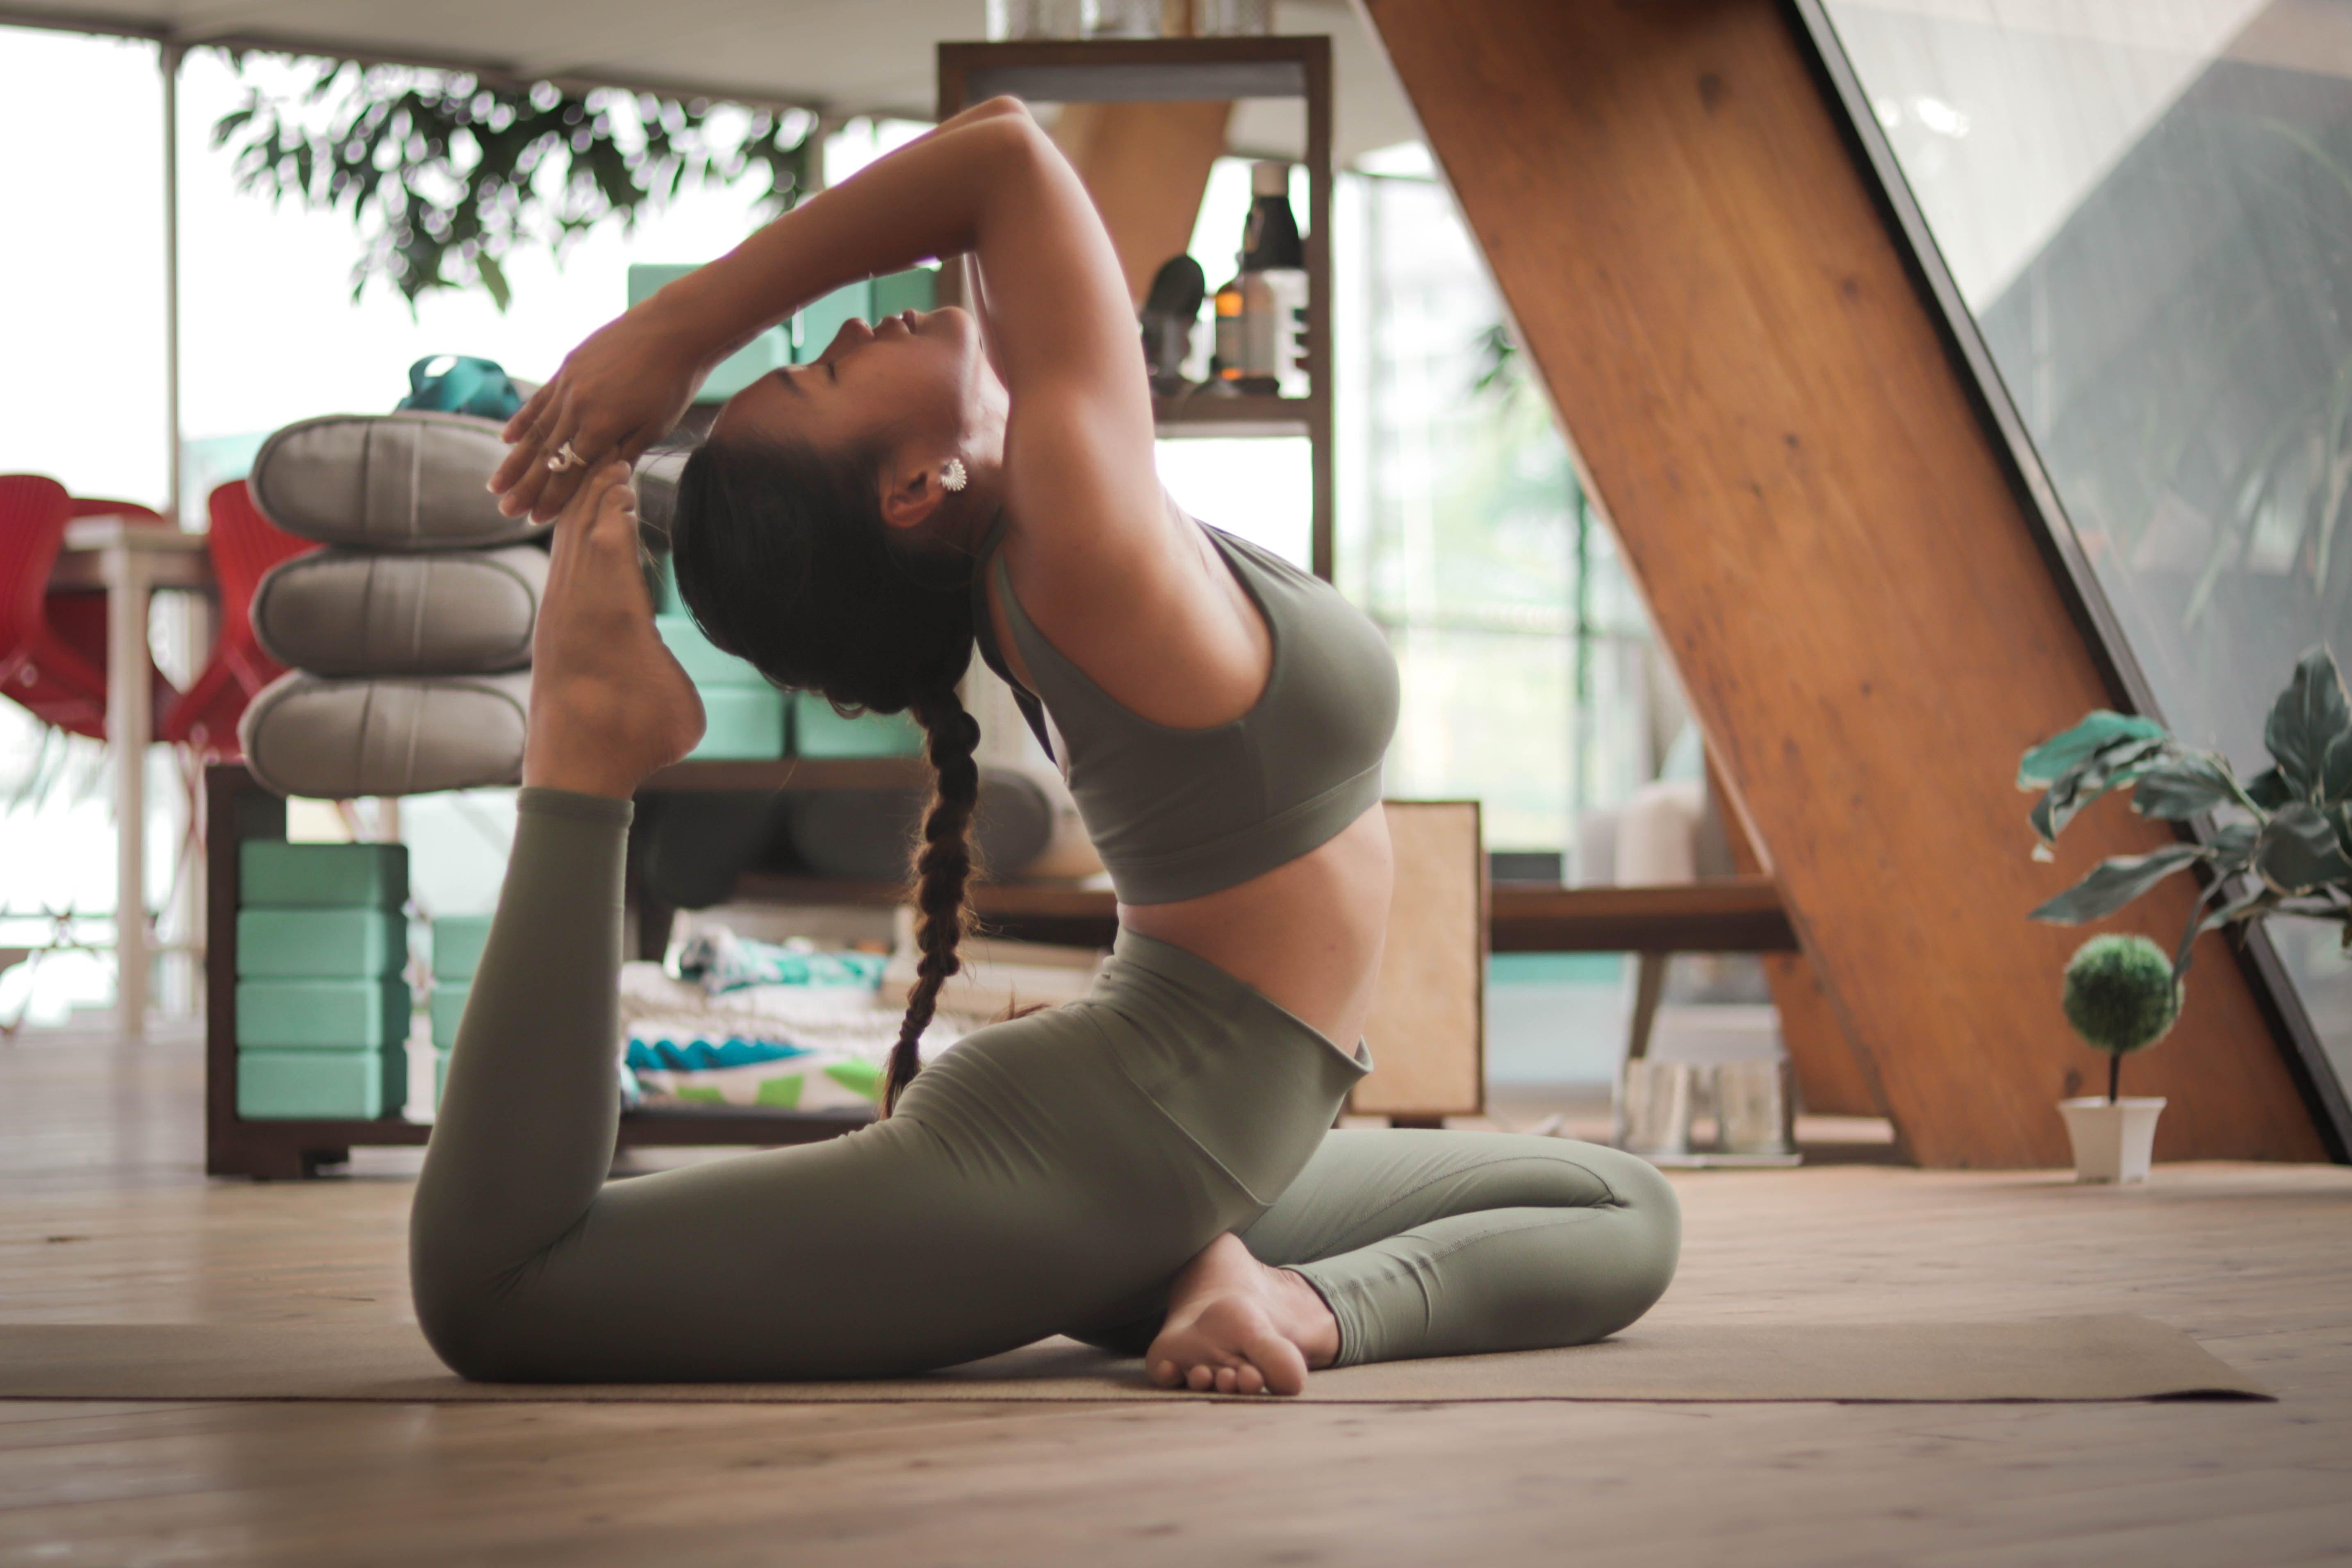
This pose builds a strong foundation for Natarajasana by giving you a deep stretch in the shoulders, chest, hamstrings, hips, lower back, and arms.
Part 2: Step-by-Step Instructions to Perform Natarajasana
Step 1- Stand in the middle of the mat, with your weight balanced equally between your feet and arms relaxed at your sides.
Step 2- Bend your right knee and lift your right heel toward your buttocks.
Step 3- Grab your right ankle with your right hand, shift your weight to your left foot, and extend your left arm toward the sky.
Step 4- Bend at your waist and slowly lean forward until your left arm aligns with your right leg in the air.
Step 5- Lift your right leg up as far as you can and try to engage the core to hold the pose here.
Step 6- Hold this standing balance posture for 3 to 5 deep breaths. If the balance is difficult, try to fix your gaze at one singular point in front of you, and make sure your core is tightly engaged.
Step 7: Now, repeat these steps on the other side.
Breath Awareness: Let's go through the breathing steps because this posture necessitates mindfulness of the breath while balancing the body.
1. Inhale and stand with your feet together, then exhale and stretch your spine.
2. Inhale and raise your right foot behind you, bending at the knee, and exhale while holding it with your right hand from behind.
3. Inhale, exhale and curl the thumb and index finger to bring the toes in between the thumb and index finger as you raise the right foot high in the air, with the left arm stretched out long in front of you.
4. Inhale and pull the chest backward; exhale and lift the leg higher and fully extend the left arm.
5. Slowly inhale and exhale for four rounds, expanding the legs and chest with each exhalation and loosening the chest with each inhalation.
6. Inhale slowly and bring the body to Tadasana, exhaling completely while keeping the spine straight.
7. Take a few breaths here and repeat the motion with the left leg, pay attention to the breath as the body moves. After releasing the posture, relax and return to Tadasana, bringing the breath back to normal.
Performance Duration for Beginners: Hold the dancer pose for 20-60 seconds on each leg.
Performance Duration for Advanced: Hold the pose for 2 to 3 minutes on each leg.
Part 3: Things to Keep in Mind
Dancer Pose (Natarajasana) is one of the most challenging yet effective balance yoga poses. Keep in mind the following points as you start the dancer pose practice.
Prepare your mind for the balance- Focus within and direct your mind to the four corners of your feet from Tadasana. Find your Drishti—a stationary place where you can focus your gaze—and begin an open-eye meditation.
If you want to flex the left leg up first, shift the body weight onto your right foot and elongate its bones in every way possible. Feel your left foot lighten and nearly lift off the surface. Slowly bend the left knee and grip the left ankle with your left hand as you feel your core tightening.
The standing knee should be protected- It's simple to hyperextend the standing knee in the Lord of the Dance stance. When the knee is straight, hyperextension occurs when it bends beyond its normal range of motion. This should be avoided by first engaging the quad muscles and then micro bending the knee on the standing leg to protect it from locking the knee joints.
Kick some more- As you kick your left foot into your left hand, extend from your tailbone to the crown of your head, bending at the hips. The strength of this position is determined by the power of the kick; the harder you kick, the more solid your dancer's pose will be. You can hold a wall for support as you learn to kick.
Hips should be squared- Instead of spreading out to the left, aim to keep your hips squared and your left knee aligned with your torso.
Part 4: Relaxing Poses After Natarajasana
Natarajasana is the final backbend pose in a series and is almost always practiced near the end of the backbend sequence of yoga poses. Thus, it's critical to give the middle back and chest some area to stretch, cool down, and relax after a long backbend practice.
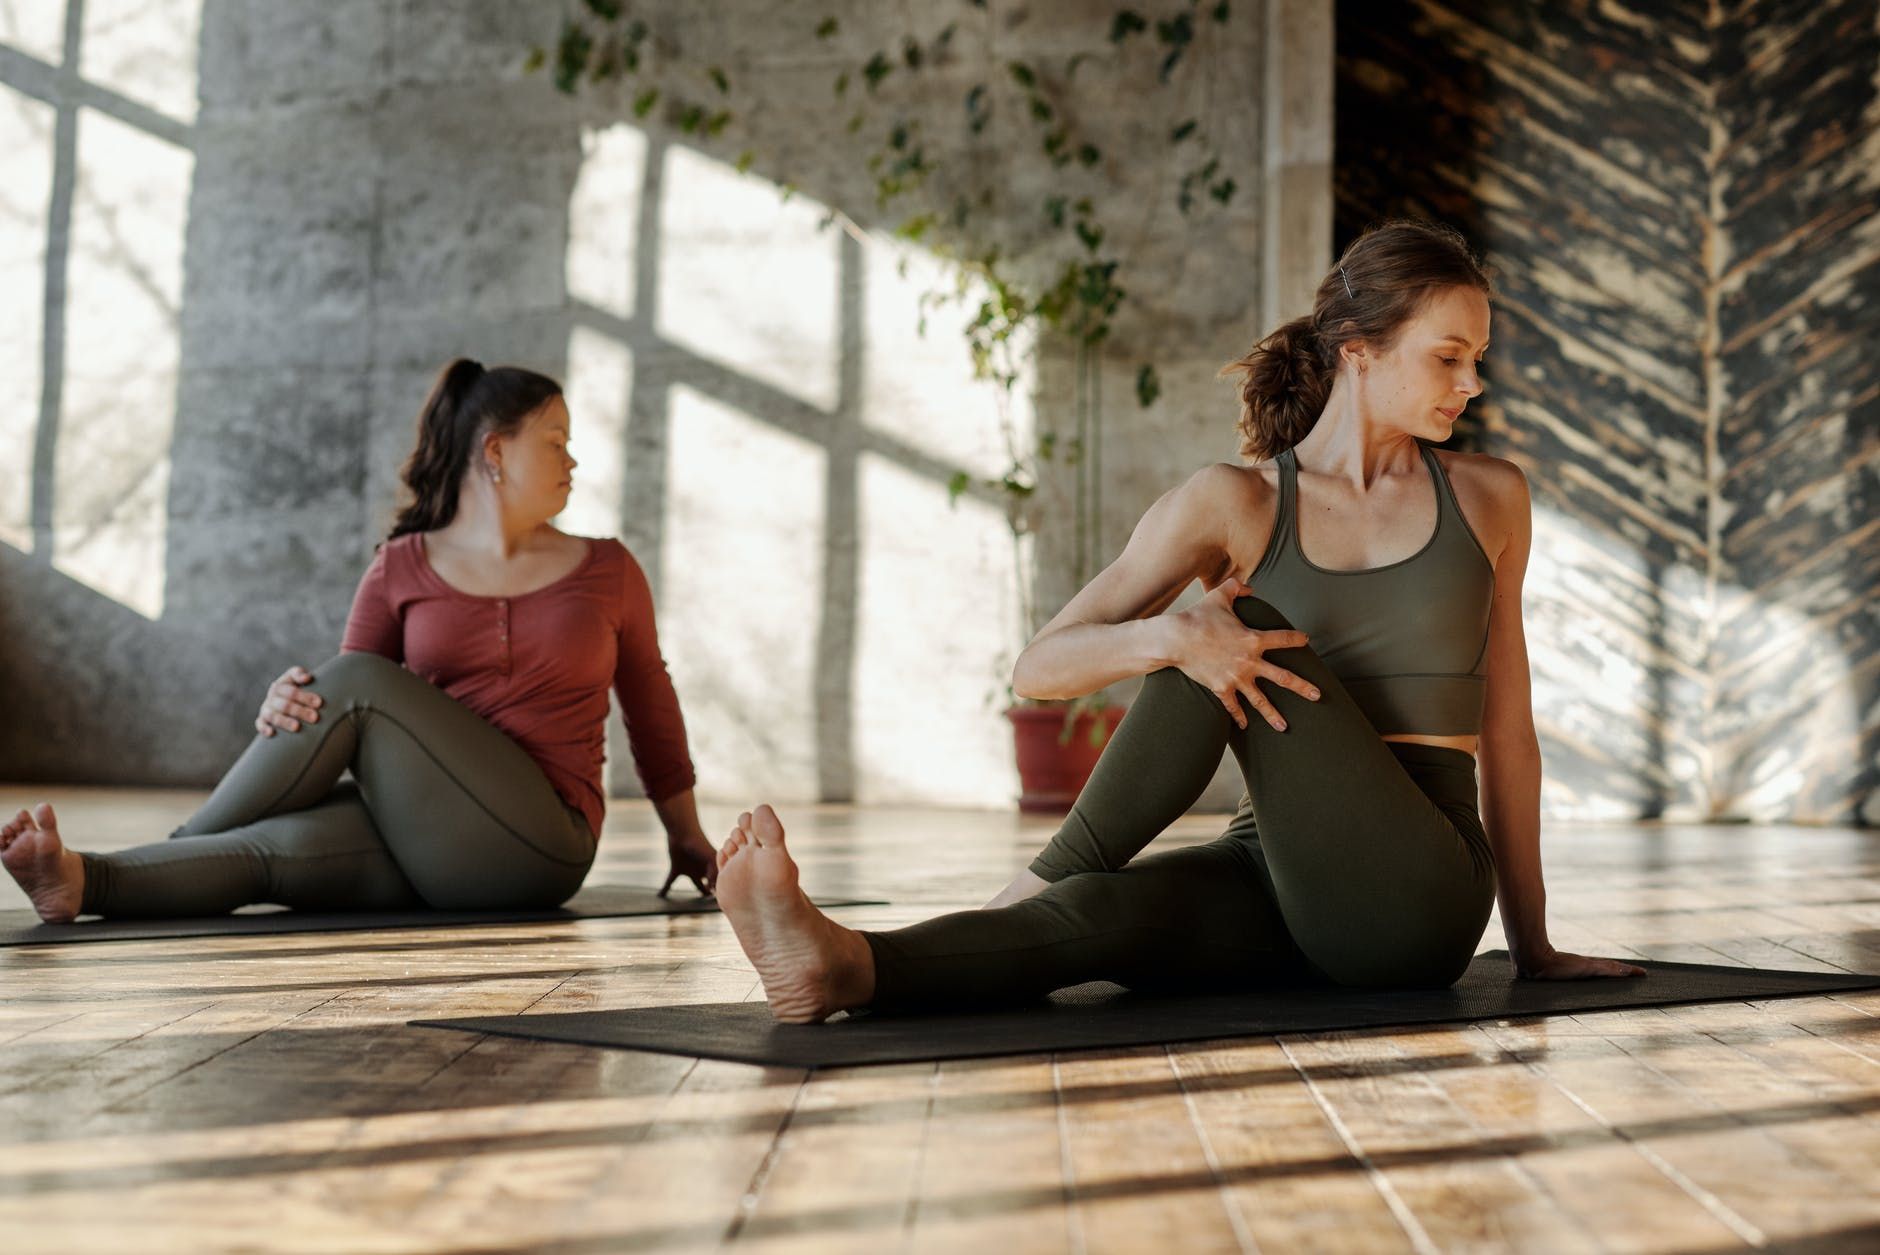
1. Perform Stretching: As soon as the sequence is finished, stand straight, taking a few breaths to control the body and the mind. Then stretch your legs by kicking them from the knee, or get seated and perform twisting of the shoulders and spine. These stretches should be repeated for two to three rounds to help you with any excess tension formation in the middle back or the chest.
2. Bow Down Yoga Mudra: After stretching the upper body, sit in Vajrasana (Thunderbolt Pose) and perform the bowing yoga mudra. Interlock your fingers behind you, stretch your arms, and elbow out behind you in Vajrasana.
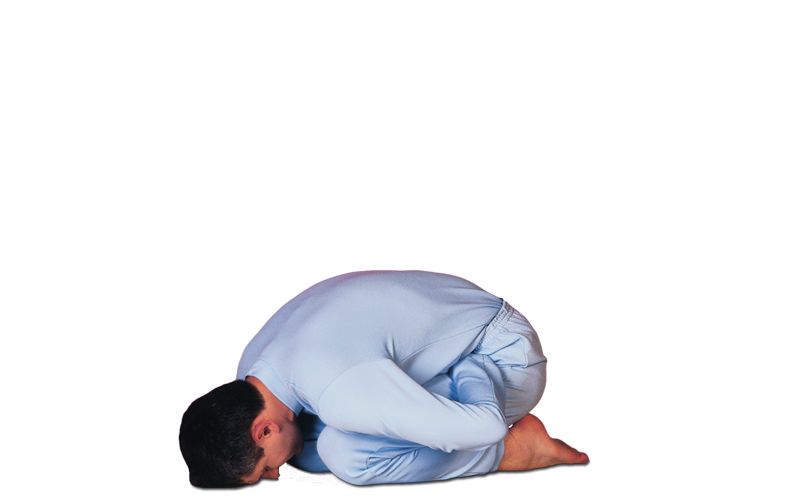
Image Credits: yogaindailylife.org
Now, inhale and move your upper body forward and downward, stretching your arms above your shoulders first and then reaching for the floor with your back arched. Relax by laying your head on the ground. This position will relieve all the tension in your shoulders, chest and stretch out the spine in a calm manner.
3. Prasarita Balasana (Wide Child Pose): Stay seated in Vajrasana and bring the knees apart more than a hip distance apart. Inhale and extend your entire upper body forward, stretching your arms in front of you on the floor, reaching for the floor with your chest and face. This pose extends the lower and middle back while keeping the spine straight and relaxed, helping the back muscles relax more quickly.
Natarajasana Variations to Consider
Natarajasana is divided into the below-mentioned basic variations, and you can practice any of them depending on your body's needs and capabilities.
1. Standing Quad Stretch: Stand on one leg, and if you need assistance with your balance, stand against a wall and place your hand on the wall. Reach behind you, grab your foot, and pull it toward your buttocks until the front of your thigh feels stretched. For 30 seconds to 2 minutes hold this position here.

Image Credits: blog.fitbit.com
2. Dancer Pose with Chair: If balancing in your practice is still a significant concern for you, consider adding a chair in front of you for more core stability. As you continue to flex further with your arms and legs behind you, the chair will support your entire core.
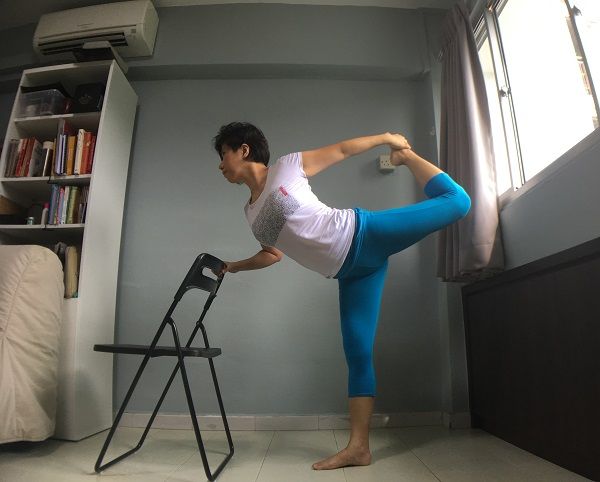
Image Credits: d1zxene68j3keg.cloudfront.net
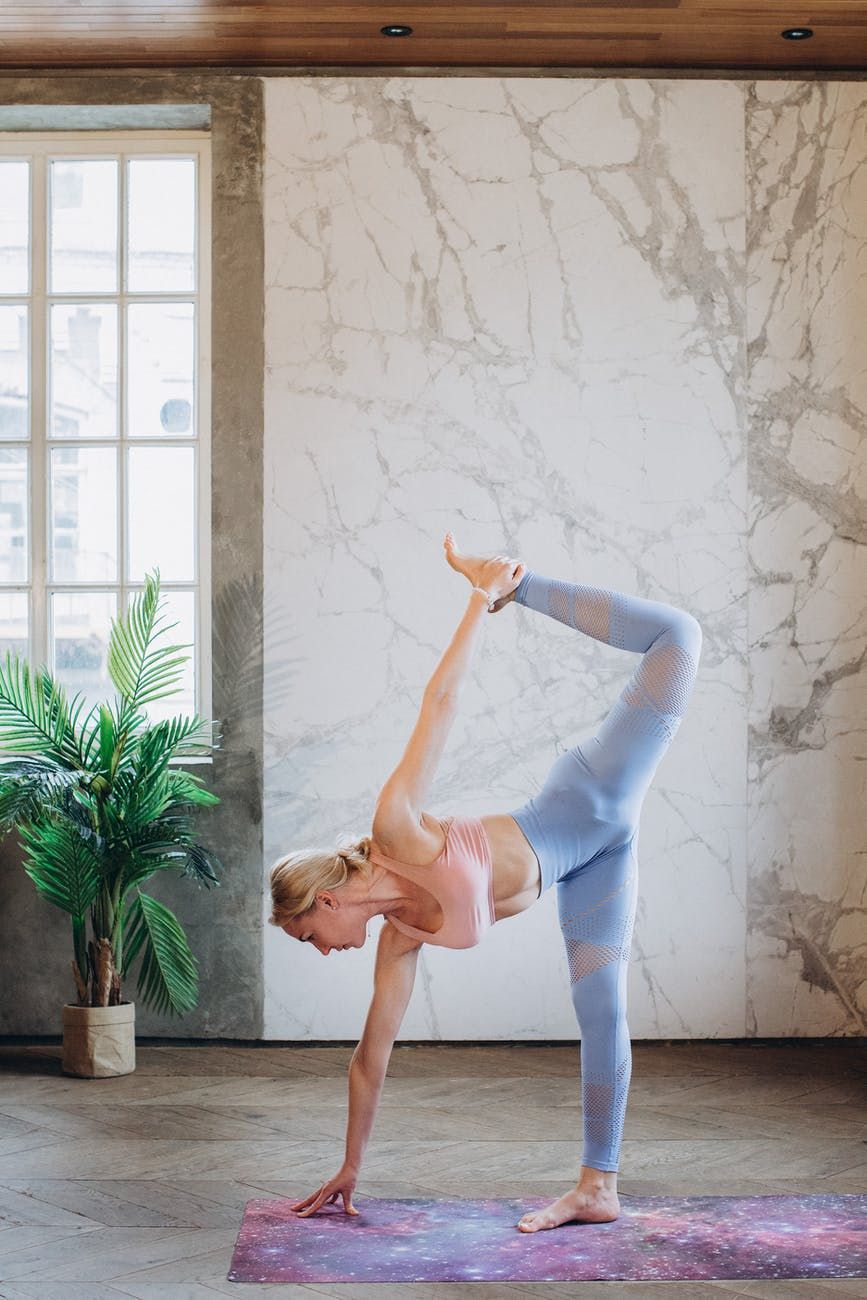
3. Bowing Lord of the Dance Pose: In a standing position, the Bowing Lord of the Dance Pose variation is an intermediate-level yoga pose.
Balance, forward-bend stretch, and strength, all are involved in this variation. If beginners feel it's difficult to balance while holding one foot up, you can place the opposite arm on the ground for a stronger and steadier foundation.
Enjoy a Free 1-on-1 Session with a Coach!
Receive personalized guidance tailored to your unique fitness goals, live with a dedicated coach—no credit card required.
Frequently Asked Questions about Natarajasana
Dancer Pose improves postural awareness, proprioception (the capacity to detect your body's location and movement in space), body awareness, balance, and focus. It can help you feel more energized, fight fatigue, and gain confidence. It strengthens your core and back muscles while stretching your chest and shoulders.
Nataraja, also known as Lord of the Dance, is depicted as a yoga pose to pay tributes and respect to Nataraja (Lord Shiva.)
In the Nataraja (Nataraj) sculpture, Shiva is shown as the source of all movement throughout the cosmos, represented by the arch of flames. The dancer position is intended to liberate people from their illusions about "self" and the physical environment.
King dancer pose and Natarajasana are various names of the same yoga asana.
Natarajasana enhances your capacity to concentrate and focus. You will learn to focus your thoughts by maintaining calm energy while balancing and back-bending, and this will help you maintain your elegance and grace in everyday situations.
Dancer pose yoga is a modern yoga exercise that involves standing, balance, and backbending. It is based on a stance from the Bharatnatyam ancient Indian dance form, represented as temple statues in Chidambaram's Nataraja Temple.
The dancer pose is the ultimate advanced version of a standing backbend, so there are no advanced level poses after the dancer pose. But, you can deepen this pose by combining dancer pose in your backbend yoga flow practice, to burn more calories and gain more flexibility.


.webp)
%20(7).jpg)
