What is Tulasana (Scale Pose)?
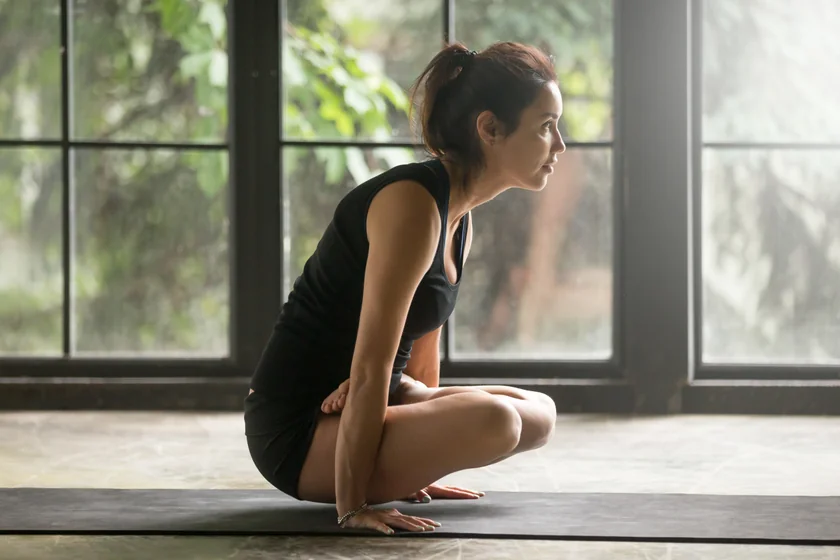
Tulasana is a challenging arm balance that requires higher strength and endurance in one's shoulders, core, and wrist. This yoga posture is also known as Scale Pose, Swing Pose, or Elevated Lotus Pose. In this pose, the practitioner's body is lifted off the ground, and they balance their lotus legs on their arms while performing the asana.
Scale Pose is an intermediate-level yogasana which can be performed by anyone who has been practicing yoga for quite some time and is familiar with the fundamentals of core and arm balance.
Overview & Etymology
The scale pose is regarded as a part of the Ashtanga Yoga primary series.
Due to the fact that this asana is shaped like the shape of a weighing scale, it gets its name from the Sanskrit word 'Tula', meaning scale, and 'Asana', meaning pose.
Hindu mythology or ancient yoga texts do not feature any detailed information about Tulasana. Instead, this pose gets its first mention in the 1960s book 'Light on Yoga' by BKS Iyengar.
A weighing scale in the spiritual realm represents a mindful alignment between your body, mind, and soul to ensure that the balance of life is always maintained.
Sanskrit Name: तुलासन Pronunciation: tu-LAAHS-anna
Pose Type: Arm Balance Also known as: Tolasana, Scale Pose, or Swing Pose,
Strengthens: Arms, Wrists, Core, Shoulders, and Upper Back
Stretches: Traps, Shoulders, and Core
Health Benefits of Tulasana
Tones the whole body.
Relieves anxiety and stress.
Increases lower body flexibility.
Enhances focus and awareness.
Stimulates the abdominal organs.
Boosts the flow of Prana (energy).
Improve digestion and relieve constipation.
Helps to improve balance and coordination.
Strengthens the wrist, core, and upper back muscles.
When to Avoid Performing Tulasana
Avoid if you just had any surgery.
Avoid if you have a severe injury.
Avoid if you have elbow or wrist arthritis.
Avoid temporarily during pregnancy and menstruation.
Avoid if you have any wrist, shoulder, or upper back pain.
How to do Tulasana (Scale Pose)
For absolute beginners, Tulasana can be a bit intimidating. We have therefore divided this practice into simple easy-to-follow phases, including warm-up, posture steps, modifications, variations, relax flow, etc.
Part 1 - Preparatory Poses for Tulasana
Before starting the scale pose practice, ensure you've activated your wrist, neck, and shoulders with basic stretching and rotations. Moving forward, you can continue with the following warm-up poses.
1. Baddha Konasana (Bound Angle Pose) - This prep pose is an excellent hip-opener that stretches, activates, and strengthens your glutes, inner thighs, and knees for the main posture. Start from staff pose, inhale and bend your knees.
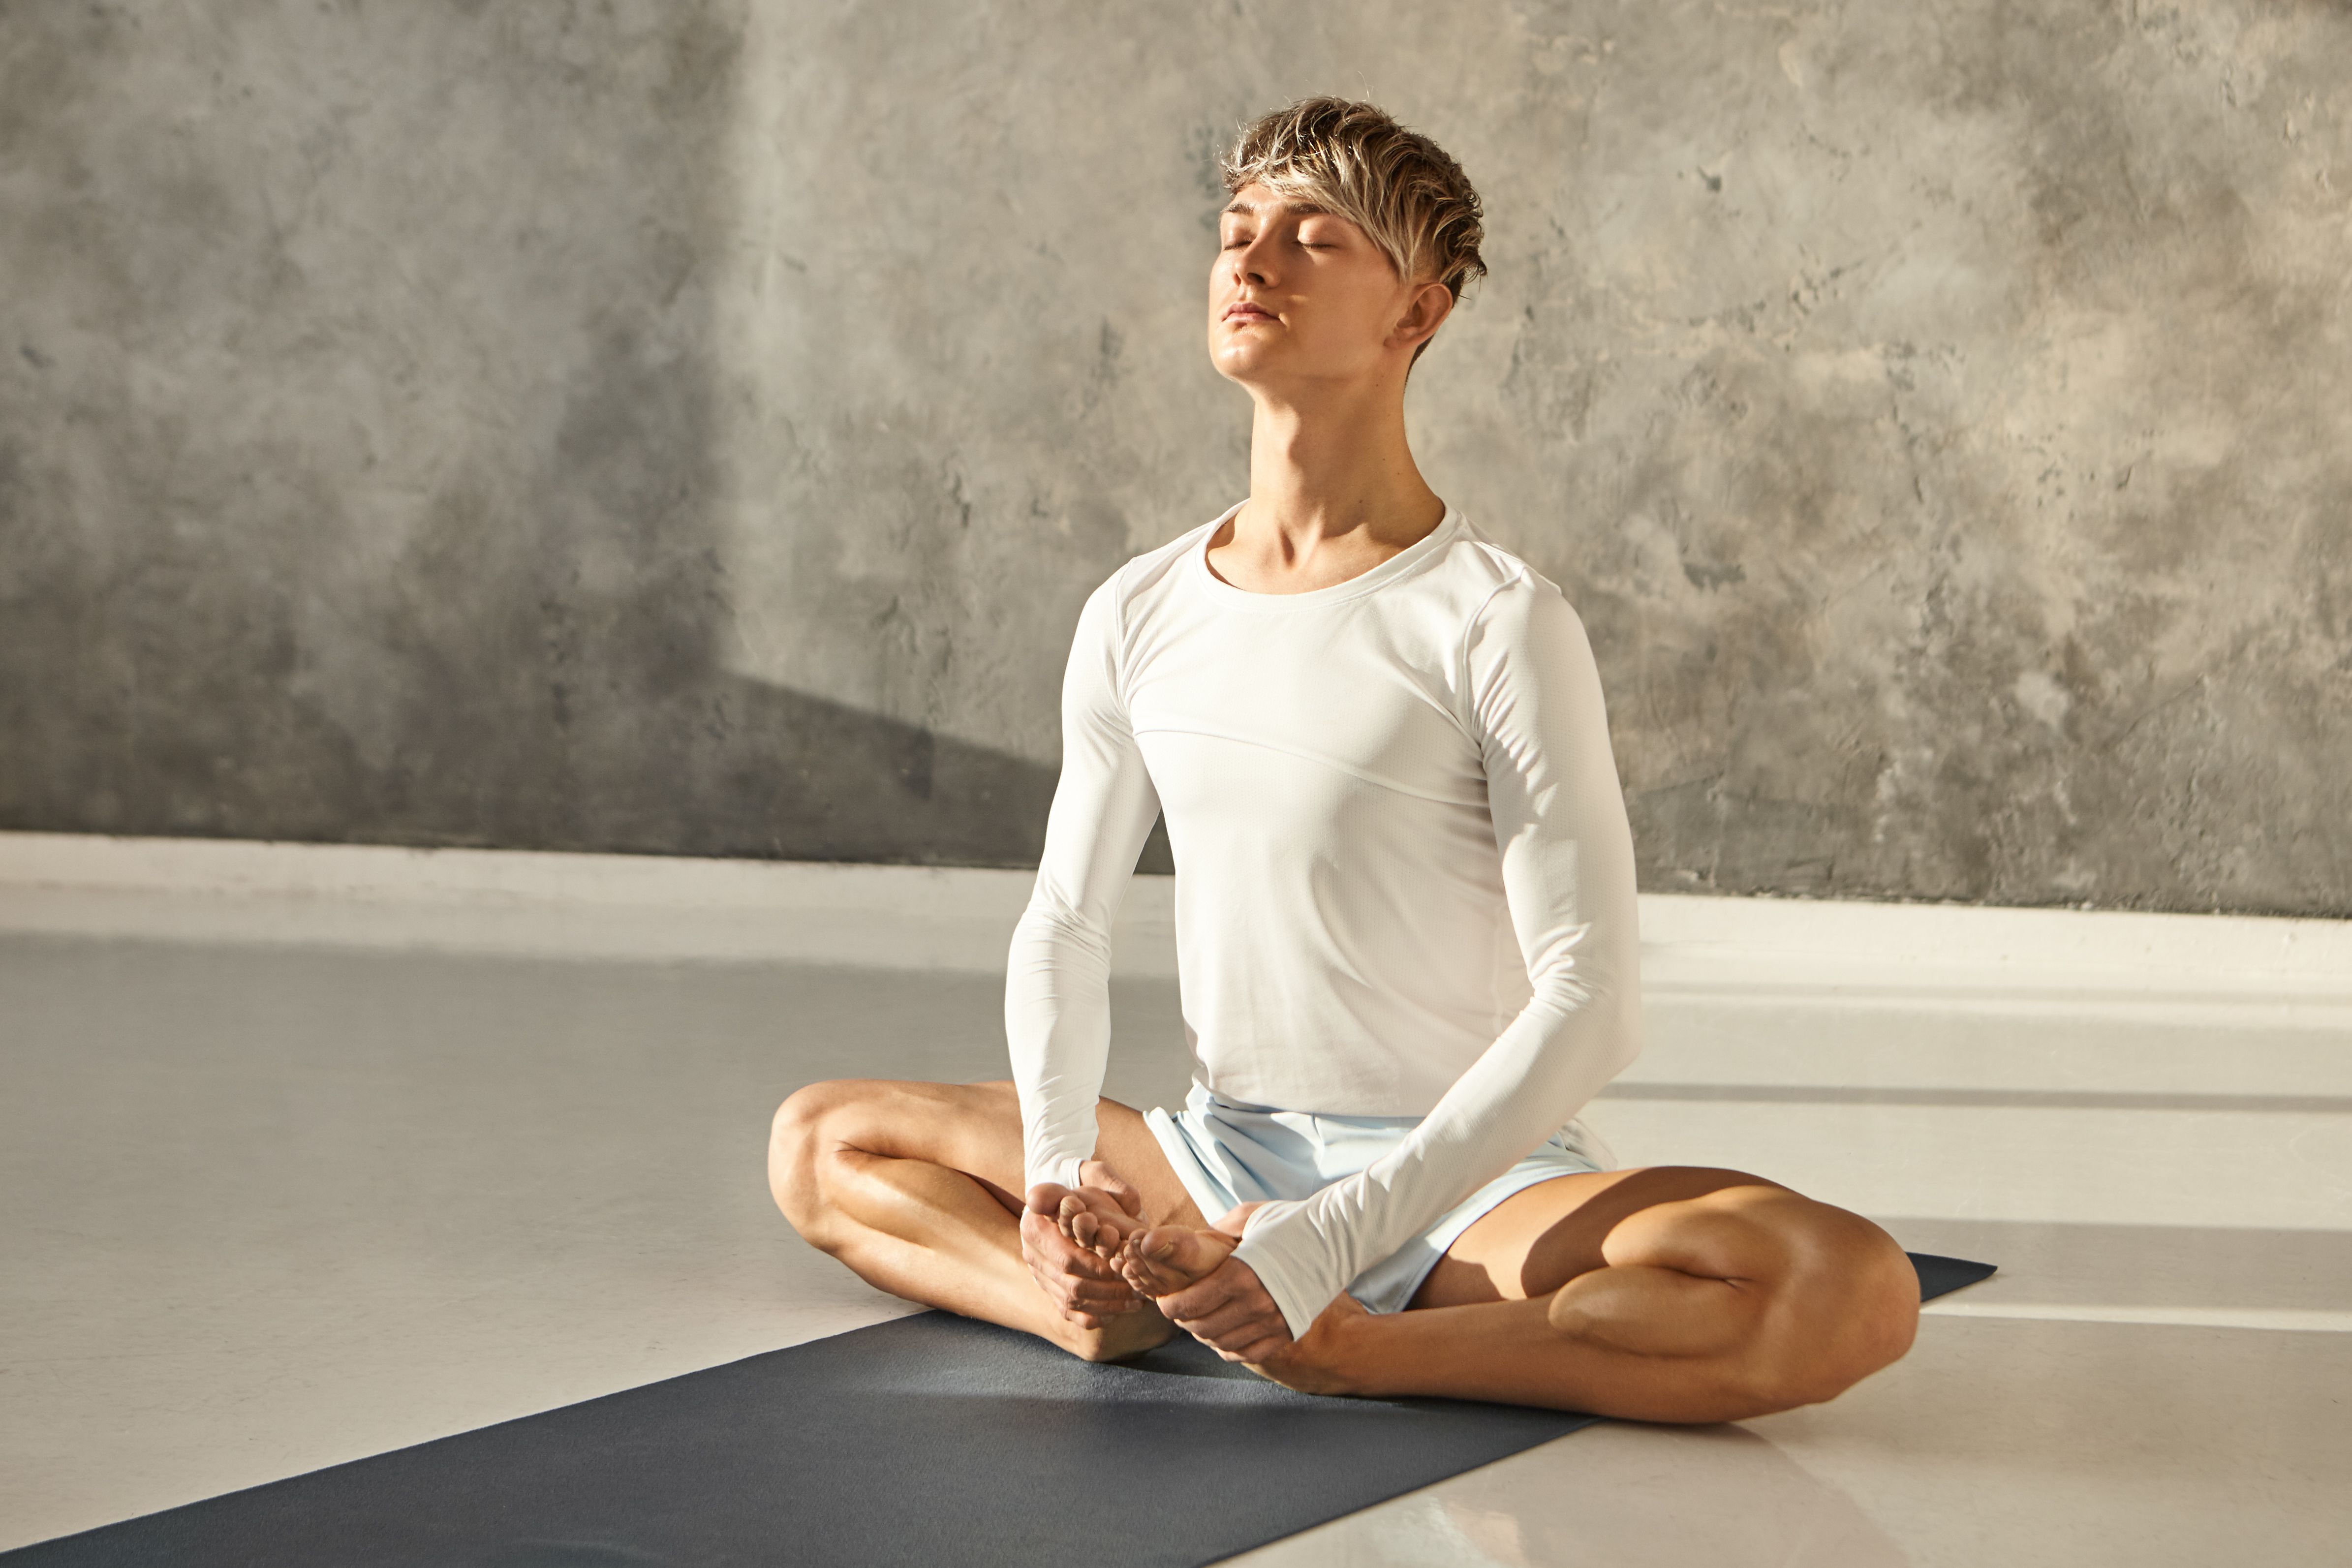
Bring the soles of the feet against each other and make the shape of butterfly wings with your legs. Lock both feet with your interlaced fingers and sit with a straight spine in this pose. Practitioners can bend their torso forward for more intensive blood circulation in the lower body.
2. Padmasana (Lotus Pose) - Start from your legs in the staff pose position. Next, bend your left leg from the knee and bring the left foot over your right thigh. Repeat the same with your right leg.
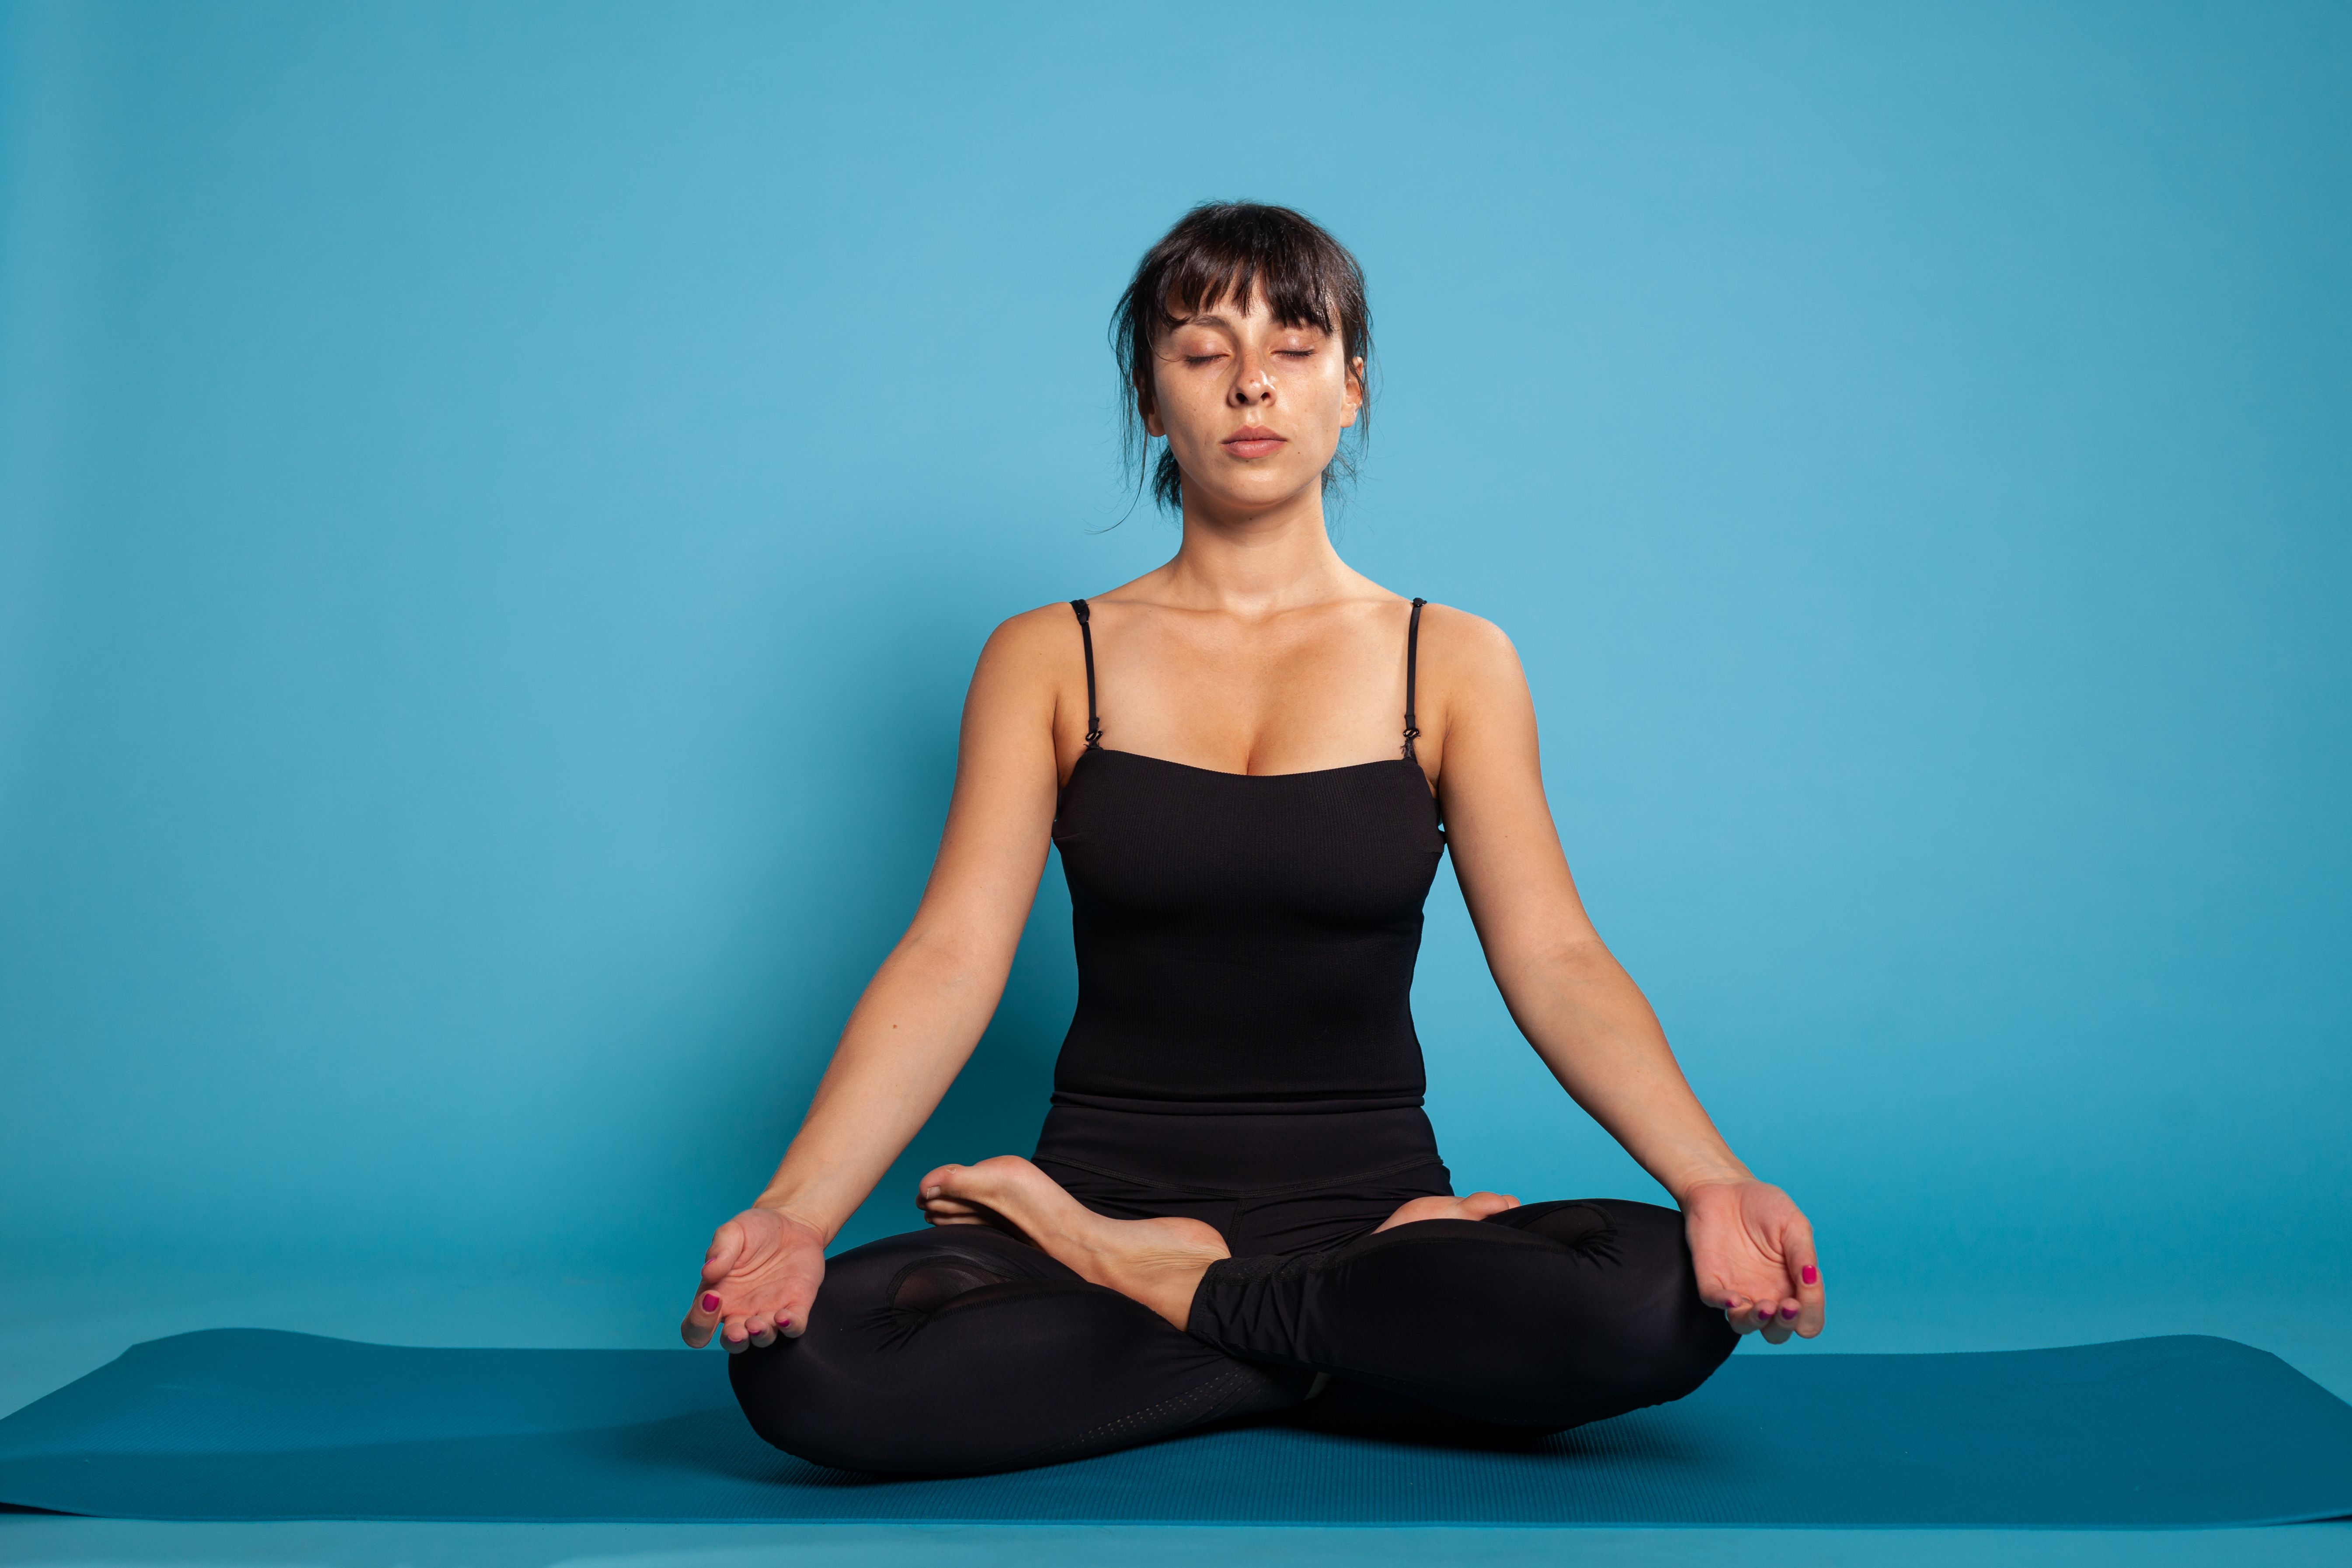
Relax your shoulder, keep the spine straight, close your eyes and place your hands on the knees in Gayan Mudra. Focus on your breath and hold this pose for 5 minutes.
This warm-up pose will help you build a strong foundation for your leg formation in the scale pose, plus the mindful aspect of this pose will bring you a tremendous amount of mental focus for the arm balance.
3. Eka Hasta Bhujasana (Elephant's Trunk Pose) - Scale pose can be overwhelming for beginners to balance. Thus, this pose is best for beginners and intermediate-level yogis to gently activate their core muscles.
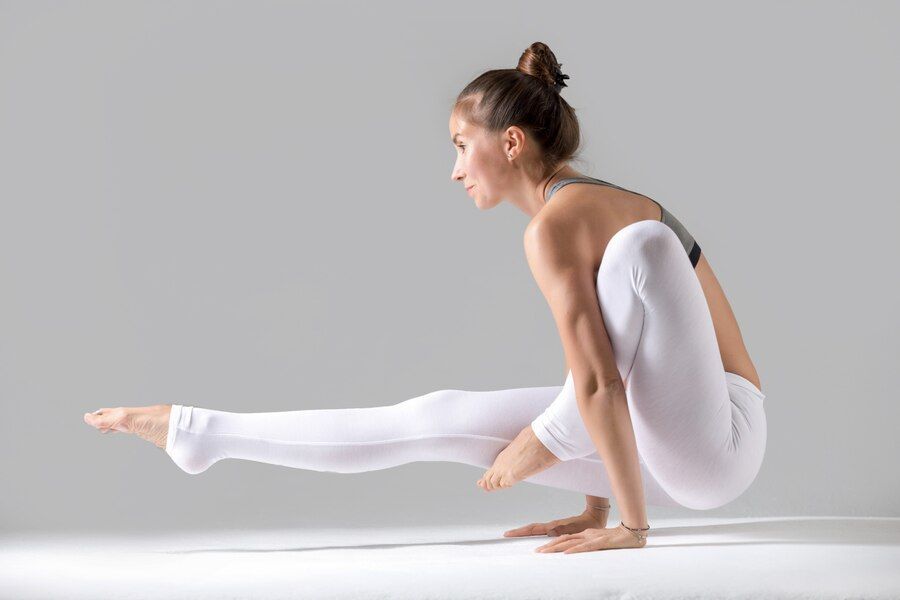
Start from the staff pose and bend your left leg. Next, hook your left leg over your left arm tricep muscle. Grip the mat with your hands on your sides and push your fingers into the mat like you are trying to grab the ground.
Inhale, engage the core such that your ribs curl deep, and round the spine. Finally, lean in slightly forward so as you push into the ground and your resting right leg gets off the ground.
Part 2: Step-by-Step Instructions to Perform Tulasana
The following are steps to practice the scale pose:
Step 1- Start in the seated lotus pose, and activate your consciousness by focusing on your breathing.
Step 2- Grip the yoga mat with wide palms, engage the shoulders, and lengthen your spine. This will help establish a strong arm balance foundation.
Step 3- Engage your core muscles inwards, so your ribs curl into your hips.
Step 4- Slowly inhale and gradually straighten your arms. Your hips will lift off the mat first, followed by your knees.
Step 5- Sit upright, with an engaged upper body, and focus on your breath to maintain this balancing sequence.
Step 6- Hold the pose for four to five deep breaths and exhale slowly as you bring the louts legs back on the ground.
Breath Awareness:
Inhale - While pushing into the yoga mat for the arm balance.
Exhale - When you feel ready to release the pose and exit.
Inhale & Exhale - Before getting into the pose and during the scale pose hold.
Performance Duration for Beginners: Hold the Scale Pose for 15 to 30 seconds.
Performance Duration for Advanced: Hold the Scale Pose for 30 to 90 seconds.
Part 3: Things to Keep in Mind
Trying arm balance for the first time?—To keep your wrist and shoulders safe during Tulasana practice, make sure you’re aware of these posture cues:
Grip the mat: Your grip determines how long you'll be able to balance the scale pose and how safe your practice will be. So, to ensure you gain strength without getting injured, always spread your fingers wide and only then push into the yoga mat for balance.
As a result, you will have a larger surface area for your arm balance, making the balance sequence safer and more stable.
Alignment & posture matters: Always make sure you are not compromising on your spinal alignment. It is normal to feel a slight hinge in your spine when you lift your glutes off your mat, but as your control and balance improves, you may be able to avoid it.
Part 4: Relaxing Poses After Tulasana
Relax your core, spine, shoulders, and arms with these counter yoga poses:
1. Paschimottanasana (Seated Forward Bend Pose) - Come to a seated position and lengthen your spine straight by extending both legs in front of you. Now inhale deep and simultaneously move your arms overhead.

Once your arms meet at the top, exhale and bend your torso onto your legs. Finally, rest your head against your knees, holding your feet with your hands. Hold this posture for 3 to 5 minutes and instantly relax your spine, shoulders, and arms.
2. Makarasana (Crocodile Pose) - To relax your whole body, lie down on your belly. Your feet should be slightly apart, with your toes pointing outwards and heels pointing inwards.
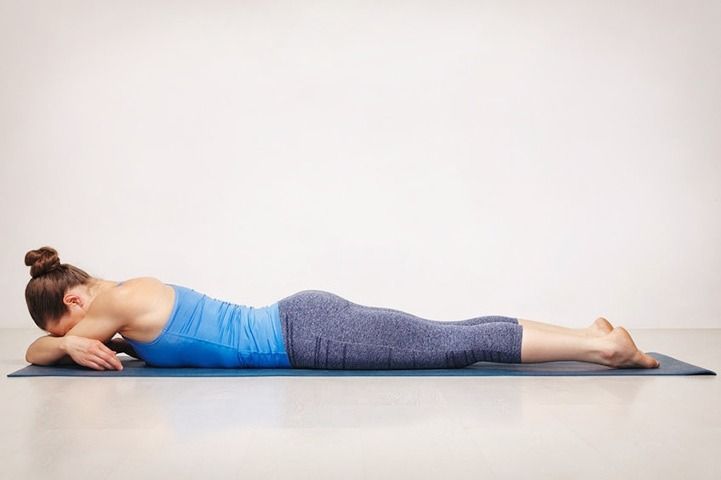
Take a deep breath and stack both forearms in front of your head. Finally, exhale and rest your head between the gap between your hands and chest. Hold this position for as long as it takes you to re-energize and rejuvenate.
Tulasana Variations to Consider
If Tulasana is too easy to execute—get into the below-listed quirky variations for something more challenging and fun.
1. Tulasana Arm Variation: Start from the basic seated posture but while sitting in a lotus-legged position, bring your palms inside your legs rather than keeping them outside. Intermediate-level practitioners can hold this variation for a couple of minutes.
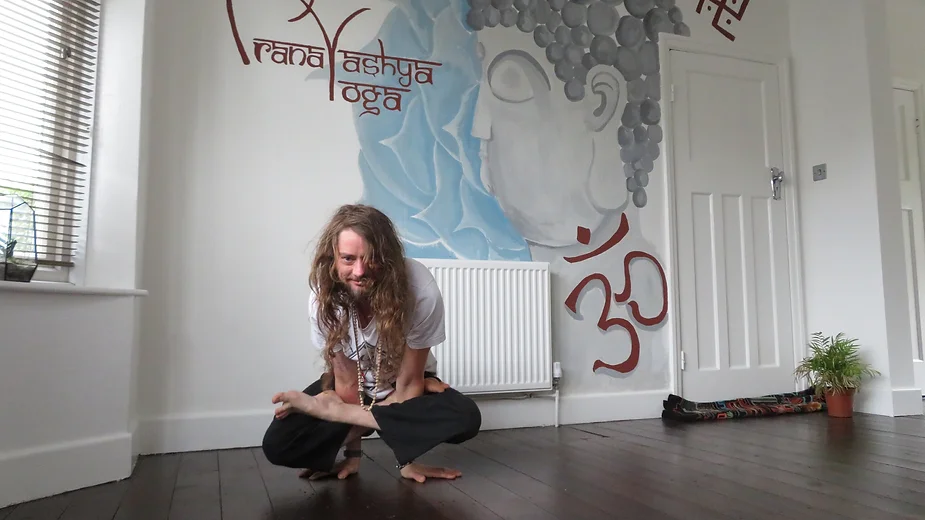
This pose is an advanced variation for a simple reason, the change in the placement of your palms increases the intensity of core balance, making this sequence even more challenging.
2. Tulasana Leg Variation: Now it’s time to challenge your arms by combining two different yoga postures, the Tulasana and Garbha Pindasana.
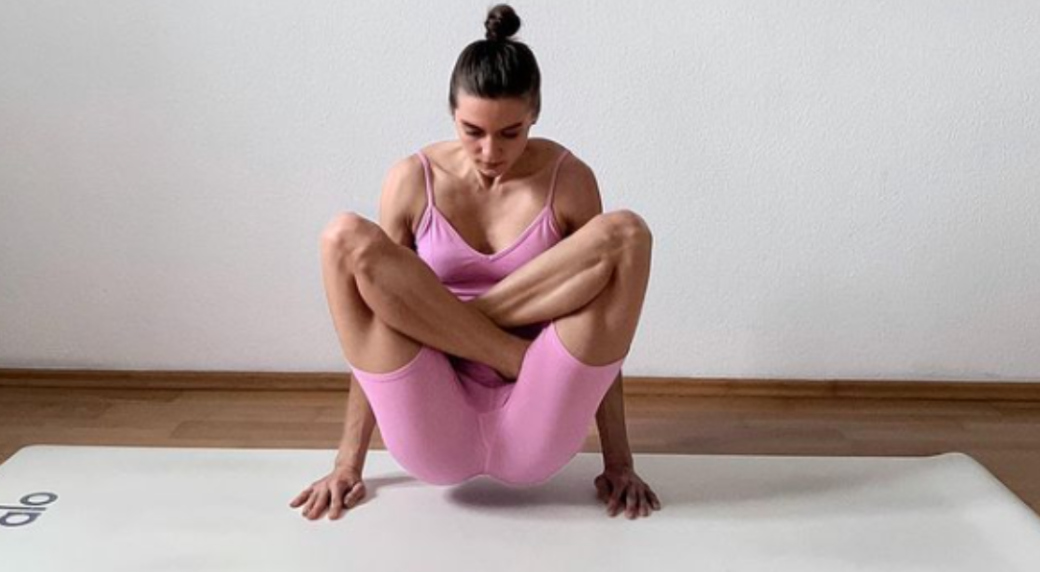
All you need to start with is a seated lotus position, then push your finger into the mat and balance your lotus legs into the scale pose, and at last, with even more control, pull your lotus legs close to the chest to hover in the embryo pose. Hold this variation for 15 to 30 seconds and finally release.
3. Tulasana Twisting Variation: Feeling even more experimental and stronger?—If yes, then this variation is for you. As you sit in the lotus leg position, rather than placing your hands on the sides, place one hand on one side and the other at the front.
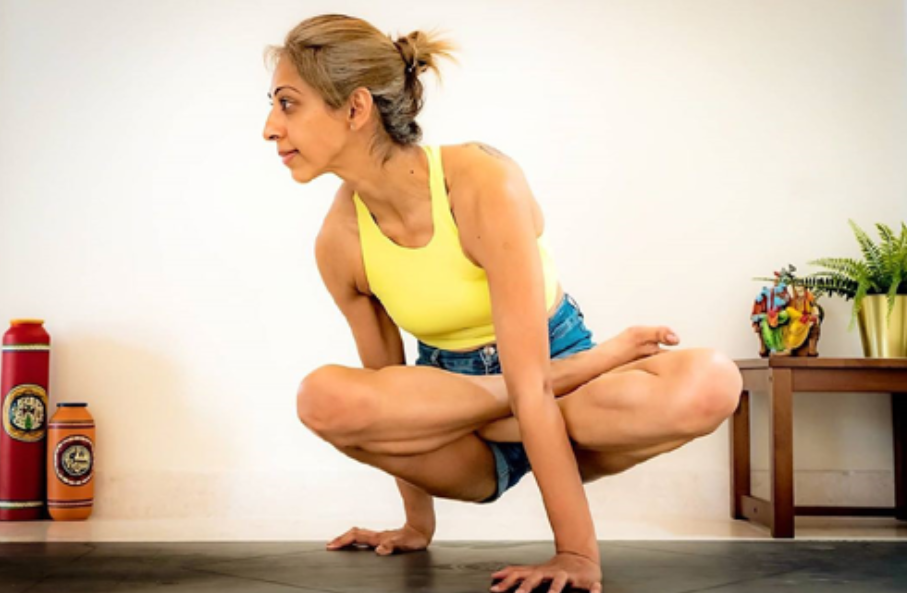
This quirky placement of arms will add a challenging twisting motion in your shoulders as well as core muscles. Exchange the arms, repeat the same process, and hold this variation for 1 - 3 minutes on each side.
You can also add yoga blocks under your palms if you feel this variation feels extremely challenging.

Enjoy a Free 1-on-1 Session with a Coach!
Receive personalized guidance tailored to your unique fitness goals, live with a dedicated coach—no credit card required.
Frequently Asked Questions about Tulasana
Tulasana is not a beginner-friendly posture, but beginners can start their practice with core and forearm strengthening drills. Also, introducing wall support or yoga blocks into the practice can help new yogis level up faster.
Tulasana is great for practitioners who aim to gain toned arms and shoulders or those who want to increase their core strength.
Tulasana has multiple benefits, like upper body toning, core muscle conditioning, and enhanced hip mobility. Apart from these, yogis also perform the scale pose to reap emotional benefits, like higher focus, balanced emotions, and increased mindfulness.
Bound Angle Pose, Crow Pose, Lotus Pose, Elephant's Trunk Pose, and Plank Pose are all perfect preparatory poses to prepare the necessary muscle groups used in the Tulasana practice.
Avoid performing Tulasana if you have severe back pain, injuries, or muscle tension. Senior citizens with arthritis or women with mensuration should also avoid performing this pose.
Being an arm balance as well as a hip opener position, Tulasana will help practitioners stretch their biceps, forearms, shoulders, and glute muscles altogether.


.webp)
%20(7).jpg)
