What is Trivikramasana (Three Steps Pose)?
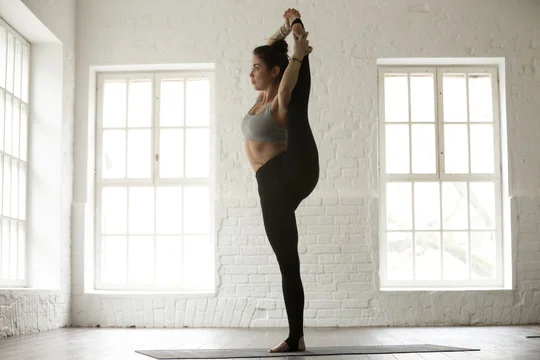
Trivikramasana is also known as the Three Steps pose or Standing Splits. This is a standing Hatha yoga asana, an advanced level yoga posture.
You’ll start with a standing yoga pose and slowly raise one leg close to your chest first, then move to your shoulder and before raising your foot to extend your leg higher than your forehead.
To stand in the Trivikramasana, you’ll need advanced hip and leg mobility with an intense amount of core and knee strength. So, if you're feeling overwhelmed with this practice, then this step-by-step guide is for you!
Overview & Etymology
The name Trivikramasana comes from a couple of Sanskrit words – 'Trivikrama' which means 'Three Steps' or 'Three Strides' and 'Asana' which means 'Pose' or 'Posture.'
Trivikramasana was first encountered in Southern Indian temple walls as a dancing pose from one of the classical Indian dance forms - Bharatnatyam.
The Standing Split pose can also be found in a 19th-century South Indian text, "Sritattvanidhi." This book includes 122 hatha yoga poses with instructions and illustrations for the postures.
According to Hindu mythology, Trivikrama is a concept of three steps in the Vishnu Sukta hymn from Lord Vishnu mentioned inside the Rig Veda (a sacred Hindu text).
The hymn states that the first step of life is Prithvi (earth), also known as an observable space. The second step is Antariksha (space-time), also known as a bridge between the first and second step of life.
The final step is Dyau or Vaikunth Lok (heaven or Vishnu's abode), also known as the ultimate goal of this human life, which can be achieved by following the eight sutras of yogic practices.
Sanskrit Name: त्रिविक्रमासन Pronunciation: TREE-vee-KR-maa-suh-nuh
Pose Type: Standing Balance Also known as: Three Steps Pose or Standing Balance
Strengthens: Spine, Hamstrings, Knees, Core, and Glutes
Stretches: Arms, Spine, Inner Thighs, Hamstrings, Shoulders, and Glutes
Health Benefits of Trivikramasana
Enhances posture.
Lengthens the spine.
Activates mobility in the glutes.
Increases flexibility in the inner thighs.
Stretches and strengthens the hamstrings.
Improves focus, balance, and coordination.
Strengthens the knee joints and core muscles.
Stimulates the function of digestive and reproductive organs.
Enhances the flow of energy and relieves tension in the lower body.
When to Avoid Performing Trivikramasana
Avoid during pregnancy.
Avoid during menstruation.
Avoid if you have sciatic nerve pain.
Avoid if you have hip joint issues.
Avoid if you have chronic back pain.
Avoid if you have inflammatory knee arthritis.
Avoid if you have any recent injury or surgery.
How to do Trivikramasana (Three Steps Pose)
This pose is divided into structured phases so that all levels of yogis can get started. Let’s jump right in!
Part 1 - Preparatory Poses for Trivikramasana
For Trivikramasana, all you need is strong legs, a stable core, and a flexible pelvis. Here are some postures to help you get ready for the main pose:
1. Vrikshasana (Tree Pose) - Stand straight, bring your right foot against your left thigh, and place your hands against your chest in Anjali Mudra. Take a few deep breaths and then extend your arms overhead, keeping your palms formation intact and hold this pose here.
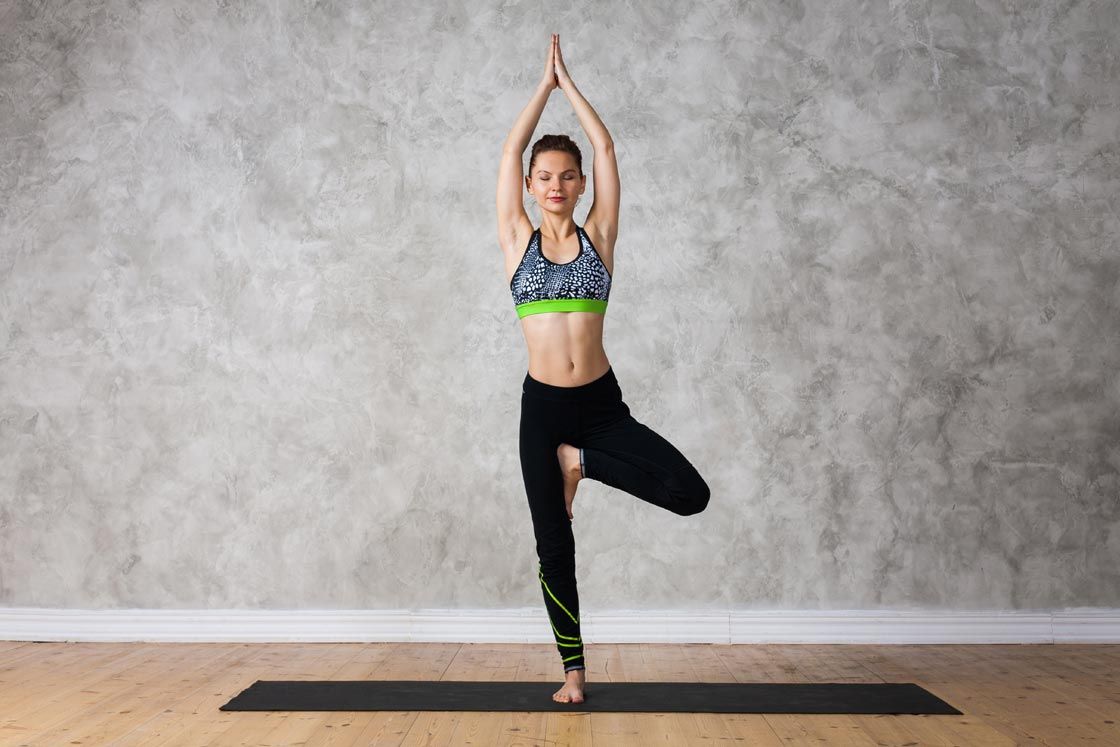
Perform this for 3 to 5 minutes regularly, and it will help you develop improved balance on a single leg and condition your core for the main practice.
2. Anantasana (Sleeping Vishnu Pose) - Lie down on your side and rest your head over your palm. Inhale and lift your leg straight toward the floor. Hold your big toe with your fingers, and slowly start to pull your straight leg sideways, getting it closer to your head.

Hold this pose here for one minute, exhale and bring your lifted leg down on the mat. Repeat the same on the other side and do this for 3 to 5 minutes.
This helps to strengthen your obliques and shoulders, plus unlocks your tight glutes, inner thighs, hamstrings, and hip flexors all at once.
Part 2: Step-by-Step Instructions to Perform Trivikramasana
The following are steps to practice the Three Steps pose or Standing Split pose:
Step 1- Stand straight in Mountain pose and focus on your breath for a minute.
Step 2- Stack two to three yoga blocks on your right side, and rest your right foot on these yoga blocks to open your groin area.
Step 3- Bring your right leg close to your chest, keep your left leg straight, and hug your right leg with both arms wrapped around it.
Step 4- Focus on your breath and hold your right heel with your right hand and right toes with your left hand, and lengthen your right leg straight to the ceiling.
Step 5- Stretch your leg as much as possible. Ideally, the goal is to stretch it straight up, making a 180-degree angle with one leg in the air and the other on the mat.
Step 6- Repeat the same on the left side and release the pose by returning to Tadasana.
Breath Awareness:
Inhale: In Mountain position, while hugging your bent leg close to the chest.
Inhale & Exhale: While stretching up and getting into the Standing Split.
Exhale: Once the Standing Split is over and your leg is back on the floor.
Performance Duration for Beginners: Hold Trivikramasana for 15 to 30 seconds on each side.
Performance Duration for Advanced: Hold Trivikramasana for 30-90 seconds on each side
Part 3: Things to Keep in Mind
One minor mistake can lead you to severe injuries while performing the Three Steps pose. Here are a few things things to keep in mind:
Engage your core: Your abdomen, glutes, thighs, and low back area together to form your core. If this area is not actively engaged while standing in Trivikramasana, it’s highly likely you won’t be able to balance your body on one leg and you may also stumble.
Keep your spine neutral: If you’re slouching forward or overextending your neck backward in Trivikramasana, you won’t be able to balance your body on one leg. Fixing your gaze in front and standing up straight is necessary. Your straight spine will also urge your lifted leg to lengthen in the same direction a bit easier, and help you appropriately target the right muscle groups.
Focus on your breathing: Breath awareness is something you realize by being mindful of each inhale/exhale action accompanied by the movement of a specific body part. Maintaining an excellent focus on your breath will also make this challenging Standing Split easy to get into and hold for a long duration.
Part 4: Relaxing Poses After Trivikramasana
Once you’ve gotten through your Trivikramasana practice, you’ll be ready to relax with the following yoga pose sequence.
1. Prasarita Padottanasana (Wide-Legged Standing Forward Bend) - This pose aids in calming post-stretch tension around your spine, neck, shoulders, and hamstrings. Start in Mountain pose, then spread your right leg to the right side. Inhale and grab your waist with your hands. Exhale and fold forward, keeping your legs straight.
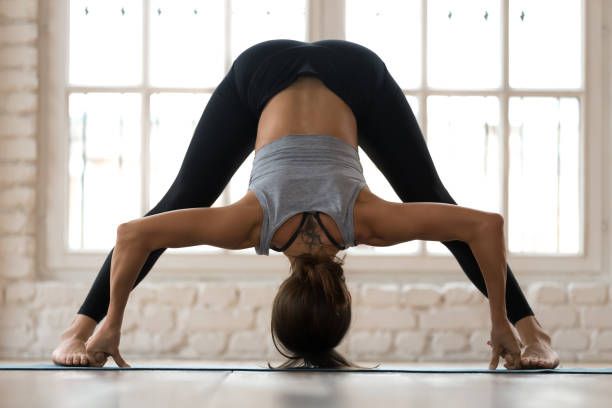
Place your hands flat on the floor, inhale more, and gaze up in front. Exhale again and bring your head down even more so that the crown of your head touches the mat. Breathe here 5-6 times and finally release by coming up.
2. Ananda Balasana (Happy Baby Pose) - Lie flat on your back, inhale and lift up your legs, bringing both knees close to your chest. Now, stretch your arms on the inside of your legs and hold your big toes using the toe lock of your fingers.
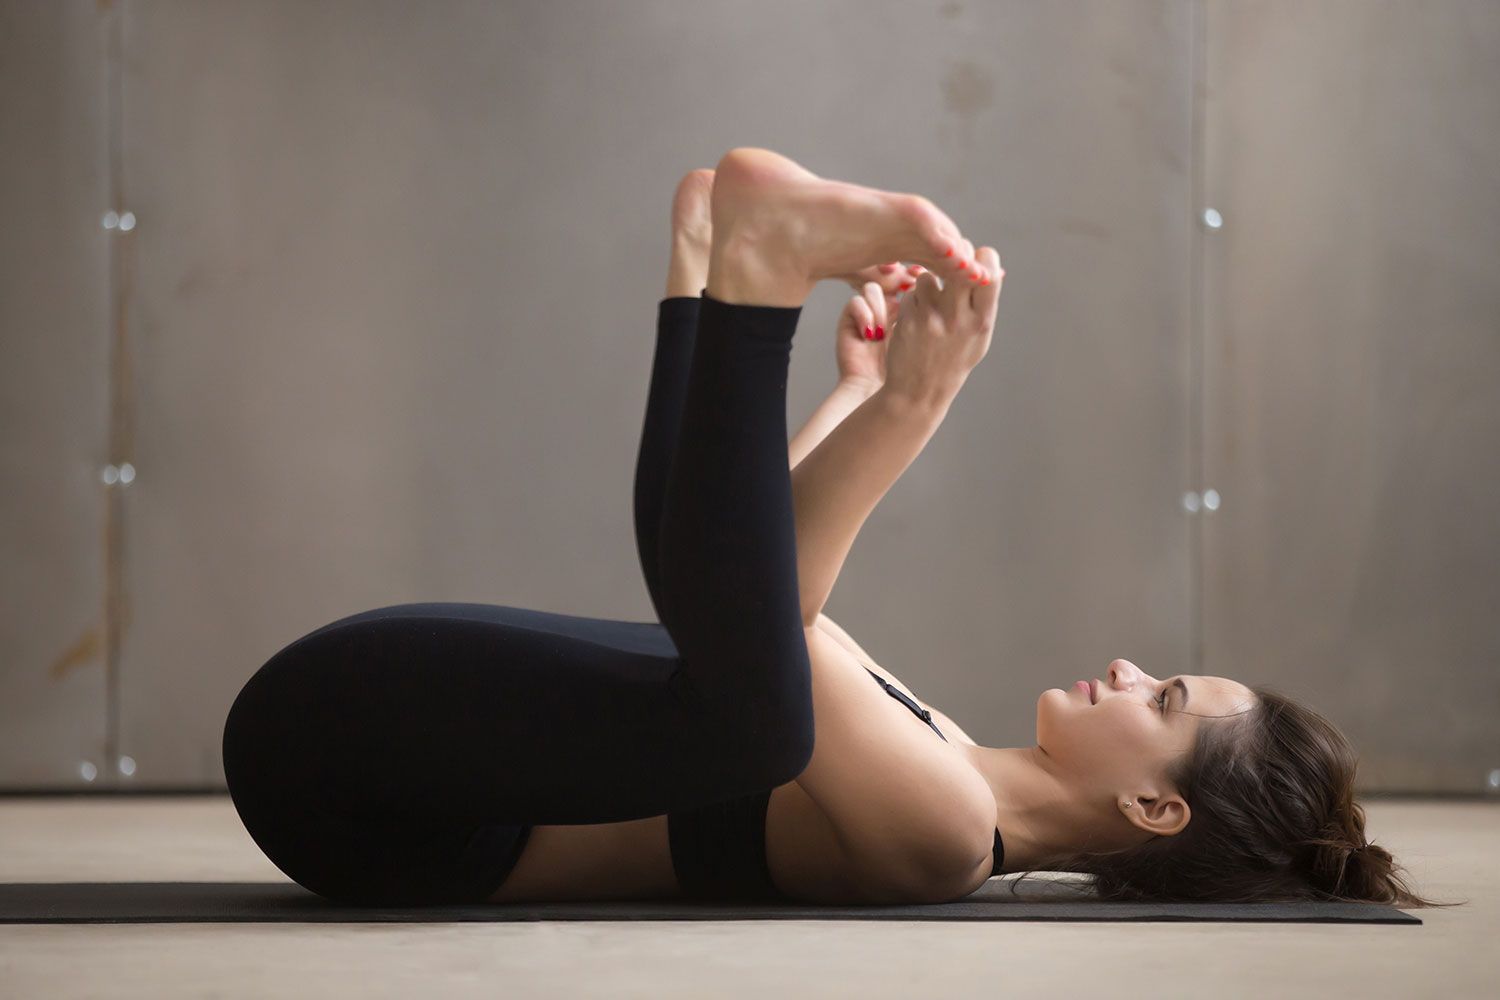
Now, gently open your hips, and widen your legs to deepen the stretch. Make sure your head is resting on the floor, and that each ankle is stacked directly over your knee so that your shins look perpendicular to the ground. Hold this pose here to entirely relax your pelvis, spine, and neck.
Trivikramasana Variations to Consider
Here are some splits variations to try if you want to challenge your body even more:
1. Eka Pada Vasisthasana (One-Legged Side Plank Pose): Get into a high-plank, palms under your shoulders. Keep your back straight and abs tight while holding this position for a few seconds.
Get into Side Plank position by placing your left palm in the middle of the mat and opening sideways through your right arm.
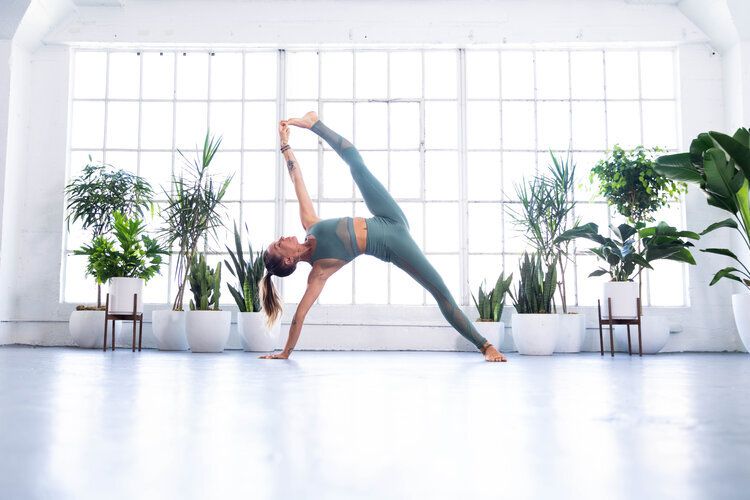
Next, bend your right leg, engage your core, align your gaze in front, hold your right big toe with your hand, and extend your leg toward the ceiling first, and once you feel comfortable, take it closer to your head!
Hold this variation on each side for 30 to 90 seconds. This will not only increase your leg flexibility and core stability but also help you build shoulder strength.
2. Visvamitrasana (Sage Visvamitrasana’s Pose): Start with the Downward-Facing Dog position and bring your right foot forward as far as possible. Next, get your right shoulder under your thigh muscle of your right leg and place your right palm flat on the mat.
Inch your right foot forward very slowly. Then engage your core muscles and balance your upper body on your toes.
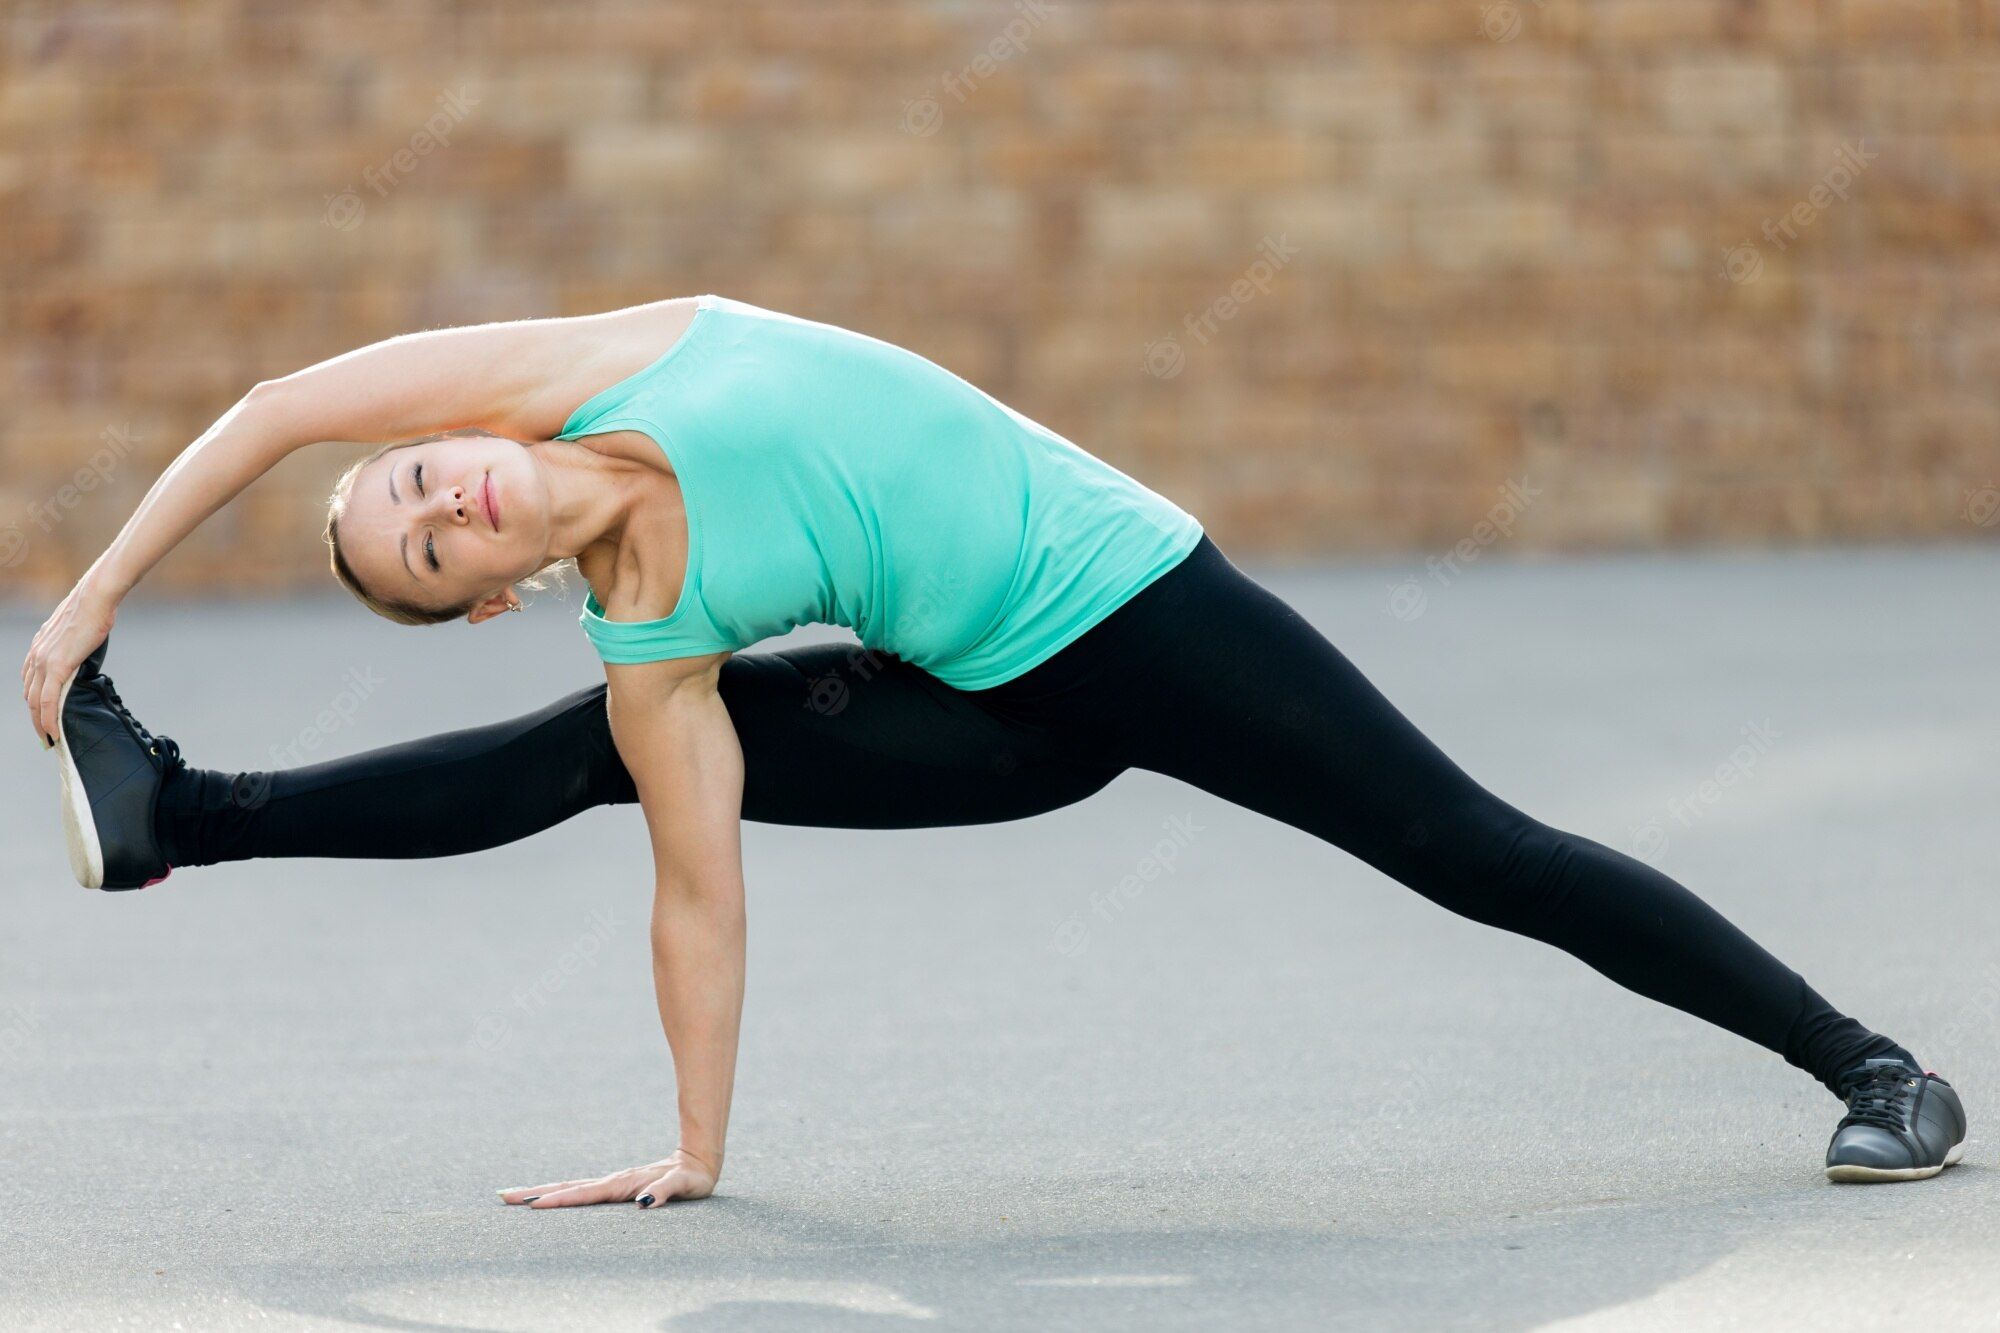
As your right arm is completely straight in the side plank, lengthen your right leg sideways.
Pause for a moment, inhale, stretch your left arm towards the ceiling, then slowly move your left arm to hold your right toes overhead. Hold this pose here for a few seconds on each side.
This pose challenges your muscle mobility in your entire body.
Enjoy a Free 1-on-1 Session with a Coach!
Receive personalized guidance tailored to your unique fitness goals, live with a dedicated coach—no credit card required.
Frequently Asked Questions about Trivikramasana
Trivikramasana is good for strengthening your lower body and core, improving your standing posture, lengthening your spine, stretching your legs, and improving overall balance in the body.
Trivikramasana is an advanced standing balance pose. Beginners must first start with easy standing poses and build their core stability and leg strength to get into the main Trivikramasana pose.
Mountain Pose, Tree Pose, Sleeping Vishnu Pose, and Standing Leg Cradle Pose are all preparatory poses for your main Trivikramasana practice.
Apart from this, if you feel super tight in your legs, try performing 5 to 10 minutes of Surya Namaskar on each side.
The following are some commonly known benefits of Trivikramasana:
- Improve posture.
- Improves lower body flexibility.
- Strengths the knees and ankles.
- Aids in core stability and balance.
- Activates glutes and hamstrings.
- Stretches the inner thighs and groin.
Utthita Trivikramasana is also known as Extended Three Steps Pose.
In standard Trivikramasana, your lifted leg is extended from the side, whereas in the Utthita Trivikramasana variation, you must extend your lifted leg close to your forehead from the front.
Try Urdhva Prasarita Eka Padasana, One-Legged Side Plank Pose, or Sage Visvamitrasana’s Pose as a challenging hip-opening stretch variation for the Utthita Trivikramasana.


.webp)
%20(7).jpg)
