What is Matsyendrasana (Lord of the Fishes Pose)?
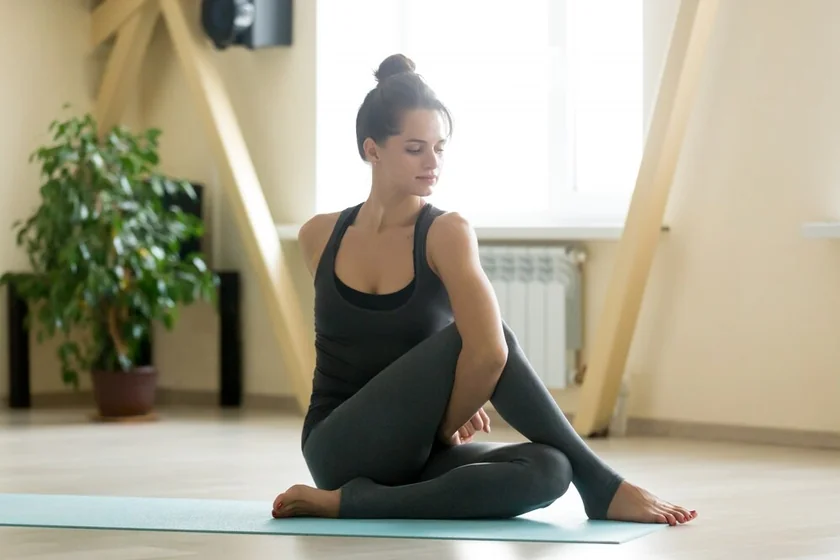
Matsyendrasana or Lord of the Fishes Pose is also known as Seated Spine Twist Pose. This intermediate-level seated yoga stretch is known for its benefits of lengthening the side, middle, and lower body muscles all at once.
Practitioners sit with a straight spine, one leg in half-lotus formation and the other leg bend with its foot resting on the ground behind the knee of the half-lotus leg.
As practitioners twist the torso gradually from the waist to the head, they can sense a deep flexion in their spine. This allows the entire body to open up and relieve tension instantly.
Overview & Etymology
Matsyendrasana is a combination of a few Sanskrit words, like - 'Matsya,' which means fish, 'Indra,' which means lord, and 'Asana,' which means pose or posture.
Matsyendrasana is known to be a popular Hatha and Ashtanga yoga pose that first appeared in the 15th century's ancient Haṭha Yoga Pradipika.
Verse number 27 of Haṭha Yoga Pradipika describes multiple benefits of Matsyendrasana in detail—like, how it ignites the digestive fire, boosts metabolism, and has the power to destroy all sorts of stomach-related diseases, etc.
According to Hindu mythology, Matsyendrasana is taken from the name Matsyendra, who was known as one of the first students of Adiyogi (Lord Shiva).
Some folklore states—One day, Lord Shiva was explaining yoga as an enlightenment practice to Goddess Parvati by the bank of a river.
While Lord Shiva was uncovering the secrets of yoga to his wife, a fish overheard their conversation and gained knowledge about yoga. As a result, the fish became enlightened about the meaning of his life and transformed from fish to a man.
The man later became a popular Rishi (Sage), named Rishi Matsyendra, and was given the responsibility of sharing his knowledge with the world by Adiyogi himself.
This story primarily symbolizes the yogic wisdom from Lord Shiva as our inner voice and Matsyendra as a human in search of his true identity. Once we humans start to listen to our inner voice and get detached from this material world, only then can we find the ultimate path to enlightenment.
Sanskrit Name: मत्स्येन्द्रासन Pronunciation: Mats-yun-DRAHS-uh-nah
Pose Type: Seated Twist, Hip Opener Also known as: Lord of the Fishes Pose
Strengthens: Glutes, Obliques, and Spine
Stretches: Spine, Obliques, Shoulders, Neck, and Pelvis
Health Benefits of Matsyendrasana
Boosts metabolism.
Reduces back pain.
Stimulates digestion.
Alleviates sciatica pain.
Builds mental awareness.
Stretches and lengthens the spine.
Increases the flow of Prana (Energy).
Improves female reproductive health.
Stretches the glutes and inner thighs.
Reduces stress and tension in the spine.
When to Avoid Performing Yoganidrasana
Avoid during chronic neck pain.
Avoid during menstruation and pregnancy.
Avoid during inflammatory knee or hip-joint arthritis.
Avoid this post-spine, back, neck, or pelvis surgery.
Avoid if you are a senior citizen with pain in the bones.
How to do Matsyendrasana (Half Lord of the Fishes Pose)
Matsyendrasana can be a little intimidating for newbies.
Thus, we have divided the entire practice into easy-to-follow steps, like Warm-Up Poses, Main Posture Steps, Related Alignment Cues, and Relax Poses.
So, once you feel ready, let’s dive straight into the practice!
Part 1 - Preparatory Poses for Matsyendrasana
Warming up the spine and pelvis is necessary to avoid any severe injuries or cramps post-workout. Here are some warm-up yoga poses for you to try:
1. Baddha Konasana (Bound Angle Pose) - Activate your glutes by sitting in the center of your mat, legs bent from the knees, and soles touching together.
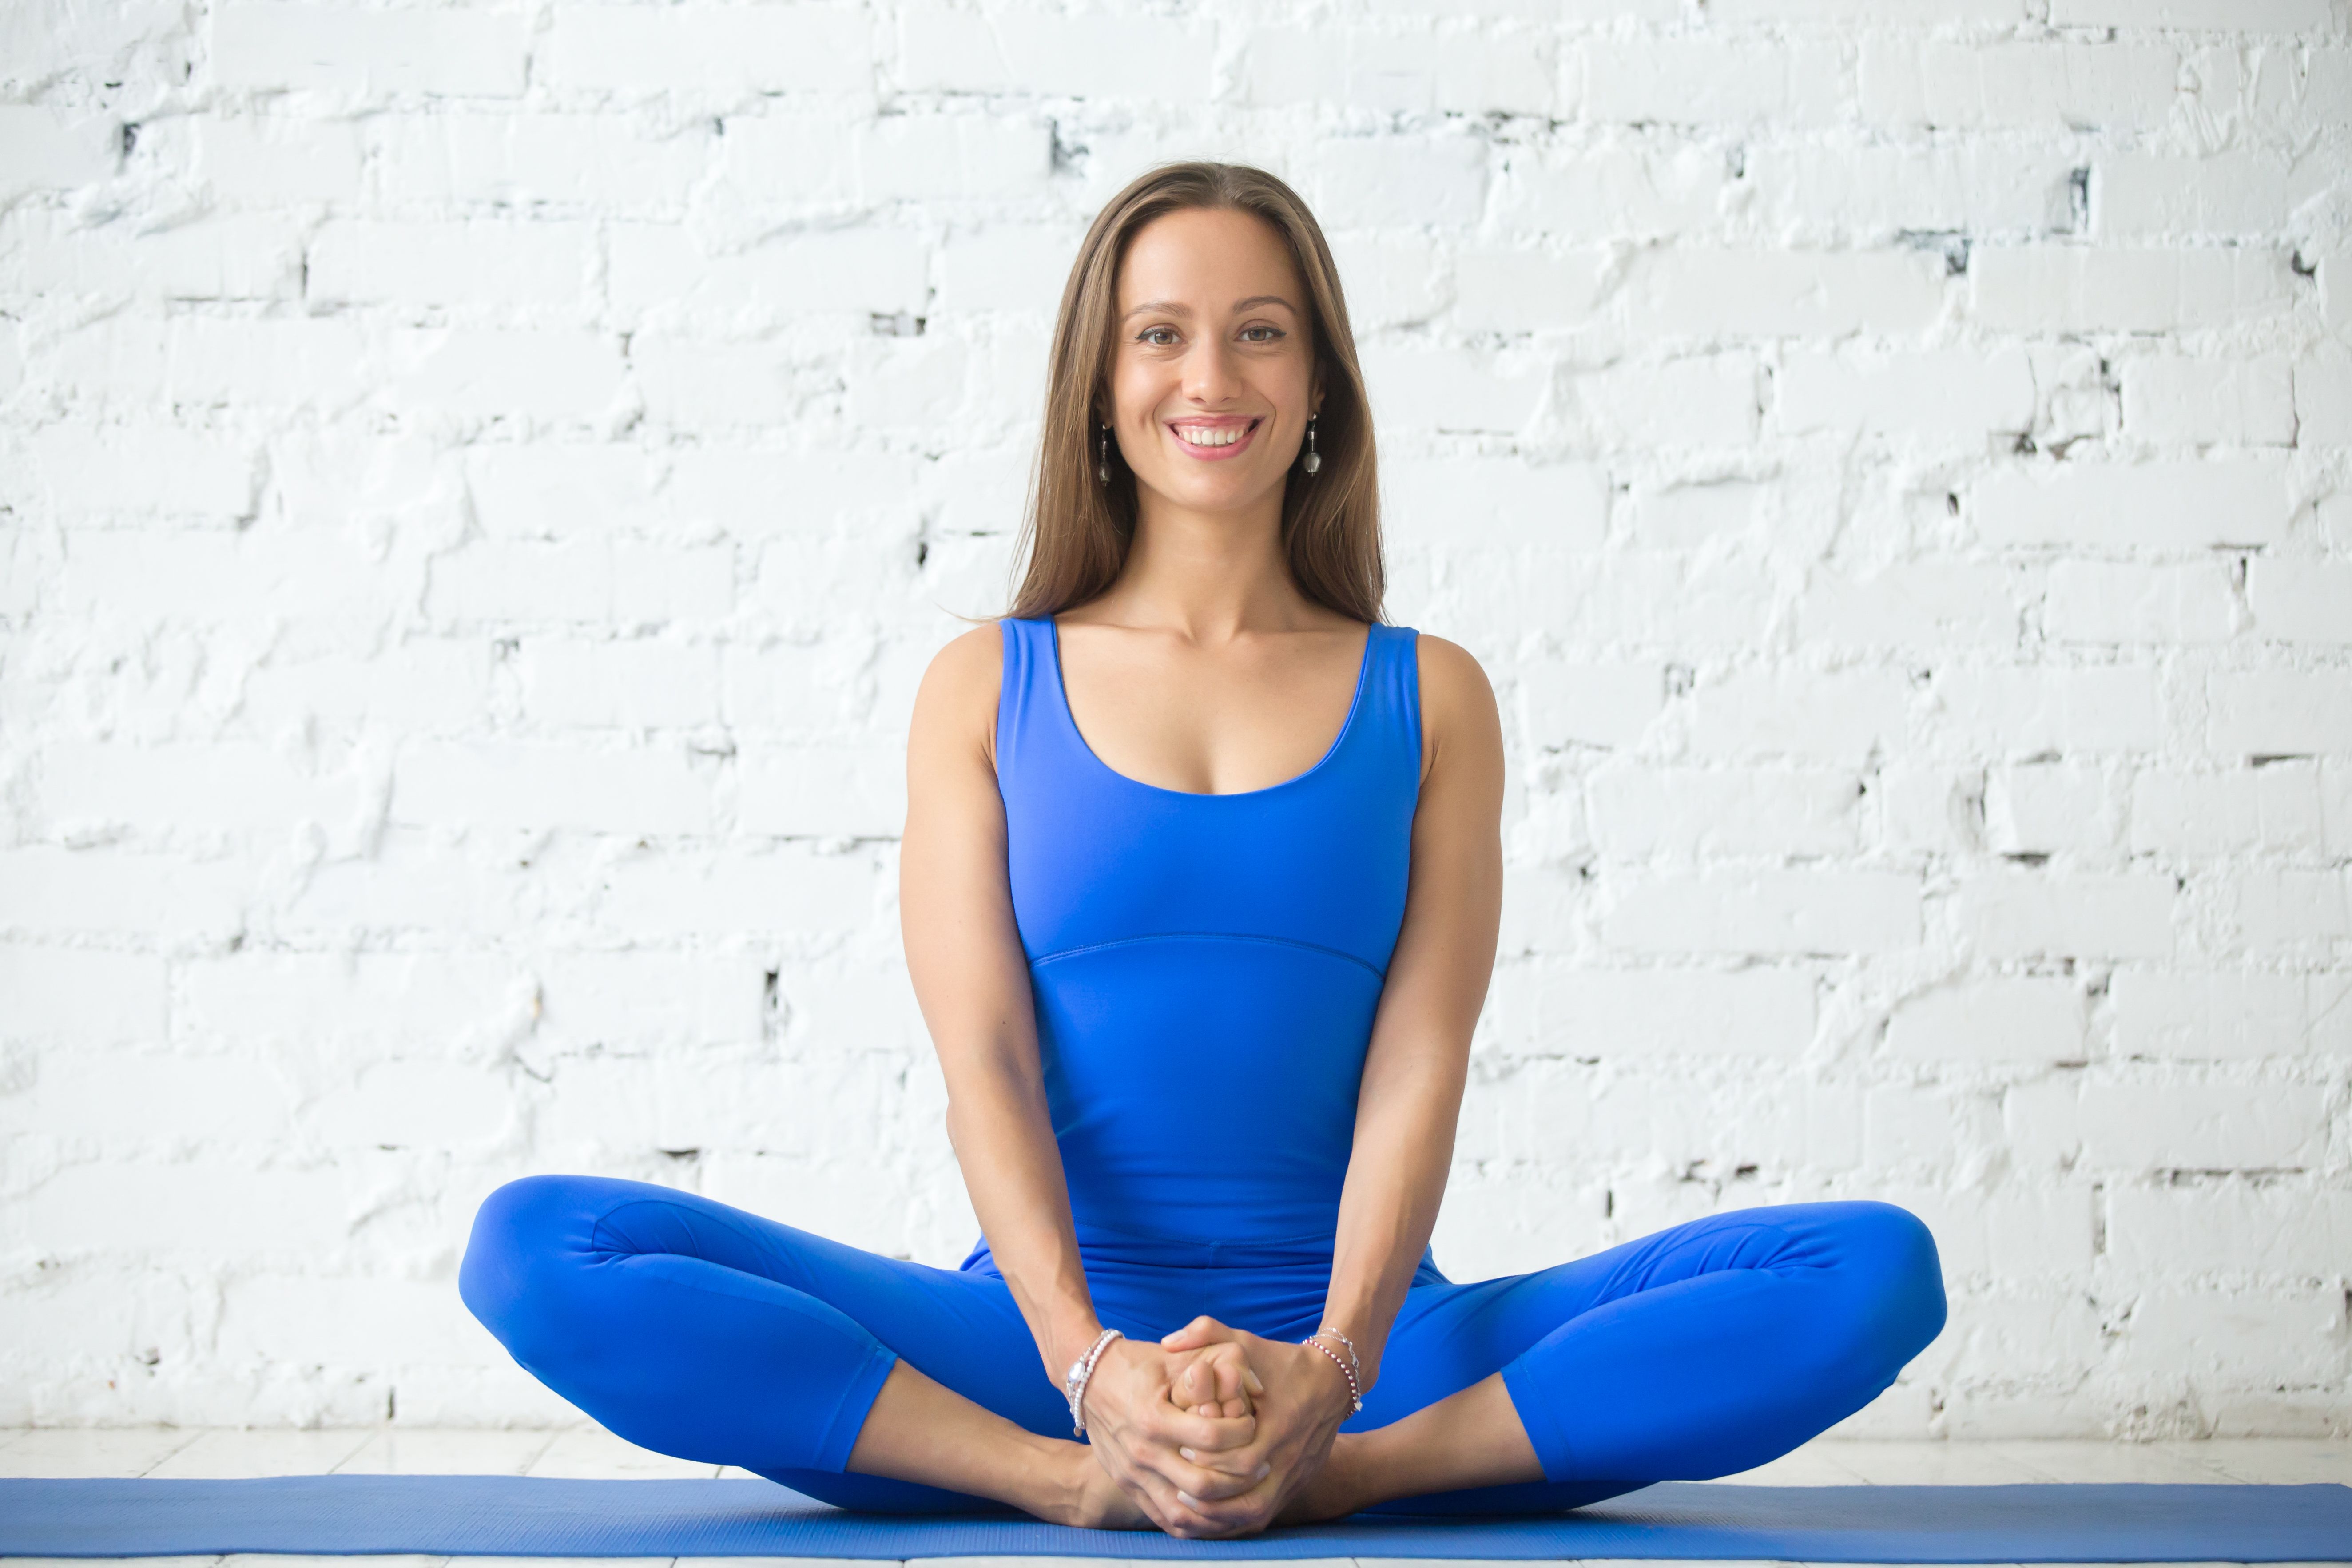
Make sure your knees are close to the ground, palms are gripping both feet, and feet are close to the groin. To increase blood circulation rapidly, you can also bend the torso forward.
2. Parsvottanasana (Intense Side Stretch Pose) - Warming up your side body is mandatory while performing a spinal side stretch. So, get into Wide-Leg Mountain Pose. Breathe in, roll your shoulders, and bring the arms to your back.
Join your palms together behind your back in Anjali Mudra. Turn the feet, abs, and chest to your right side, exhale, and fold your body forward onto your right leg.
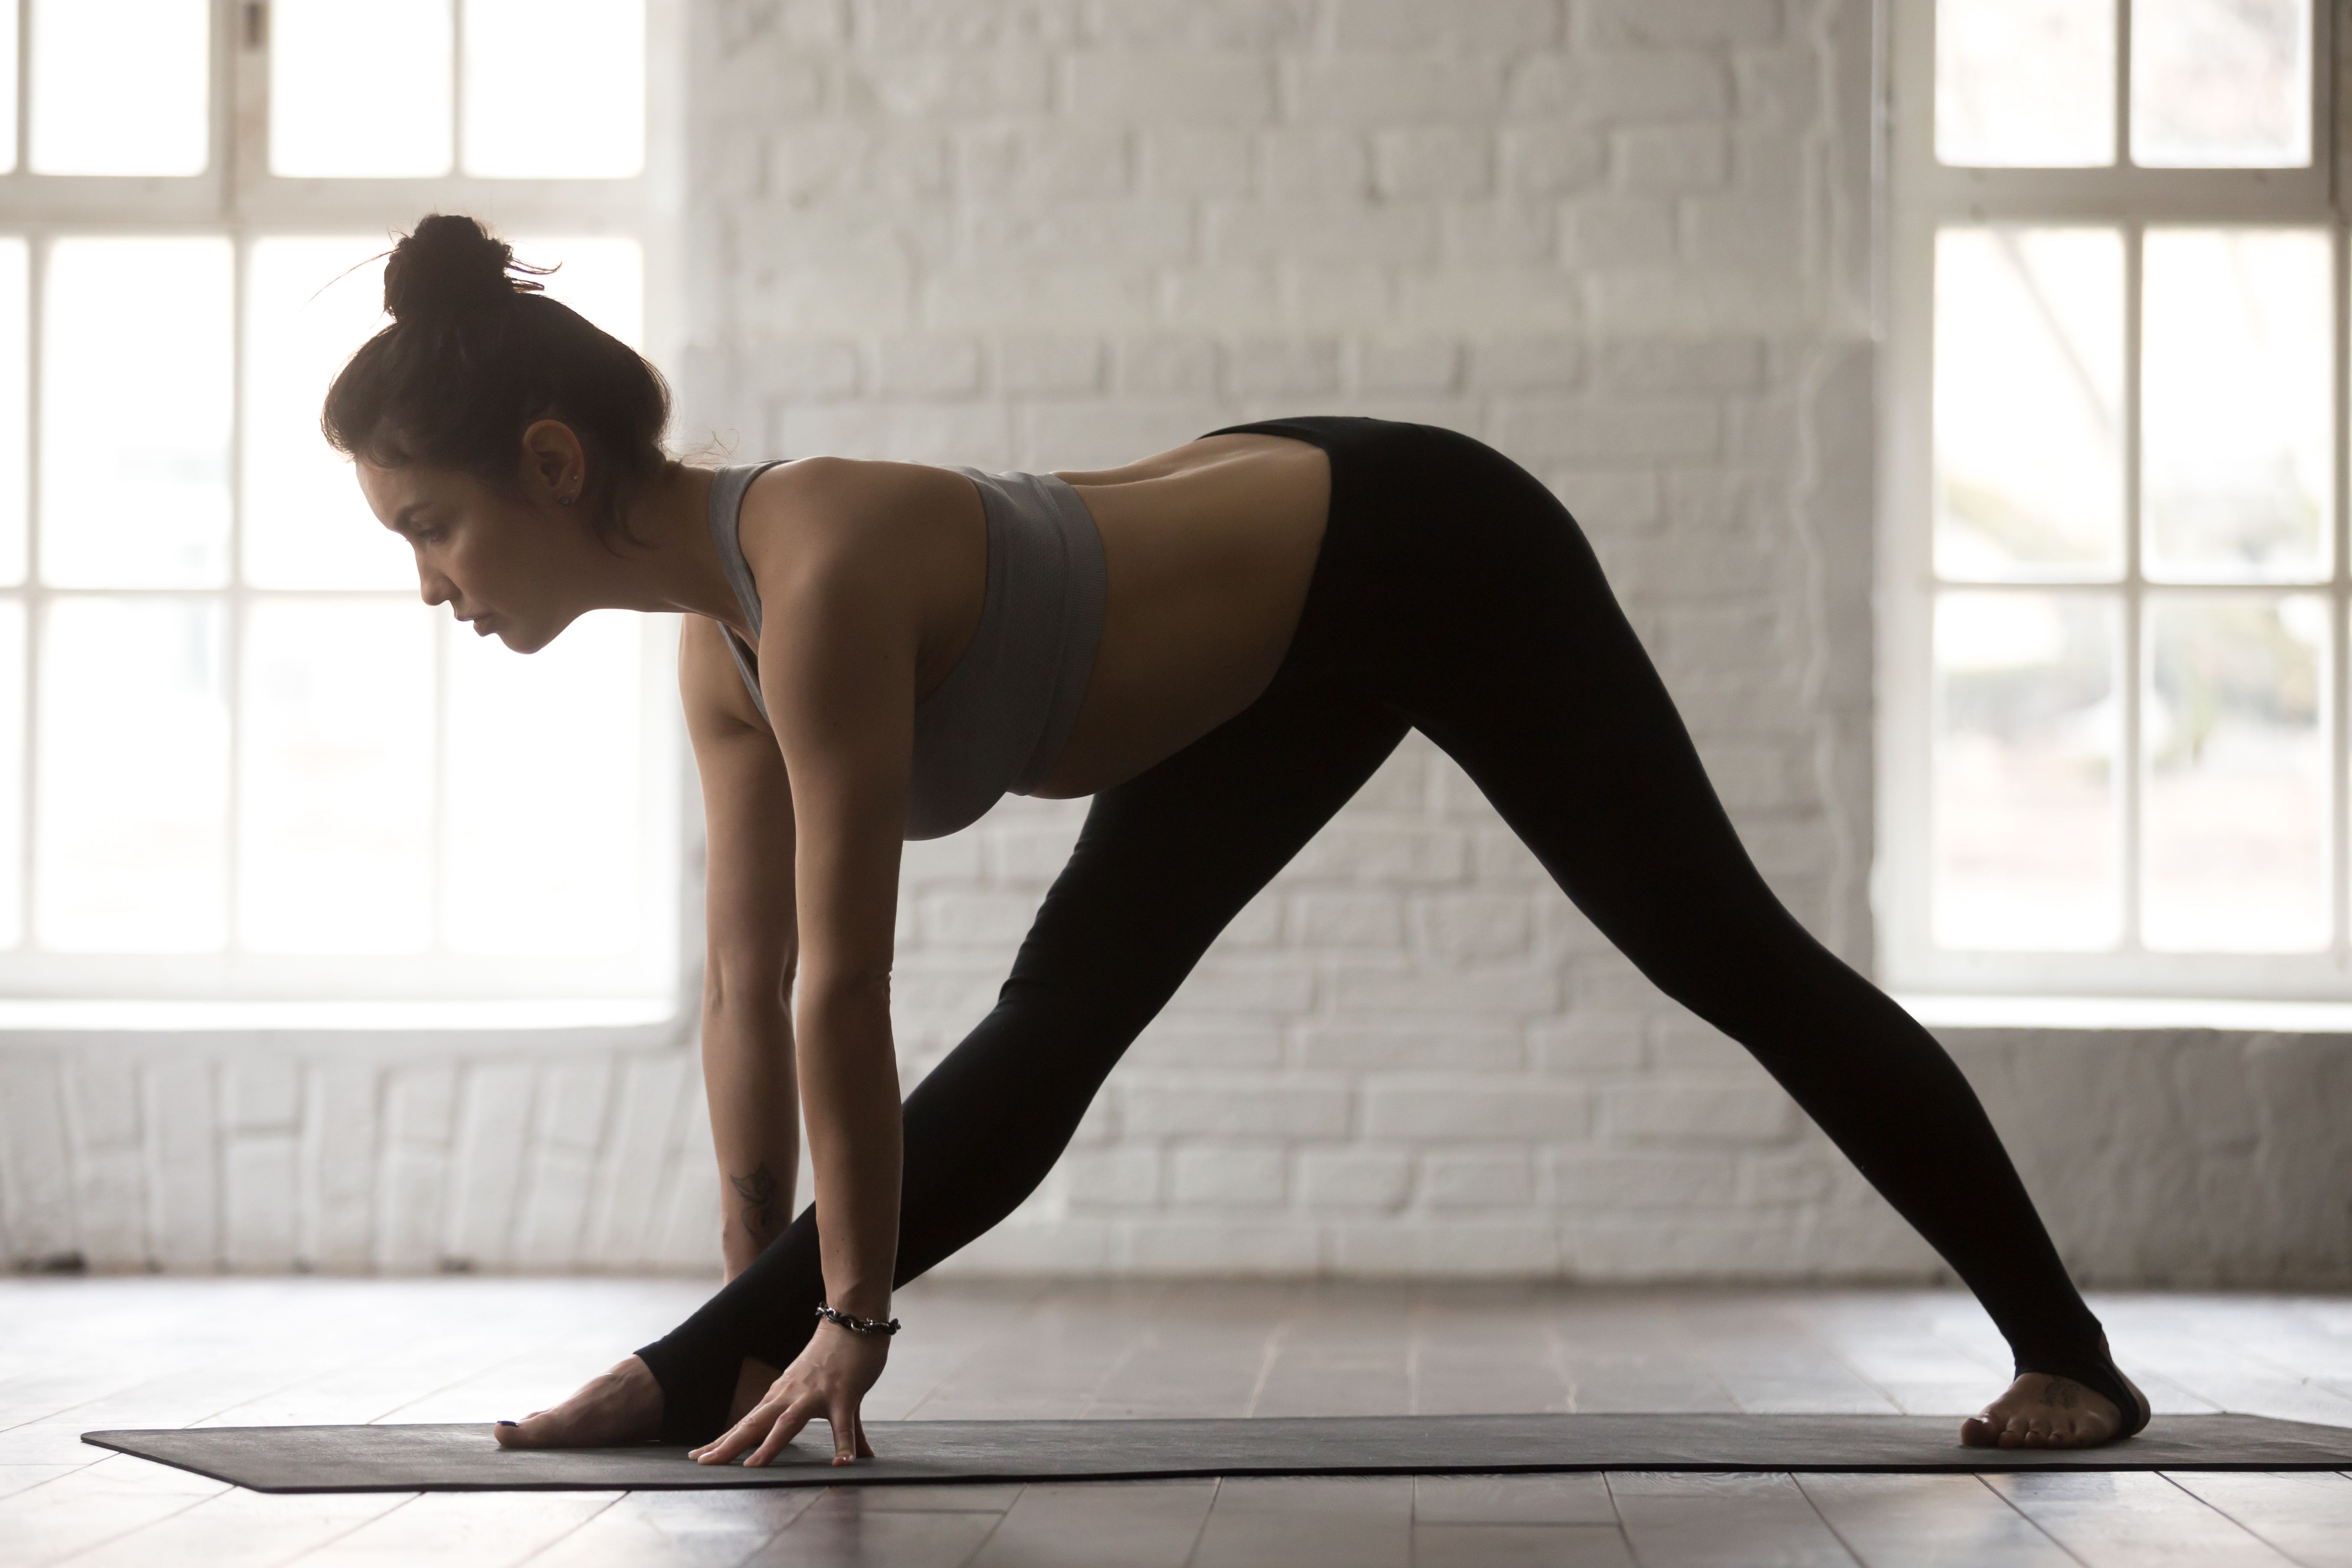
Once your head touches the right knee, hold the pose here and feel your glutes, obliques, and hamstrings activating. Hold this pose on each side for a few seconds until the lower body is thoroughly warmed up.
Part 2: Step-by-Step Instructions to Perform Matsyendrasana
The following are steps to practice the half lord of the fishes pose:
Step 1- Begin by sitting in Dandasana or Staff Pose. Keep the spine straight, palms slightly behind the buttocks, and core tight. Take a few deep breaths here.
Step 2- Bend your right leg at the knee and place your right foot close to the outer edge of the left knee. Ensure you maintain the body in the center of the mat.
Step 3- Fold the left leg into a half lotus pose, bring the left foot close to your right glute, and extend the left foot by pointing the toes.
Step 4- Inhale and extend your left arm to the sky. Next, twist and lower your left arm with an exhale, ensuring your left shoulder rests against the right knee.
Step 5- Engage the core muscles to hold the right big toe with your left fingers.
Step 6- Next, gently turn your head to the back and align your gaze with the right shoulder.
Step 7- Inhale deep, wrap your right arm around the waist, and allow the ribs and spine to twist.
Step 8- Then exhale, reach the right arm all the way around and push into the left upper thigh muscle with your right fingers.
Step 9- Hold this pose for a few deep breaths. Finally—release, relax, and repeat the same on the other side.
Breath Awareness:
Inhale - When any one arm is extending overhead, or you want to engage the muscles.
Exhale - When any one shoulder is placed against the knee, or any one arm is wrapped around the waist.
Inhale & Exhale - While transitioning or while holding the seated spinal twist pose for a longer duration.
Performance Duration for Beginners: Hold the Matsyendrasana for 5 to 10 deep breaths on each side.
Performance Duration for Advanced: Hold the Matsyendrasana for 30 to 60 seconds on each side.
Part 3: Things to Keep in Mind
Before getting started with the Matsyendrasana practice, kindly read the following posture and alignment tips:
Don’t round the spine - Many practitioners usually round their spine instead of leaning to the side. Matsyendrasana mandates the upper body to lean very slightly so that you can hold the big front toe.
After that, straighten your back muscles to reap more promising benefits.
In case holding the front-big toe compromises your spinal alignment, you don’t need to grip the big toe. Just keep your hand nearby the front foot to feel the twisting motion.
Place the sole on the ground - If you have very tight glutes, placing your bent leg’s foot flat on the floor — over the other leg can be challenging.
Thus, perform deep hip opening poses before you get into the main Matsyendrasana practice.
Don’t twist from your shoulders - Twisting from the shoulders will only cause unnecessary pressure in your lower back.
Therefore, start by rotating your lower back and ribs; then your spine and shoulders. Lastly, twist your neck and head, following with your gaze aligned in the same direction.
Part 4: Relaxing Poses After Matsyendrasana
Done with your Matsyendrasana practice? — Now, let’s unwind your back and glute muscles with the following relaxing yoga poses:
1. Paschimottanasana (Seated Forward Bend Pose) - As you exit from the Matsyendrasana pose, get your legs back in the staff pose. Inhale deep and close your eyes to relax the spine.
Next, inhale deep by raising both arms over your head and joining the palms in Anjali Mudra.

Finally, exhale and bend the torso onto your legs. Relax the forehead over the knees and extend both arms along with your shins.
Unwind your lower back, ribs, glutes, spine, and shoulders in this pose for 3 to 5 minutes until you feel relaxed.
2. Supta Baddha Konasana (Reclining Bound Angle Pose) - Again, start from the Staff Pose. Inhale, engage the core and begin to lie down on your back, vertebrate-by-vertebrate.
Next, bend the legs and join the soles of your feet together. Inhale deep, pull your navel into the ground, and rest your arms over the head.
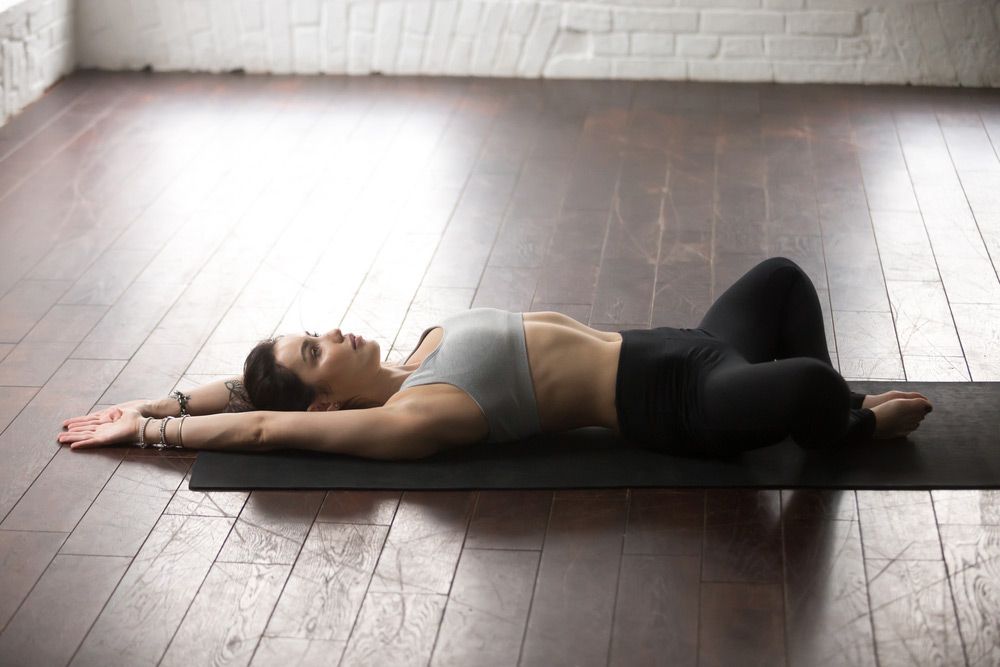
If you still feel any tension is left in the body, just close your eyes focus on that area, keep on breathing consciously, and de-stress that area.
Matsyendrasana Variations to Consider
Choose a Matsyendrasana variation based on your level of flexibility and strength. We have included variations for all levels of yogis below.
1. Ardha Matsyendrasana (Half Lord of the Fishes Pose) - Start by sitting in the staff pose and bend both legs. Keep the left leg in a half-lotus posture and take your right foot across your left knee, placing the foot flat on the mat.
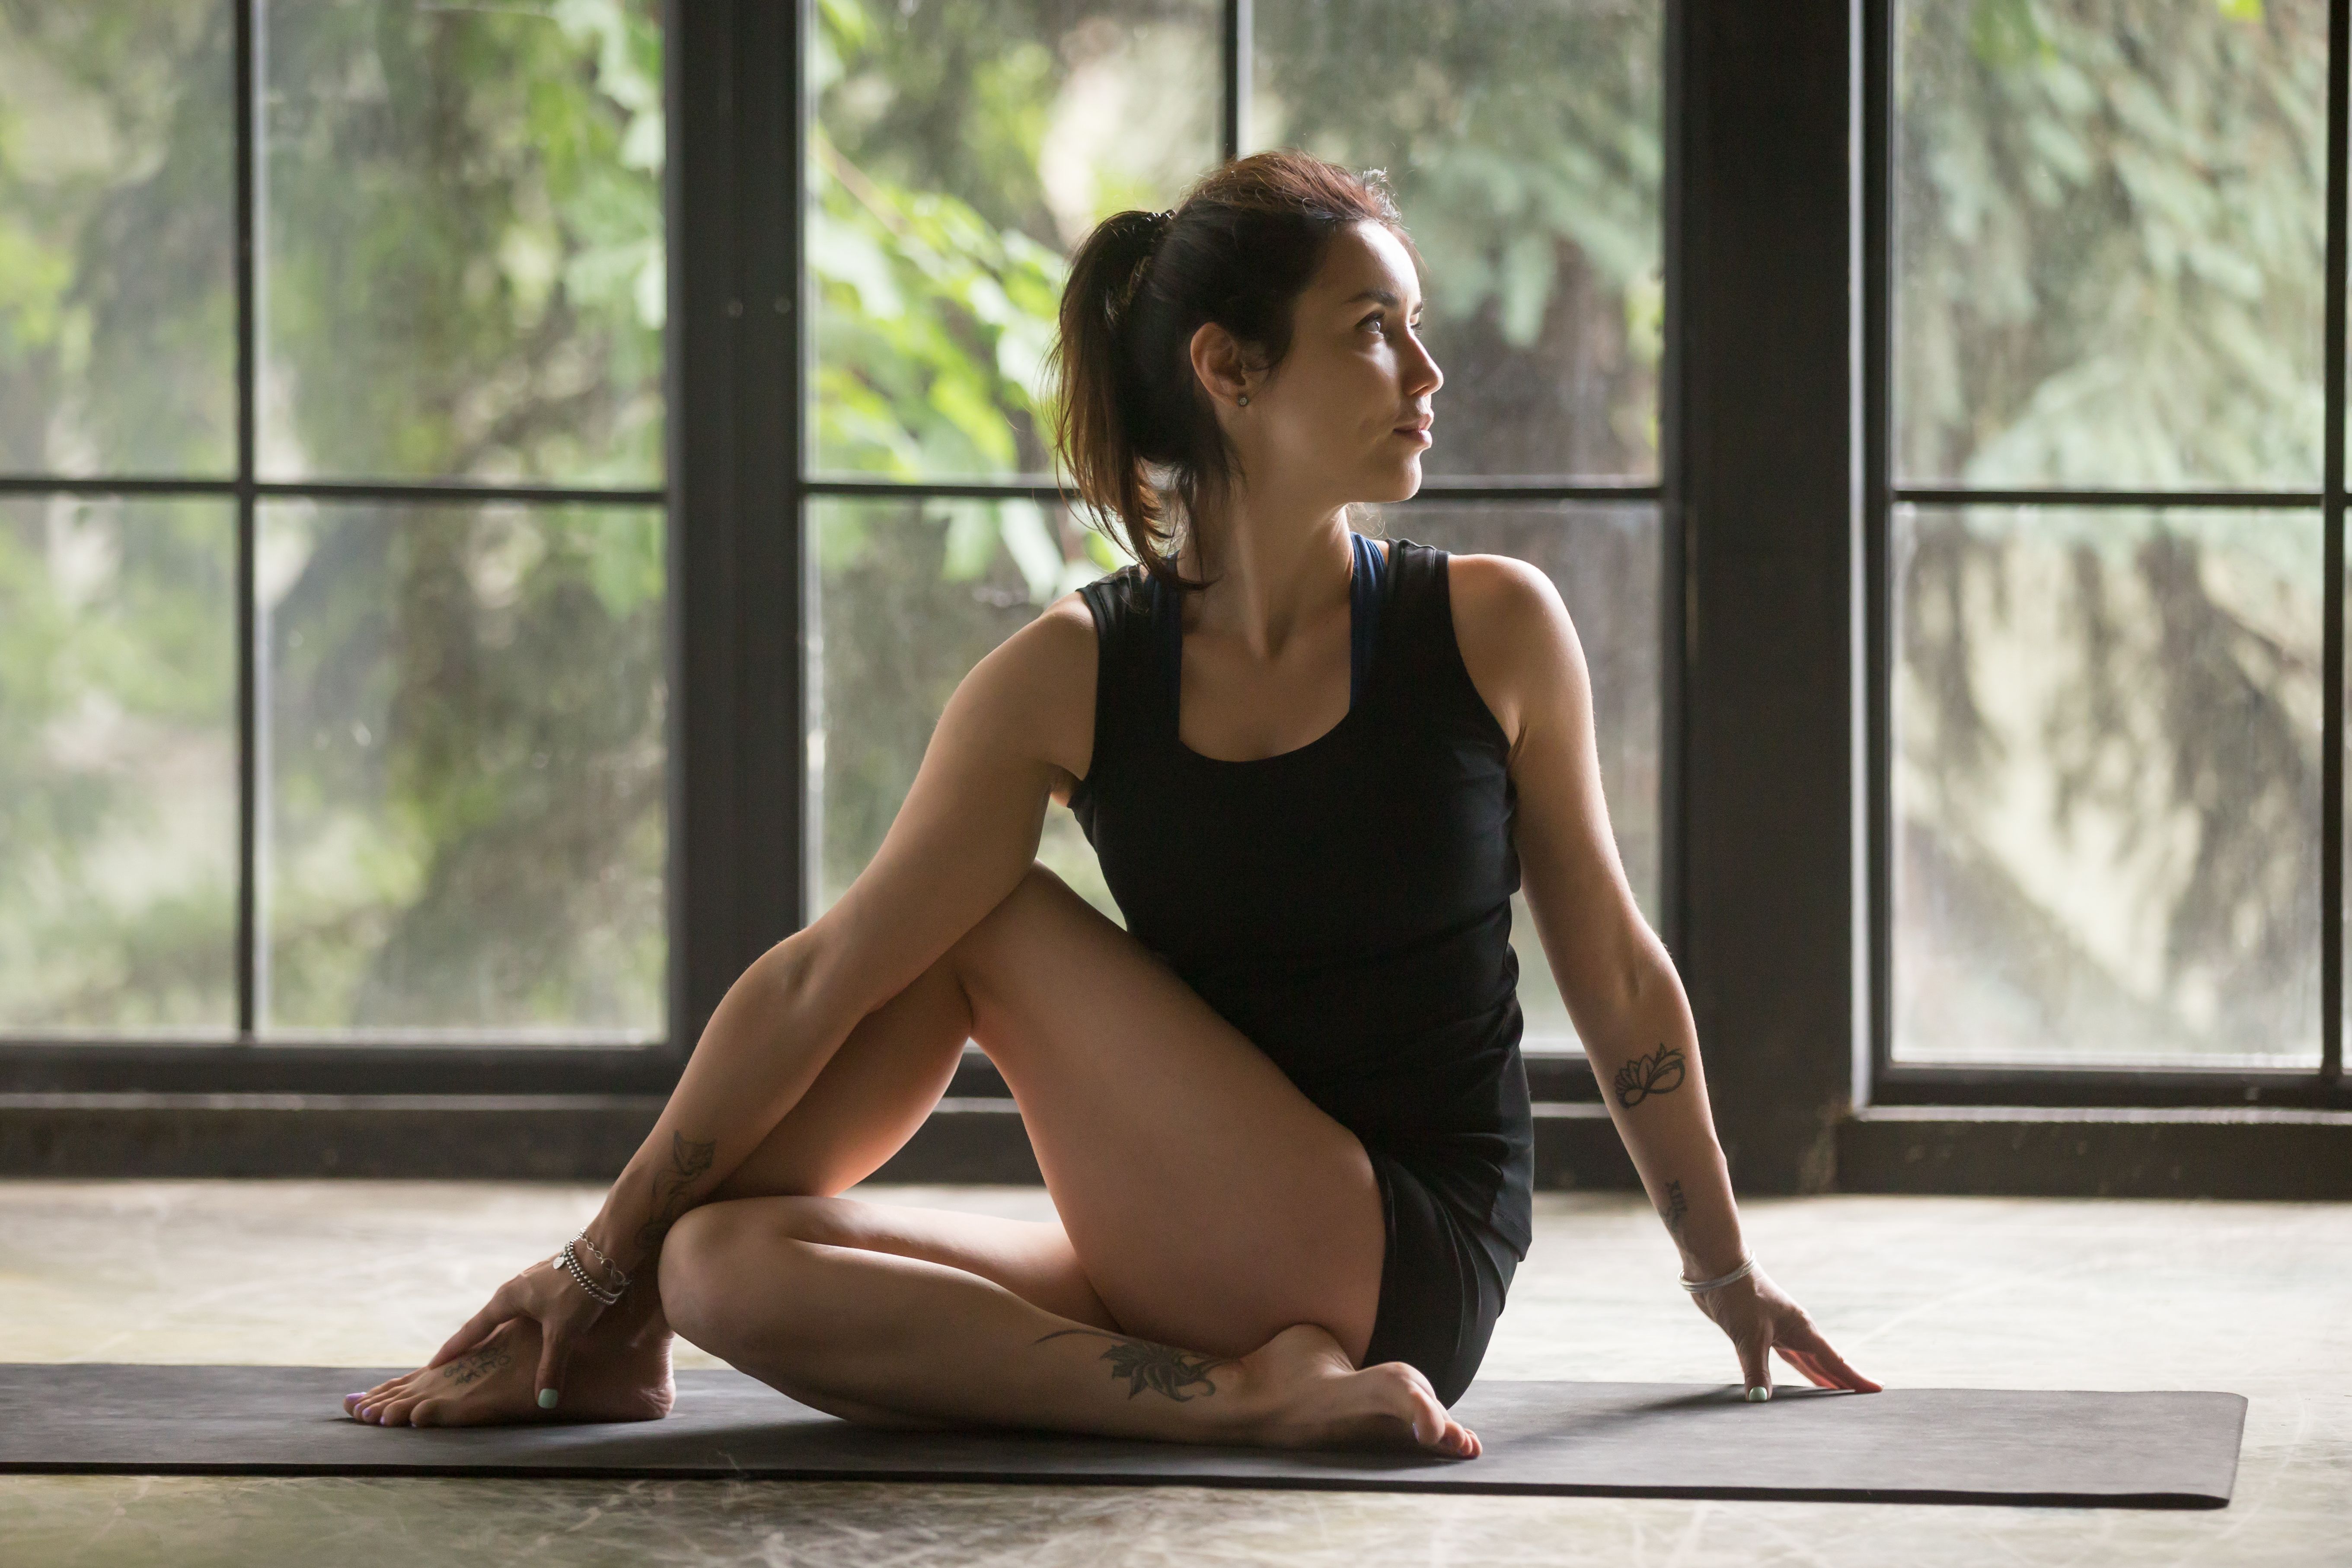
Place the right hand behind your buttocks. Take a deep breath, raise the left arm, twist the spine, lean forward your shoulder, and place your left hand over or close to the front foot.
For a stronger Matsyendrasana foundation, hold this intermediate variation for a couple of minutes on each side.
2. Marichyasana I (Marichyasana A) - Get started by coming into the half-staff pose—keep your right leg bent with your right foot flat and your left leg straight on the mat.
Bring the torso down to the inside of your right leg, and wrap the right arm tricep around the front shin, turning the palm over and reaching it behind you.
Also, bring the left arm behind your back, bind the body, and interlock both hands together.

Inhale and using length from your spine, bend your torso forward. Exhale, engage your core and bring the forehead close to your left shin. On each side, hold this advanced twist variation for five breaths.
3. Marichyasana II (Marichyasana B) - Bend your left leg from the full-staff pose into a half-lotus.Make sure your left foot is placed between your right foot and right glute in a half-lotus stance.
Lean forward, reach your right arm around the bent right leg, then wrap your left arm behind. Hold on to your fingers in a bind.
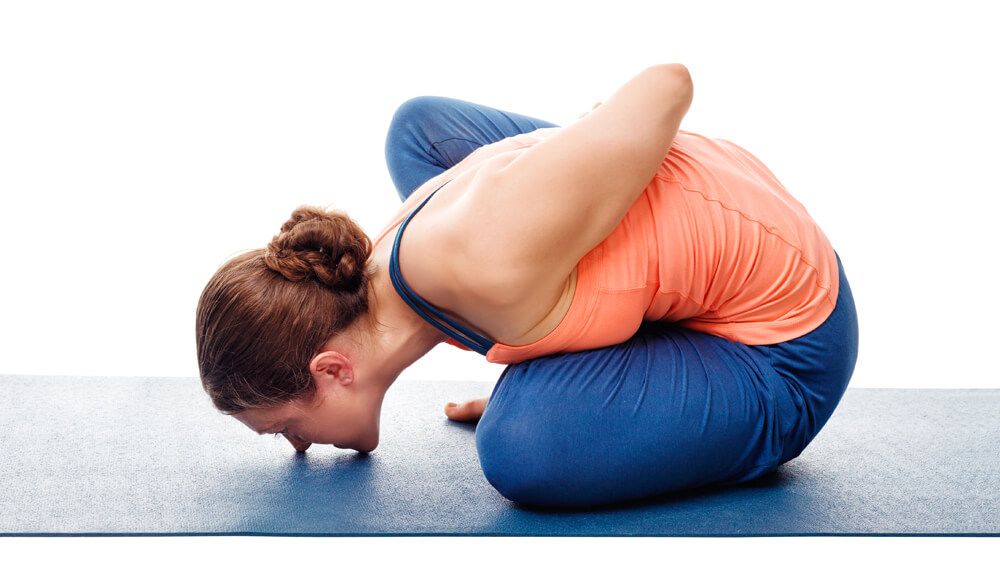
Inhale, raise the spine, and pull the navel in. Finally, exhale as you fold the torso forward onto the mat. Hold this twist on each side for 3 to 5 deep breaths and challenge your entire body.
Enjoy a Free 1-on-1 Session with a Coach!
Receive personalized guidance tailored to your unique fitness goals, live with a dedicated coach—no credit card required.
Frequently Asked Questions about Matsyendrasana
Out of the primary twelve Hatha postures, Matsyendrasana is a type of seated twist pose that all levels of practitioners, including beginners and intermediates, can easily execute.
Matsyendrasana not only helps to rejuvenate the body, but it also helps to improve digestion, reduce stress, and increase flexibility.
Among the many benefits of Matsyendrasana:
- This pose is great for improving the health of your spine and toning of the muscles and ligaments surrounding it.
- This pose can also help improve blood circulation, allowing blood to move freely throughout the body.
- On top of that, Matsyendrasana is known to reduce fatigue, boost your energy levels, and stimulate your abdominal organs.
To prepare for Matsyendrasana, Baddha Konasana, Parsvottanasana, and Bharadvajasana are highly recommended. These poses will help practitioners open their lower body and activate the spine and sides of the body, which is necessary for the twisting motion.
If you're feeling extra adventurous, you can take your Matsyendrasana practice to the next level by tossing in a few additional variations into your practice, like—Marichyasana A, B, C, and D.
Those with intense back or neck pain should exercise cautiously and under close supervision. If you have disc issues, then completely avoid performing Matsyendrasana altogether.



.webp)
%20(7).jpg)
