What is Jathara Parivartanasana (Revolved Abdomen Pose)?
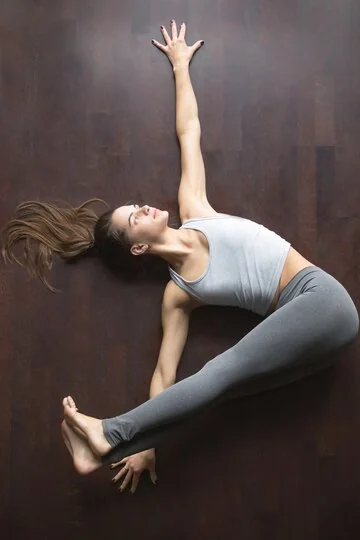
Jathara Parivartanasana, or Revolved Abdomen Pose, is a cool-down yoga asana for your spine and lower back. It is also known as the master revolved abdomen pose, belly twist, or spinal twist pose.
In this yoga asana, the practitioner lies on the yoga mat on their back, with their arms spread on the sides. Your legs can be bent or fully flexed, but it is important to keep them parallel with your arms as you turn/revolve your torso in the opposite direction.
Overview & Etymology
The name Jathara Parivartanasana is derived from Sanskrit, where Jathar means "Belly" or "Abdomen," Parivarta means "Revolving" or "Turning," and Asana means "Pose."
This pose is not mentioned in any ancient hatha yoga texts. Instead, it was first described in the 20th-century book "Light on Yoga," by B.K.S. Iyengar, so we can say that it's a modern yoga asana.
Sanskrit Name: ञठर परिवर्तनासन
Pronunciation: JUT-ah-are-uh par-ree-VAR-tuh-nuh-suh-nuh
Pose Type: Spinal Twist Also known as: Revolved Abdomen Pose, Belly Twist, Spine Twist
Strengthens: Lower Back, Spinal Column, Obliques, Hamstrings, and Tailbone
Stretches: Spine, Pelvis, Obliques, Shoulders. and Glutes
Health Benefits of Jathara Parivartanasana
Improves blood circulation in the spine.
Strengthen the low back, obliques, and legs
Stretches and relaxes the spine and tailbone.
Lengthens the shoulders and opens the upper body.
Assists in soothing feelings of stress, anxiety, and depression.
Helps in recovering from back pain, neck pain, and sciatica pain.
Provides a soothing, calming, and therapeutic effect on menstrual cramps.
Stimulates the Manipura Chakra and enhances abdominal organ function.
When to Avoid Performing Jathara Parivartanasana
Avoid if you’ve recently had surgery or experienced an injury.
Avoid if you’re suffering from knee, hip, or back arthritis.
Avoid if you have a slipped disc or a herniated disc.
Avoid during pregnancy and post-pregnancy.
How to do Jathara Parivartanasana (Revolved Abdomen Pose)
We have divided the Revolved Abdomen Pose practice into four primary parts: warm-up, posture steps, alignment cues, and relaxation postures. There are also modifications and variations for this pose that you can try.
Part 1 - Preparatory Poses for Jathara Parivartanasana
To prepare for the Revolved Abdomen Pose, you must warm up your legs, core, and low back. Here are a few poses to get you started:
1. Ardha Matsyendrasana (Half Lord of the Fishes Pose) - To slightly activate the obliques and spine, get into a seated position. Now, lift your left leg from the mat and step it over your right bent knee on the mat.

Place your left arm on your side – over the mat. At the same time, wrap your right arm over your left leg and feel a mild stretch in the side of your abdomen. Hold this pose for 2 minutes on each side to help you lengthen your spine.
2. Supine Windshield Wipers - Start by lying down on your back on the yoga mat. Bend your knees and place your foot flat on the mat. Make sure that your feet are slightly more than shoulder-width apart.
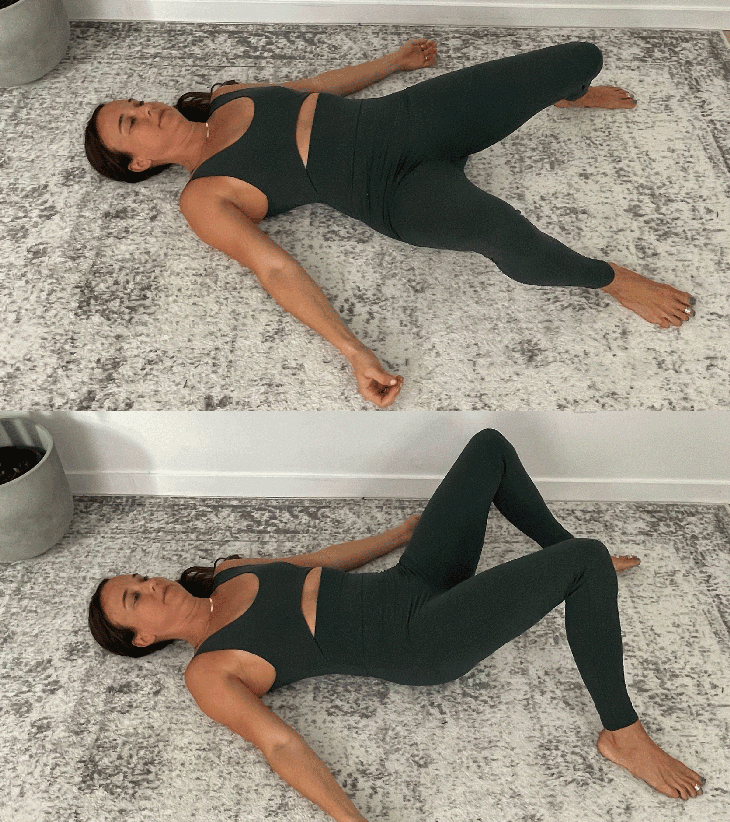
Now, start to open and close your legs and move them side-to-side. Perform this dynamic movement for 2 to 5 minutes for deeper hydration of the sacrum and activation of the lower back, pelvis, and legs.
Part 2: Step-by-Step Instructions to Perform Jathara Parivartanasana
The following are steps to practice the belly twist or revolved abdomen pose:
Step 1- Lie on your yoga mat in the Corpse Pose and relax your spine.
Step 2- Draw your knees close to your chest and inhale-exhale here for a few seconds to activate your lower back’s deep connective tissues.
Step 3- On a deep inhale, tighten your core and spread both your arms in a 'T' shape at your sides. Also, make sure that your tailbone is flat against the mat.
Step 4- Now, exhale and twist your torso on the right side. You can keep your legs bent or straight. Hold the stretch when you feel a deep lengthening in your obliques and lower back.
Step 5- Come back to the center and relax your spine with a few deep inhales and exhales.
Step 6- Finally, bend on the left side, hold, and keep repeating this movement dynamically for a few minutes.
Breath Awareness:
Inhale - When you bend your knees and engage your core muscles.
Exhale - When the placement of your legs is changed or your core is revolved.
Performance Duration for Beginners: Hold Jathara Parivartanasana for 5-10 seconds on each side.
Performance Duration for Advanced: Hold Jathara Parivartanasana for 10-30 seconds on each side.
Part 3: Things to Keep in Mind
Be aware of the following alignment cues if you are just starting your Jathara Parivartanasana practice.
Keep your core muscles tight: If your goal is to strengthen your obliques, keeping your entire core engaged is essential. This will not only help you tone and lose side belly fat, but it will also help you hold the pose for a longer duration.
Do not lift your arms up: Don’t let your shoulder blades move away from the ground. Try to keep your arms close to the ground as you perform the twisting motion with your torso. This will help you avoid any unnecessary strain on your neck, upper spine, and shoulders.
Keep your legs parallel: Do not sink your knees lower than your pelvis. To feel a deeper stretch in your spine and obliques from the Revolved Abdomen Twist pose, ensure that your legs are aligned and parallel with your arms. This will help you maintain a healthy alignment in this pose.
Part 4: Relaxing Poses After Jathara Parivartanasana
After practicing the abdomen twist pose, the torso muscles need to relax.
To deeply relax your lower back, a few counter poses can help. Here are a few you can try:
1. Supta Baddha Konasana (Reclining Bound Angle Pose): Soon after you finish the Revolved Abdomen pose, spread your legs in a Butterfly pose and flex your arms overhead.
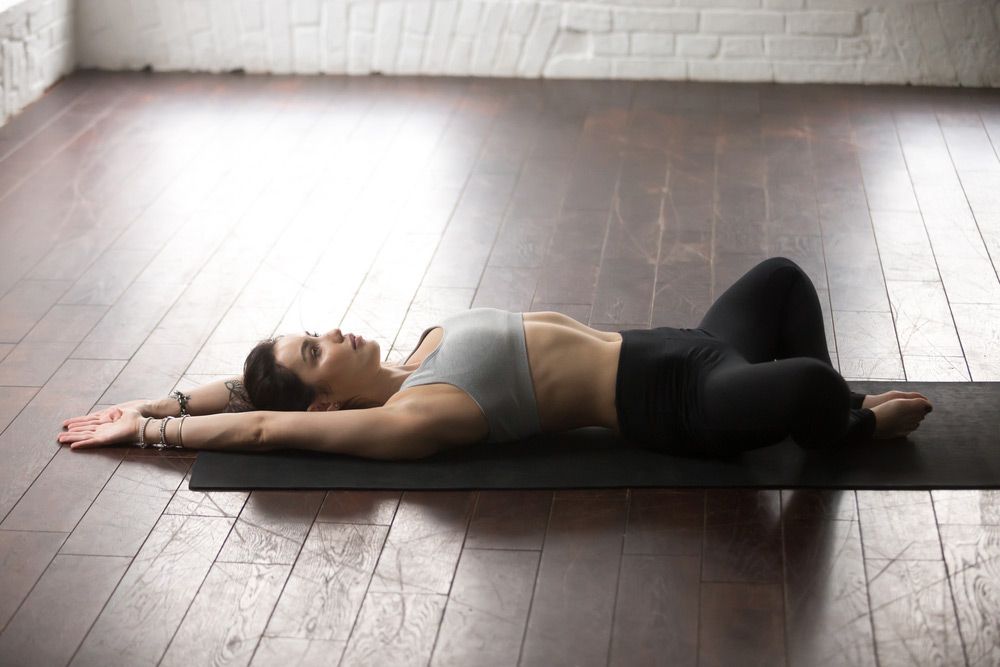
Ensure that your knees are close to the ground and your spine is lengthened and your arms are extended. Close your eyes and focus on deep inhaling and exhaling. Hold this pose here for 1 to 5 minutes. This counter pose will soothe any tension around your tailbone and throughout your upper body.
2. Apanasana (Wind-Relieving Pose): After the Reclining Bound Angle pose, continue to relax your lower back further with Apanasana. Draw both the knees close to your chest, wrap both arms around your legs, and start breathing deeply.
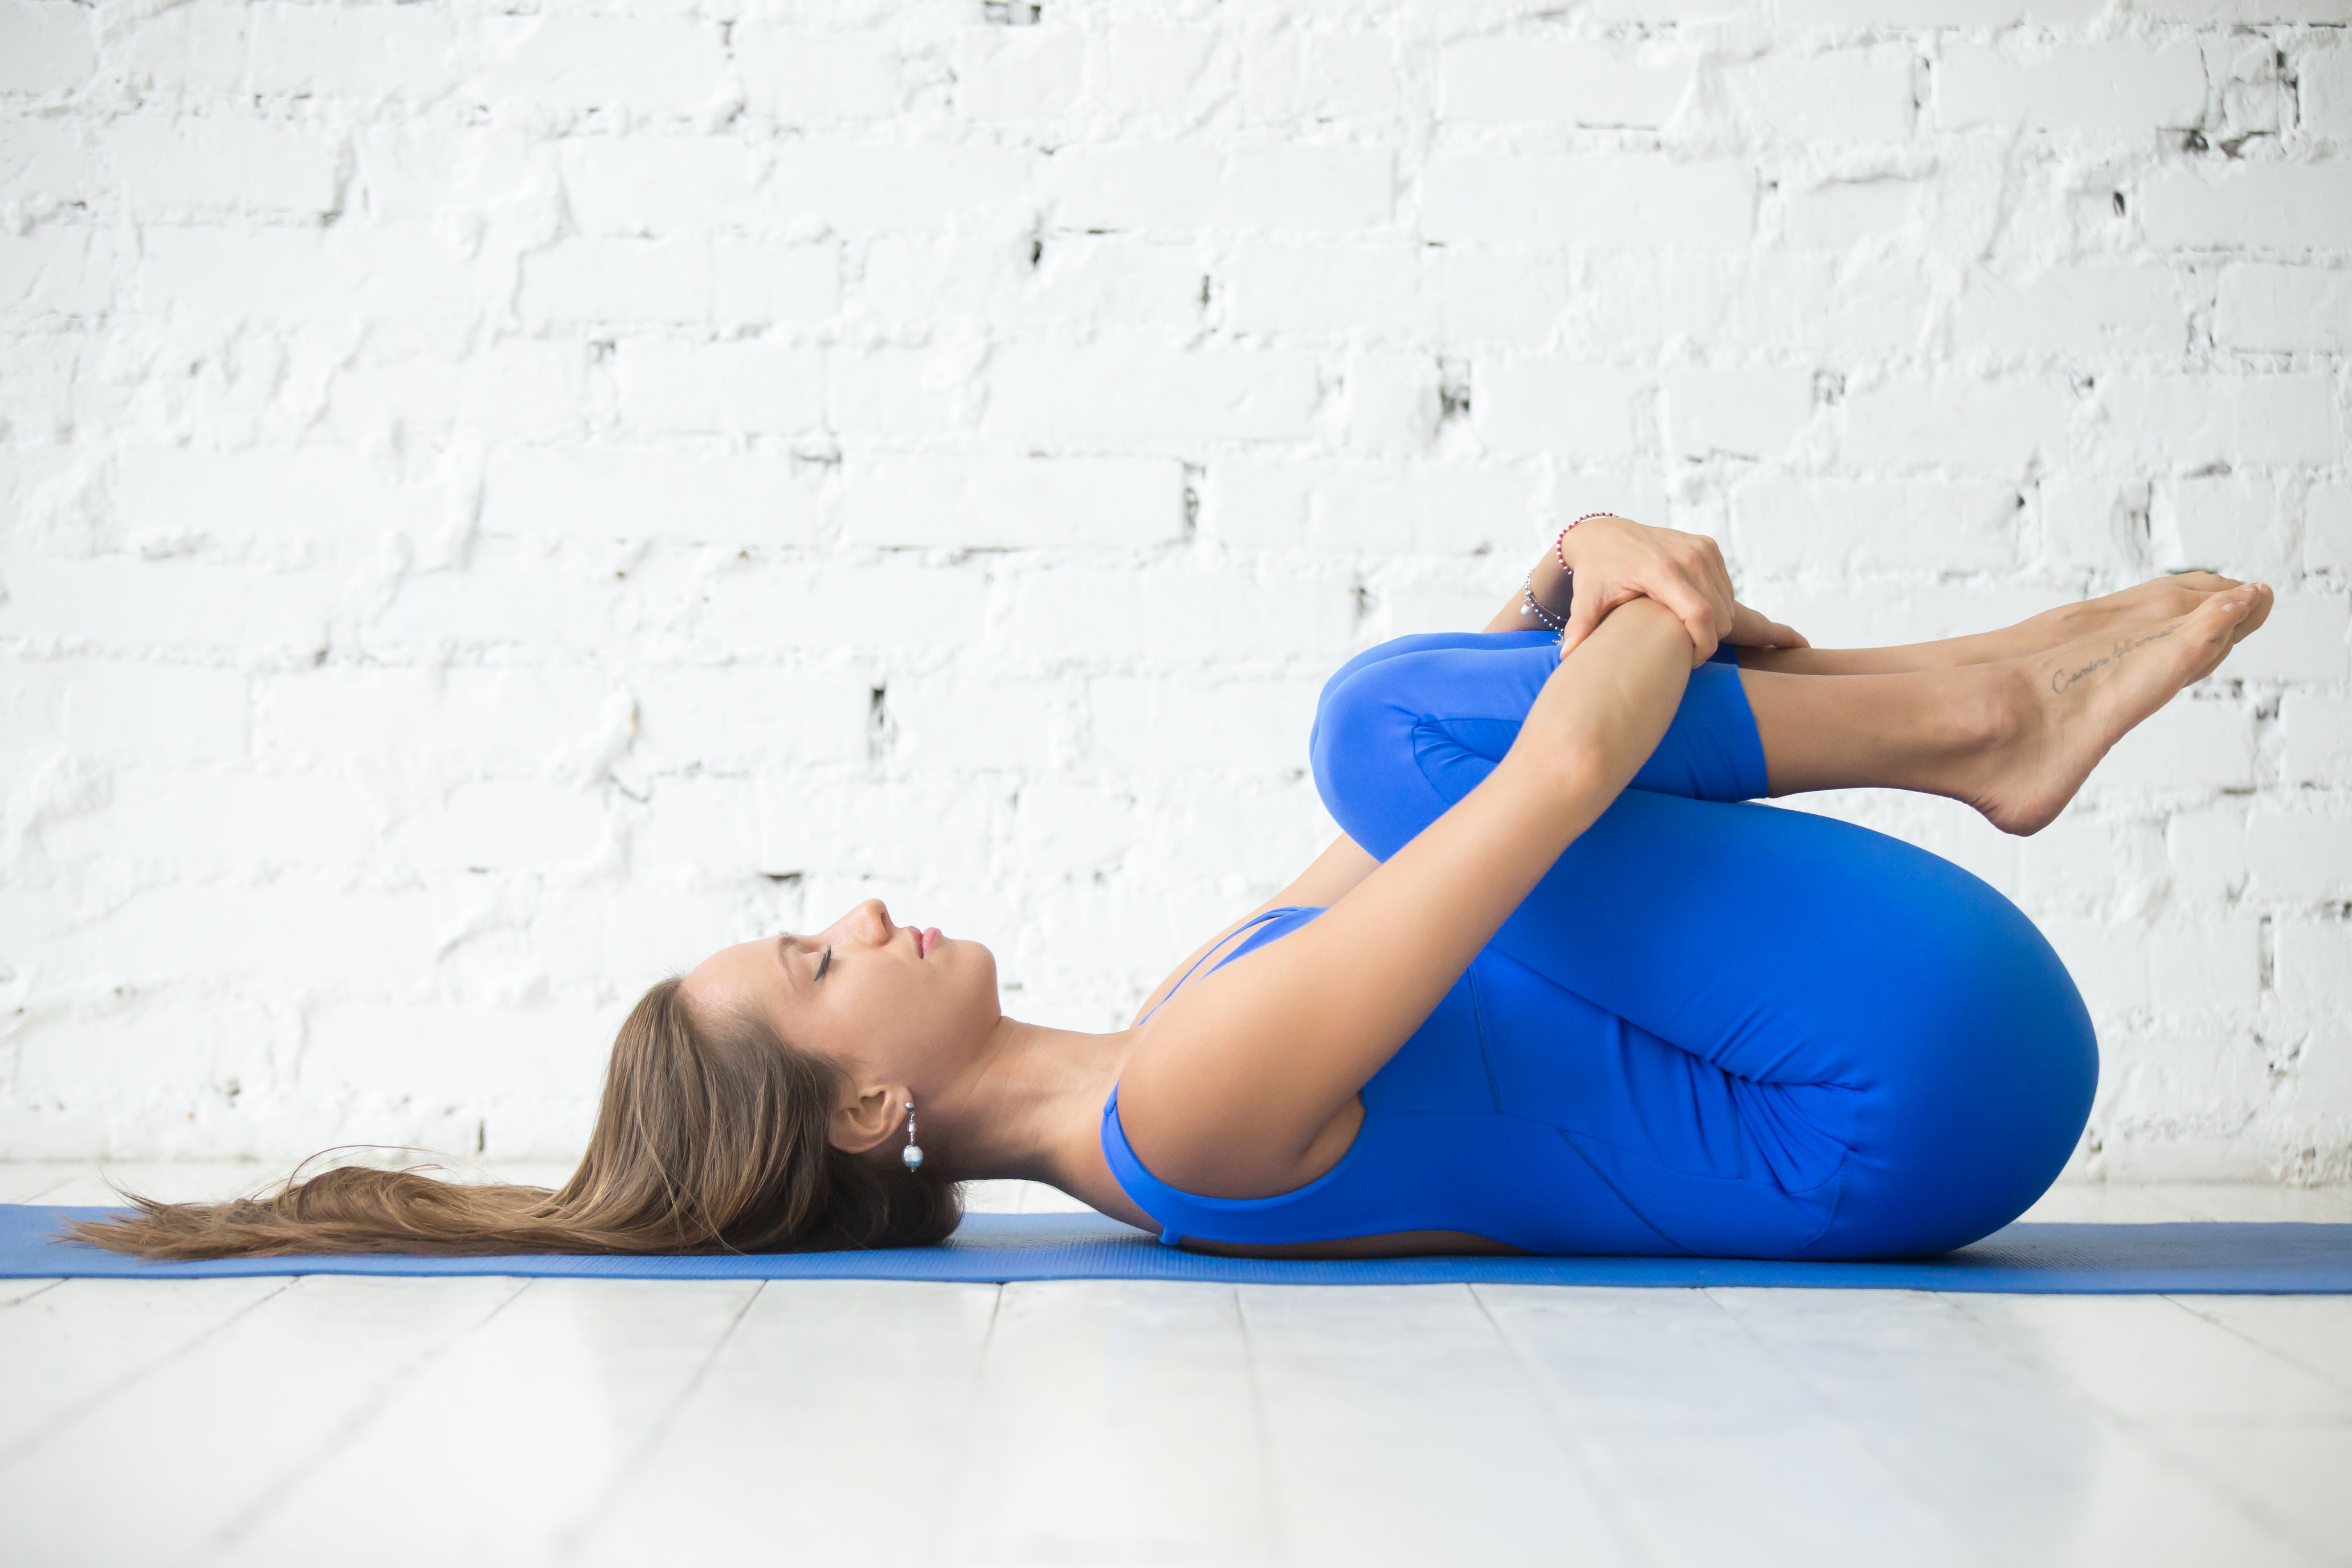
Slowly rock side-to-side in this position. This will help stimulate your lower back’s connective tissue and support your spine in relaxing completely.
Jathara Parivartanasana Variations to Consider
Below you can find some helpful Revolved Abdomen pose variations to incorporate into your regular yoga practice:
1. Revolved Abdomen Pose with Low Legs Variation: If your core doesn’t feel strong enough to align your knees parallel with your arms, you can keep your legs lower than your pelvis.

This is a beginner-friendly variation for those who have lower core strength and flexibility. This will help your lower back and obliques stay safe from muscle tears.
2. Revolved Abdomen Pose with High Legs Variation: If you are an advanced yogi with a powerful core, take your Jathara Parivartanasana practice to the next level.
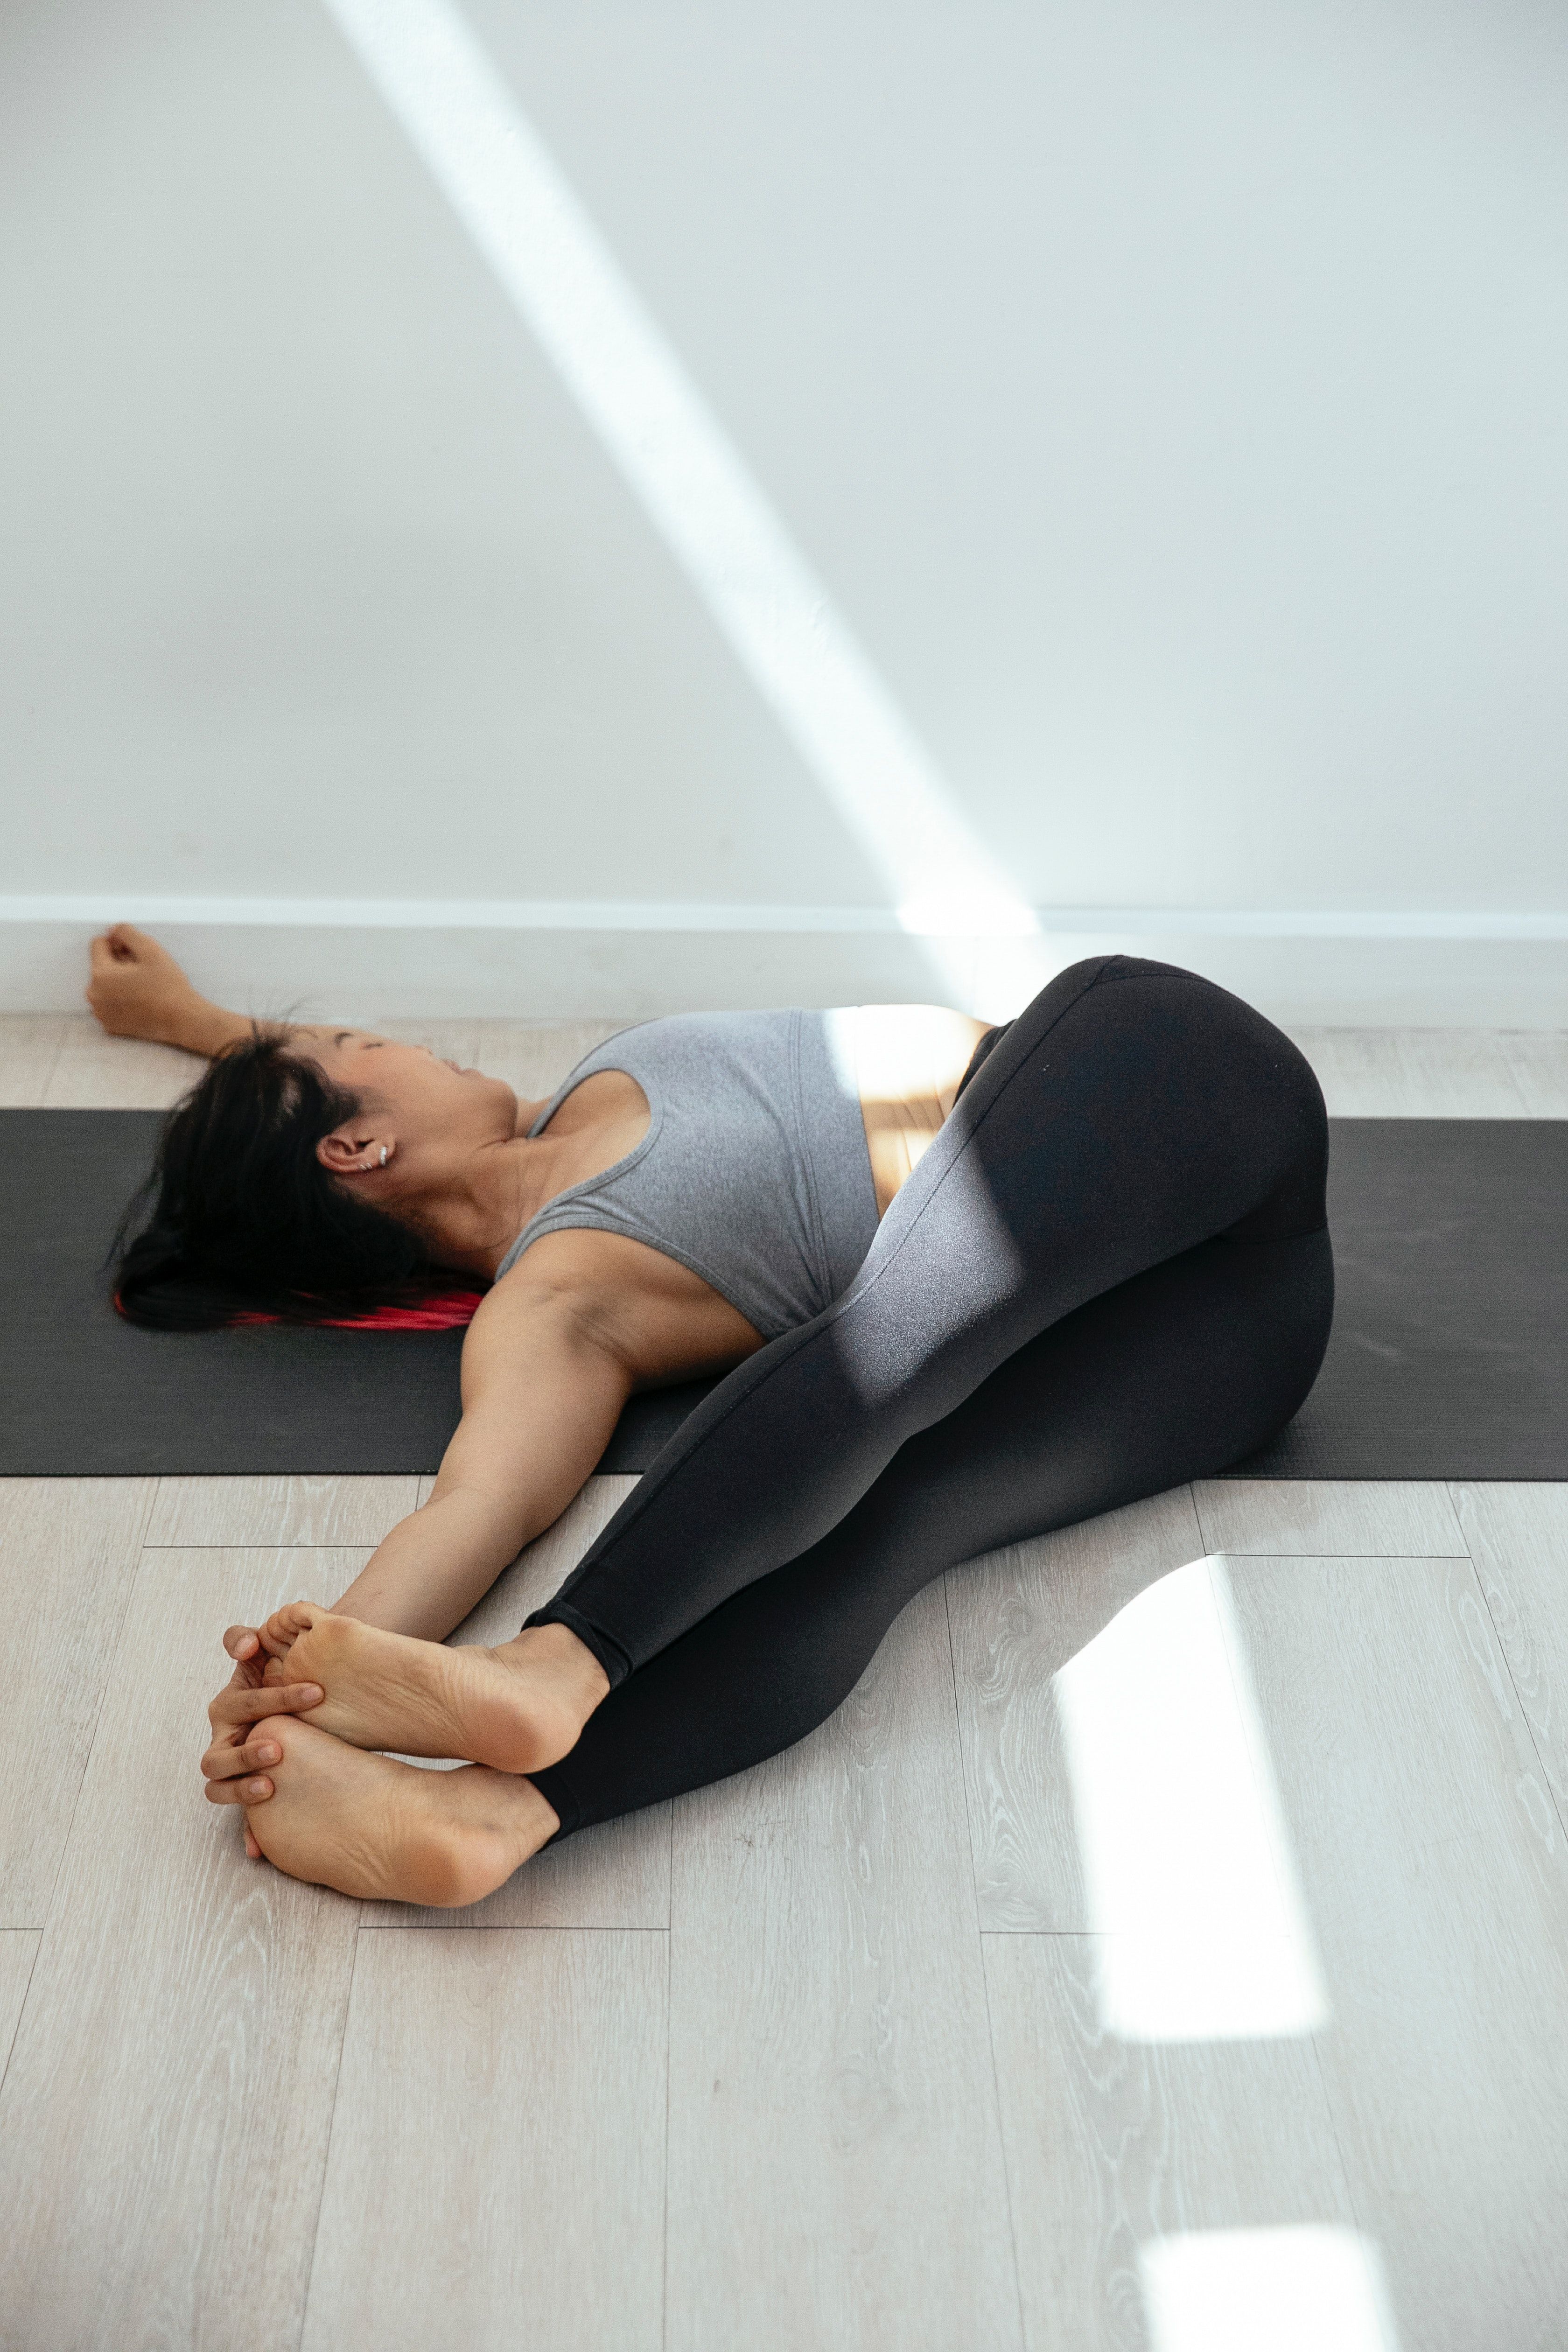
Gently straighten both legs and touch your feet up to your arms with the help of an engaged core. This will strengthen your obliques to another level.
Enjoy a Free 1-on-1 Session with a Coach!
Receive personalized guidance tailored to your unique fitness goals, live with a dedicated coach—no credit card required.
Frequently Asked Questions about Jathara Parivartanasana
Supta Jathara Parivartanasana is a belly twist pose performed on your back. It’s also known as Supta Matyendrasna 2 pose, and it’s very similar to the Revolved Abdomen pose – the only difference is the placement of your legs. Instead of using both legs together, stretch one leg at a time on each side.
For variations of Jathara Parivartanasana, beginners can keep their legs bent on the side, lower than their hip flexors. This will not put unnecessary strain on their obliques and tailbone. If you’re an intermediate yogi with strong core muscles, you can also try to straighten both the legs and reach your toes to your arms.
The following are some important health benefits of Jathara Parivartanasana:
- Strengthens the spine.
- Tones the obliques and upper abs.
- Stimulates the Manipura Chakra (Naval).
- Soothes and calms lower back pain.
- Improves digestive and reproductive system health.
Yes, beginners can perform Jathara Parivartanasana pose, but make sure not to try any advanced posture variations with a twisted spine.
Take your time, gradually build a strong core, and keep modifying the main pose. This way, you can start the Jathara Parivartanasana pose and keep growing with time.
The following are the instructions to perform Ardha Jathara Parivartanasana:
Inhale, lie on your back, bring your legs close to your chest, and keep your arms in a ‘T’ shape at your sides.
Keep your core tight and tail bone attached to the mat. Exhale and drop your knees to your side by keeping your core engaged the whole time.
Hold and breathe for 5 to 10 seconds on one side.
Come back to the center, relax for a few seconds, inhale, and repeat the same on the other side.


.webp)
%20(7).jpg)
