What is Garudasana (Eagle Pose)?
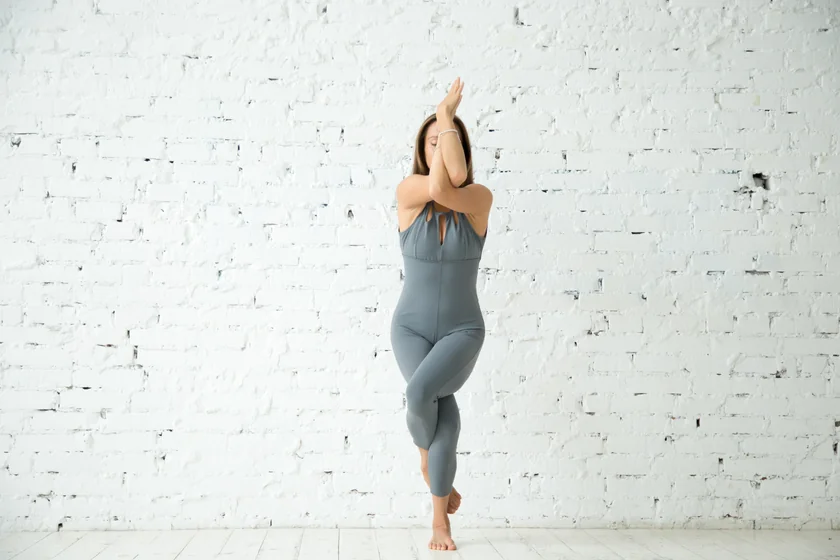
Garudasana, or Eagle Pose, is a standing yoga pose with twisted arms and legs. This is a standing pose that is balanced on one leg at a time.
Eagles are considered strong birds with great focus. Similarly, this posture also requires immense core strength and mental consciousness to balance your whole body on one leg.
The more you hold this pose, the more you will feel your ankles, thighs, glutes, knees, core, arms, shoulders, and back start to burn.
Overview & Etymology
The name Garudasana is a combination of Sanskrit words. 'Garuda' means Eagle, and 'Asana' means posture or seat.
According to Hindu mythology, Garuda is the king of all birds, the enemy of snakes, and a friend of humans.
He is the Vaahan (vehicle) of the supreme Hindu god, Lord Vishnu. This king of all birds can carry Lord Vishnu through the sky, never needing to land.
In Hindu culture, you will find two famous scriptures devoted to Garuda. The first is Garuda Purana and the second is Garudopanishad.
Garudopanishad is a book about mantras and charms that can heal you from poison. On the other hand, Garuda Purana is one of 18 Mahapurans, including a vast collection of topics, like cosmology, karma, soteriology, and yoga theory.
Whereas in the Buddhist culture, eagles are known as a mythical species, and you will find Garuda as a common subject in Buddhist folk art.
In Tibetan Buddhist culture, Eagle is one of the Four Dignities in animals, representing Bodhisattva (a monk attaining Nirvana).
Sanskrit Name: गरुडासन Pronunciation: gah-roo-DAH-sah-nuh
Pose Type: Standing Balance Pose Also known as: Eagle Pose
Strengthens: Knees, Ankle, and Calves
Stretches: Glutes, Shoulder, Thighs, and Upper Back
Health Benefits of Garudasana
Improves posture.
Enhances flexibility in the body.
Strengthen the knee and elbows.
Stimulates abdominal organ function.
Increase awareness and mental focus.
Strengthens the core and lengthens the legs.
Improves blood circulation in the legs, glutes, and arms.
Burns excess fat around the legs, glutes, abdomen, and arms.
Activates the vertebrate and improves nervous system function.
When to Avoid Performing Garudasana
Avoid if you have any injuries.
Avoid if you have a severe surgery.
Avoid if you have chronic lower back pain.
Avoid if you have inflammatory knee or elbow arthritis.
Avoid if you are experiencing pelvic or abdominal discomfort.
Avoid during pregnancy or if you have sore feet and back pain.
How to do Garudasana (Eagle Pose)
Eagle Pose can be an overwhelming yoga asana to perform. That’s why we have segmented the whole practice into multiple phases, with a warm-up, steps to get in the main pose, alignment cues, and relaxation.
For beginners and intermediate yogis, we have also included some easy modifications and fun variations to try during your Garudasana practice. Let’s get started!
Part 1 - Preparatory Poses for Garudasana
The main muscles you need to activate for Eagle Pose are your arms, glutes, calves, knees, and spine. The following are some preparatory poses to warm up all the necessary body parts:
1. Tadasana (Mountain Pose) - Also known as Samasthiti, this is a fundamental standing yoga asana practiced for mild activation in the feet, spine, legs, and core.
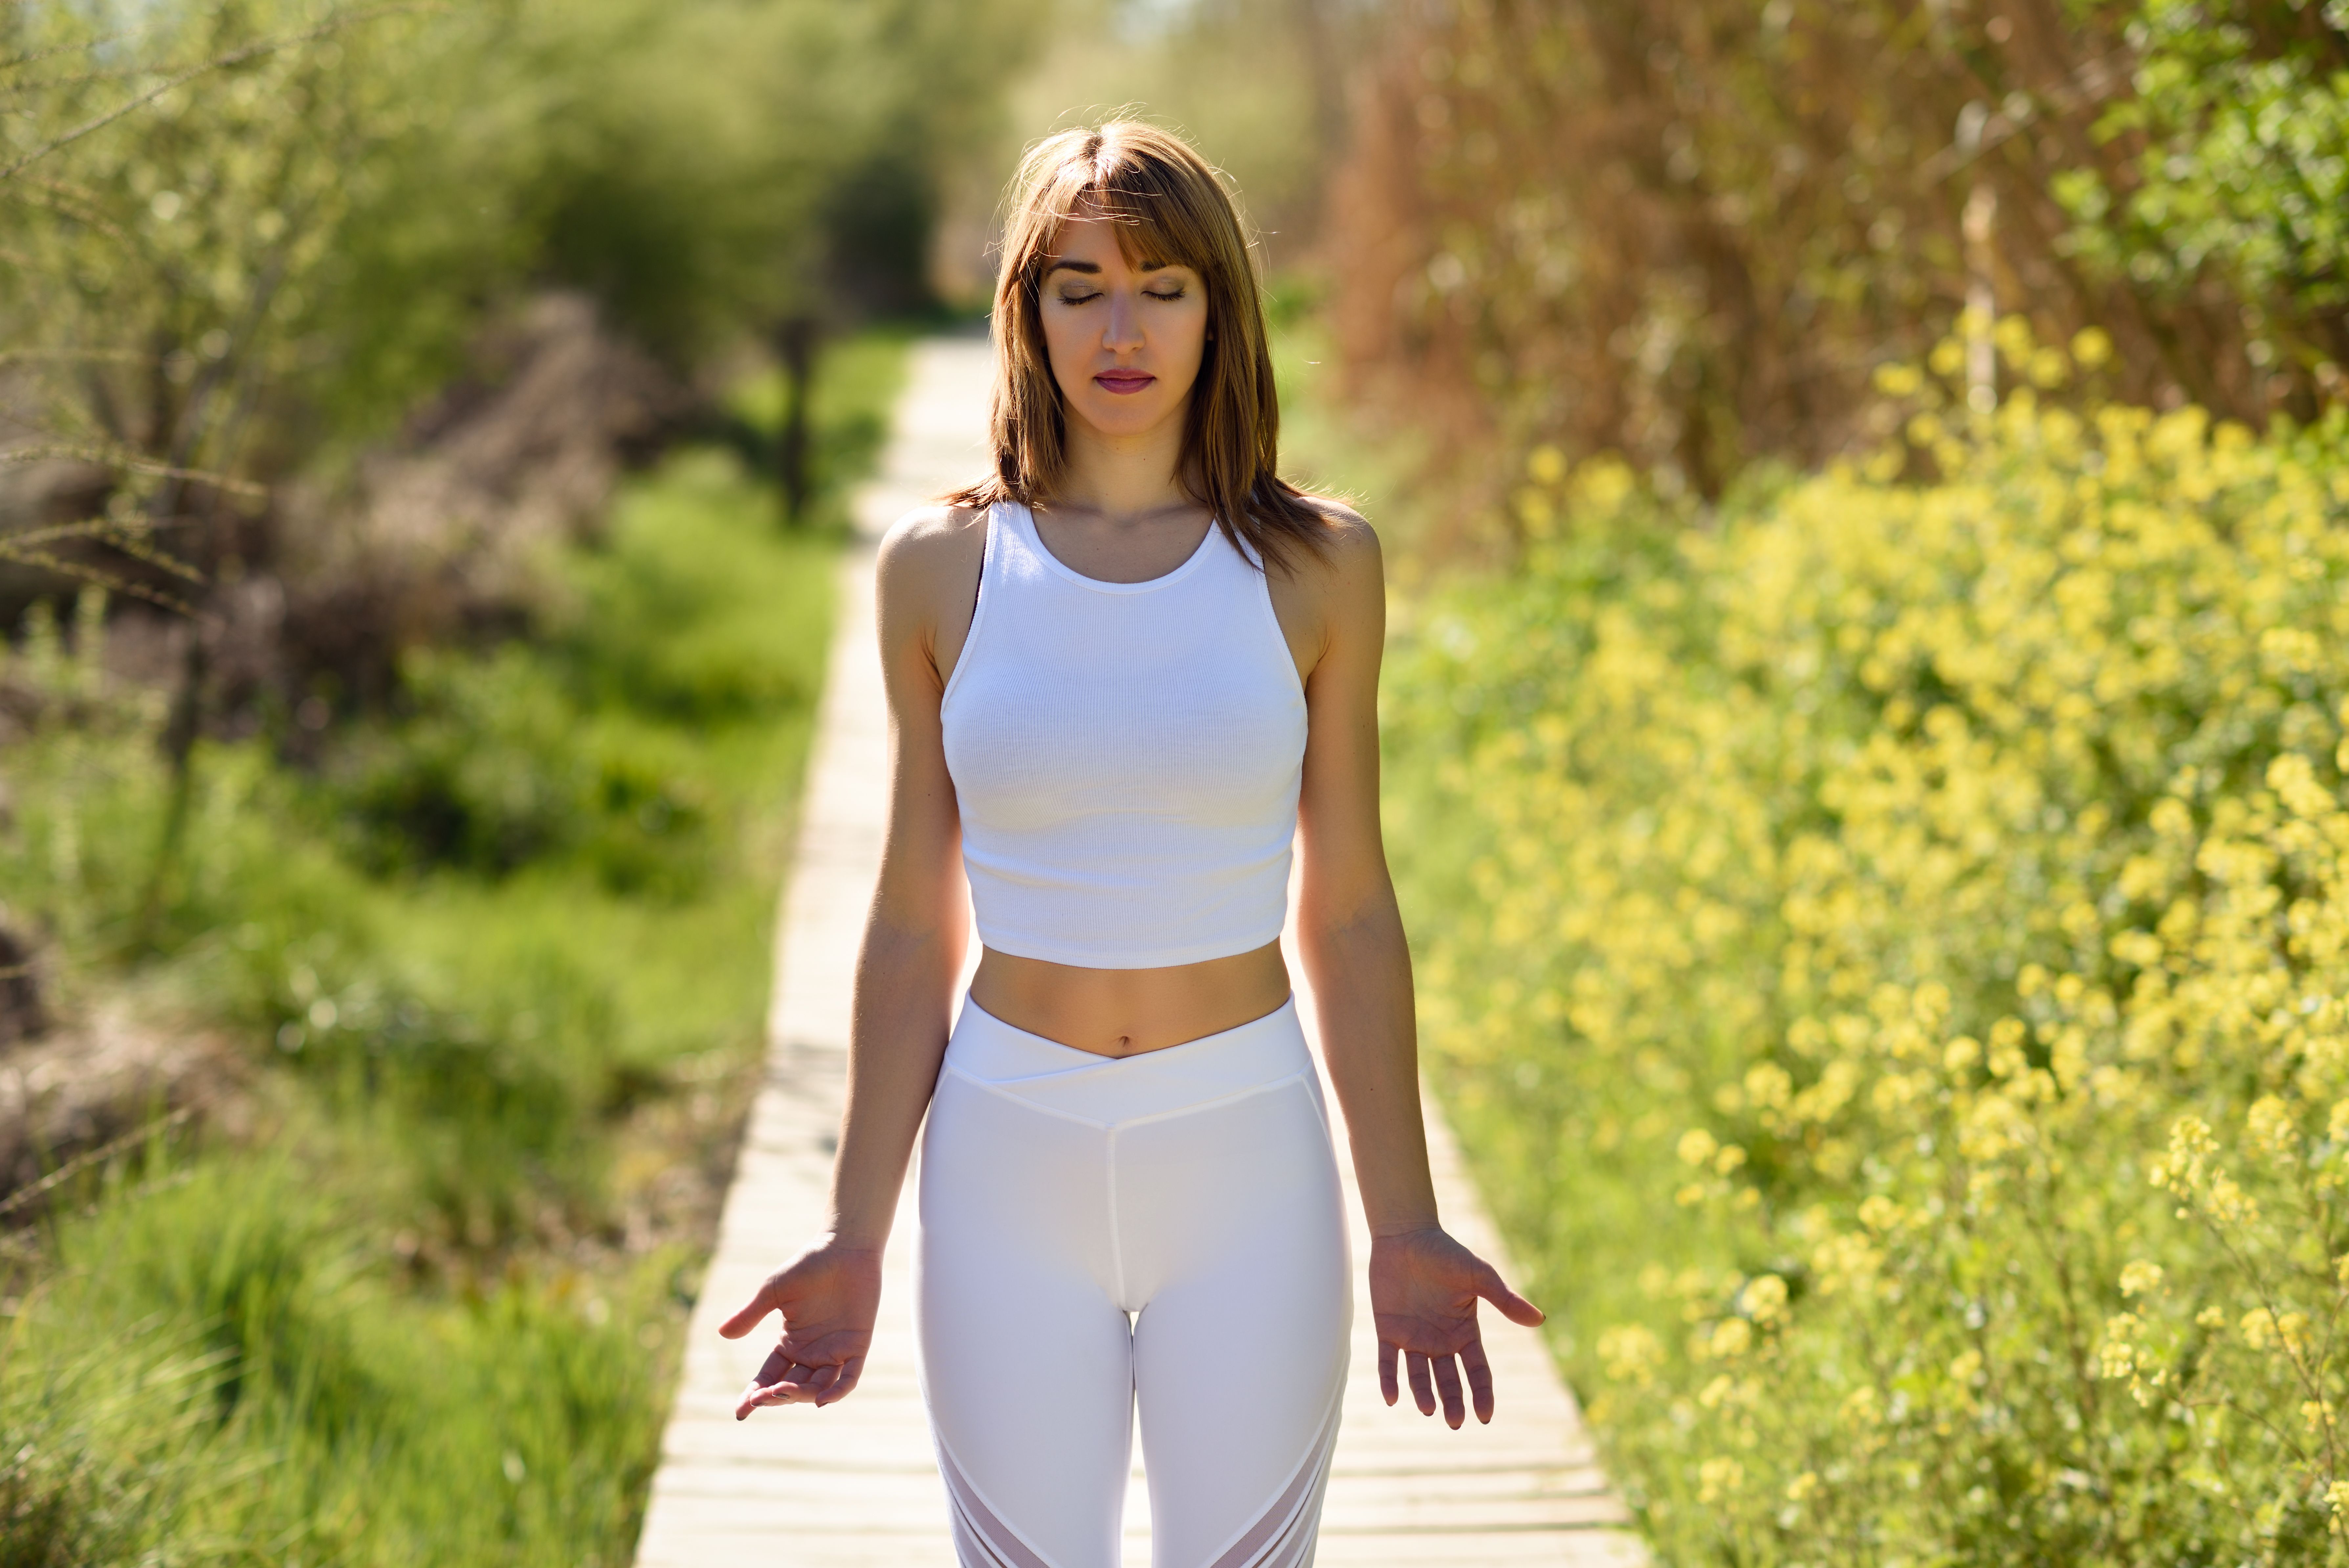
Stand straight in the center of your mat with your feet slightly hip-distant apart and parallel to each other. Keep both arms relaxed beside your torso, with both the palms facing toward the front. Hold this stance for 2 to 5 minutes with deep conscious breathing.
2. Gomukhasana (Cow Face Pose) - This is a seated cross-legged yoga asana in which the leg formation resembles a cow's face. It’s an excellent hip opener, and it helps to lengthen your spine. Start by sitting upright and cross both your legs so that your knees are stacked on top of one another.

To reach your arms behind, flex one arm up from the shoulder and the other from below on the side of your oblique. Elongate your spine to open your chest, and clasp your fingers behind your back. Hold this pose for 2 to 3 minutes, then alternate the placement of your legs and arms.
3. Utkatasana (Chair Pose) - This is the foundation yoga posture for getting into Eagle Pose. Start by standing in Mountain Pose, inhale deep, and keep both legs close.
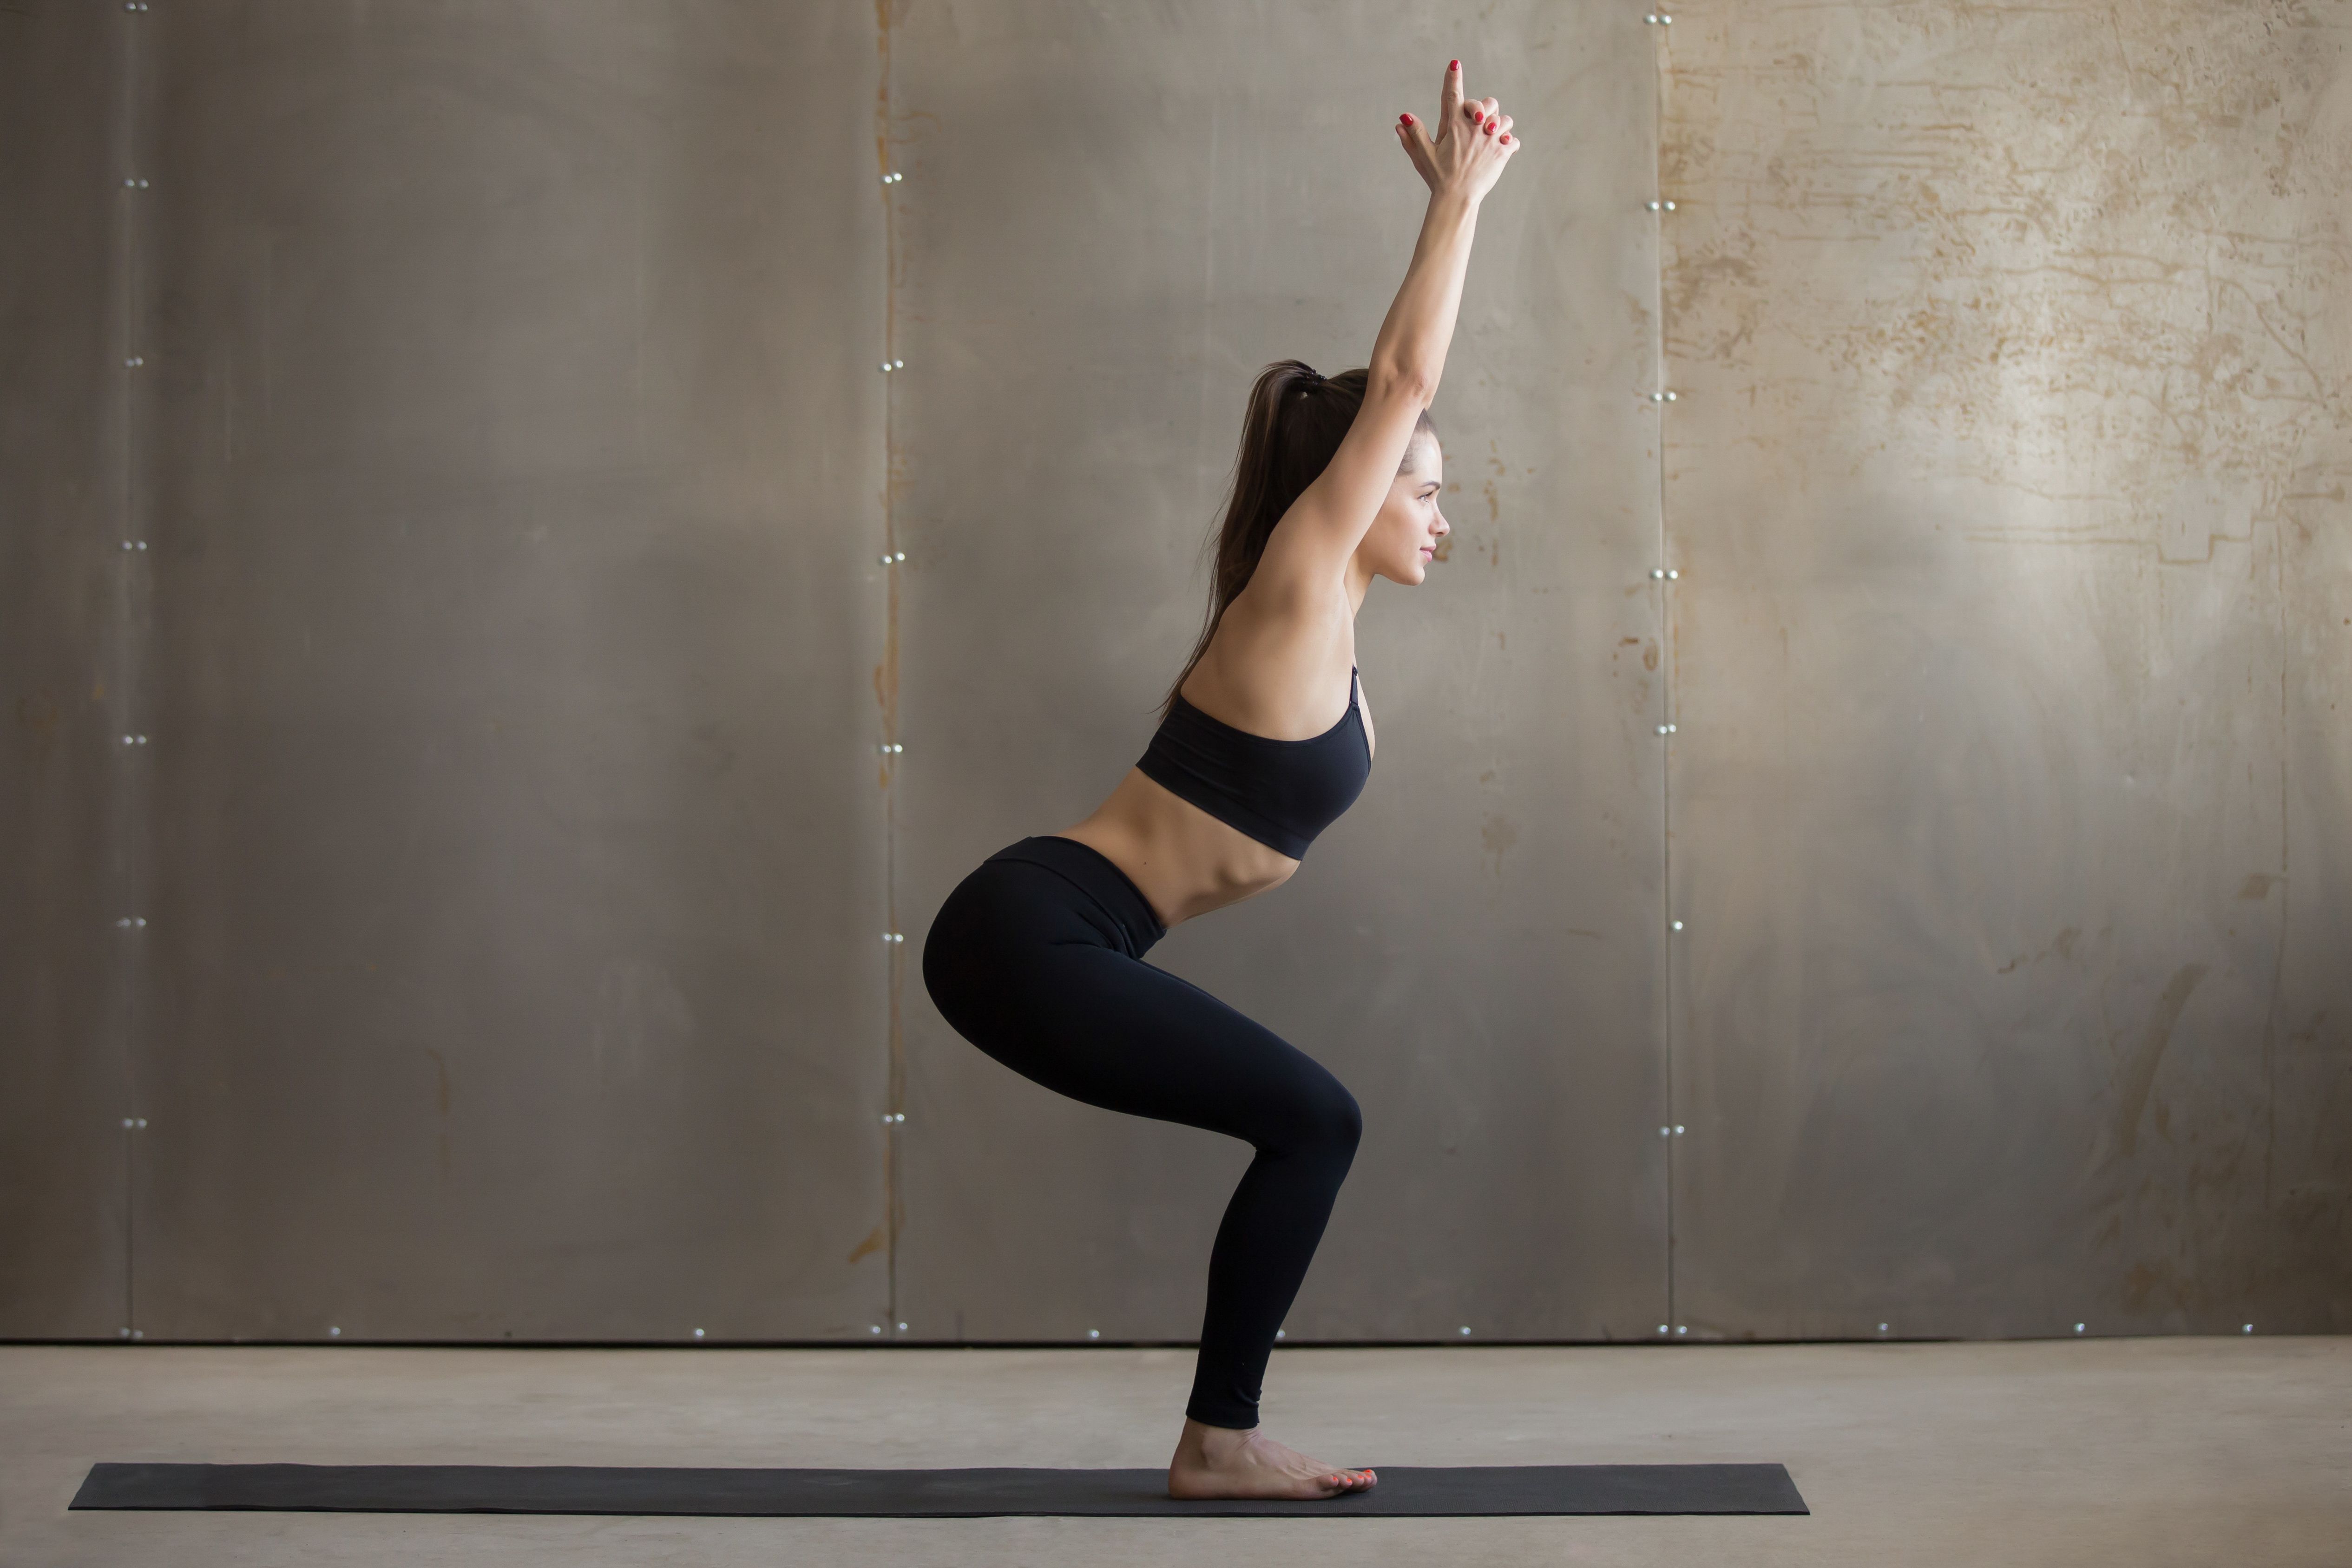
Now, exhale as you bend your knees and move your glutes at the back. Lift your arms overhead and hold this pose for 5 to 10 deep breaths. Keep repeating for 5 to 10 rounds, which will increase the blood flow in your lower body.
Part 2: Step-by-Step Instructions to Perform Garudasana
The following are steps to perform Garudasana or Eagle pose:
Step 1- Stand straight in Tadasana and take a few deep breaths, making sure to relax your body.
Step 2- Inhale, place both hands on your waist and engage your core muscles. Slightly bend your knees and lift your right foot off the mat.
Step 3- Now, wrap your right leg on your left leg and curl your right foot over your left calf muscle to lock your legs completely.
Step 4- Exhale and lower your glutes towards the ground, like you are doing a narrow squat.
Step 5- When you feel comfortable, raise both your arms to chest level and bend them from your elbows.
Step 6- Keep breathing gently as you wrap your left elbow over your right forearm and interlock your arms by clasping both palms together.
Step 7- Focus on your breath and your gaze to hold this formation here for the next 5 to 10 deep breaths.
Step 8- Exhale as you release your locked legs and arms. Stand straight for your blood to circulate back and then repeat the same on the other side.
Breath Awareness:
Inhale - When you engage your core and lift any one foot off the mat.
Exhale - As you lower down after interlocking, and when you finally release the pose.
Performance Duration for Beginners: Hold Eagle Pose for 5 to 10 deep breaths on each side.
Performance Duration for Advanced: Hold Eagle Pose for 60 to 90 seconds on each side.
Part 3: Things to Keep in Mind
The following are some alignment cues that are essential for the safe execution of Eagle Pose:
Engage the core: When the core muscles are loose, you’ll have a higher chance of becoming imbalanced and getting injured. Make sure your core muscles are super tight while balancing your entire body on one leg.
Once you have built a stable foundation with your core strength, engage your ankles, lower back, shoulders, and arms. This will help you hold the pose longer.
Focus your gaze: Eagles not only have the sharpest eyesight in the whole animal kingdom but they are also estimated to have 4 to 8 times better sight than humans.
This is because eagles are very well-focused, and you have to mimic the same kind of intense concentration to maintain your posture balance.
All balancing yoga poses are best performed with a focused Drishti (Gaze).
In Eagle Pose, your gaze must be focused on the tip of your thumbs, but if this is not possible for some reason, then try to focus your eyes on one point and only at that point until the practice is over.
Part 4: Relaxing Poses After Garudasana
Practice the below counter yoga poses after Eagle Pose to keep the energy flowing and to release any remaining muscle tension.
1. Uttanasana (Standing Forward Bend Pose) - After a long session of Eagle Pose, your spine will need some attention. Start by gently bending your upper body from the torso and reaching for your toes.

This is a full-body stretch, but you will feel a counter stretch in your lower back and hamstrings, providing a soothing sense of release. Hold this pose here for 1 to 2 minutes. This forward bend helps the blood flow back into your head, arms, and shoulders, energizing them again.
2. Prasarita Padottanasana (Wide-Legged Standing Forward Bend) - From the forward bend pose, widen your legs to more than hip-width apart and perform the same bending action.

Place your hands on the floor and breathe deeply as you hold this pose for a few minutes. This will help you relax your mid-back, neck, and legs even deeper.
3. Malasana (Garland Pose) - Get into this deep yogi squat to release any leftover tension in your ankles, tailbone, thighs, knees, and pelvic floor. From the wide-legged pose, continue to exhale and pull your glutes close to the ground in a deep squat position.
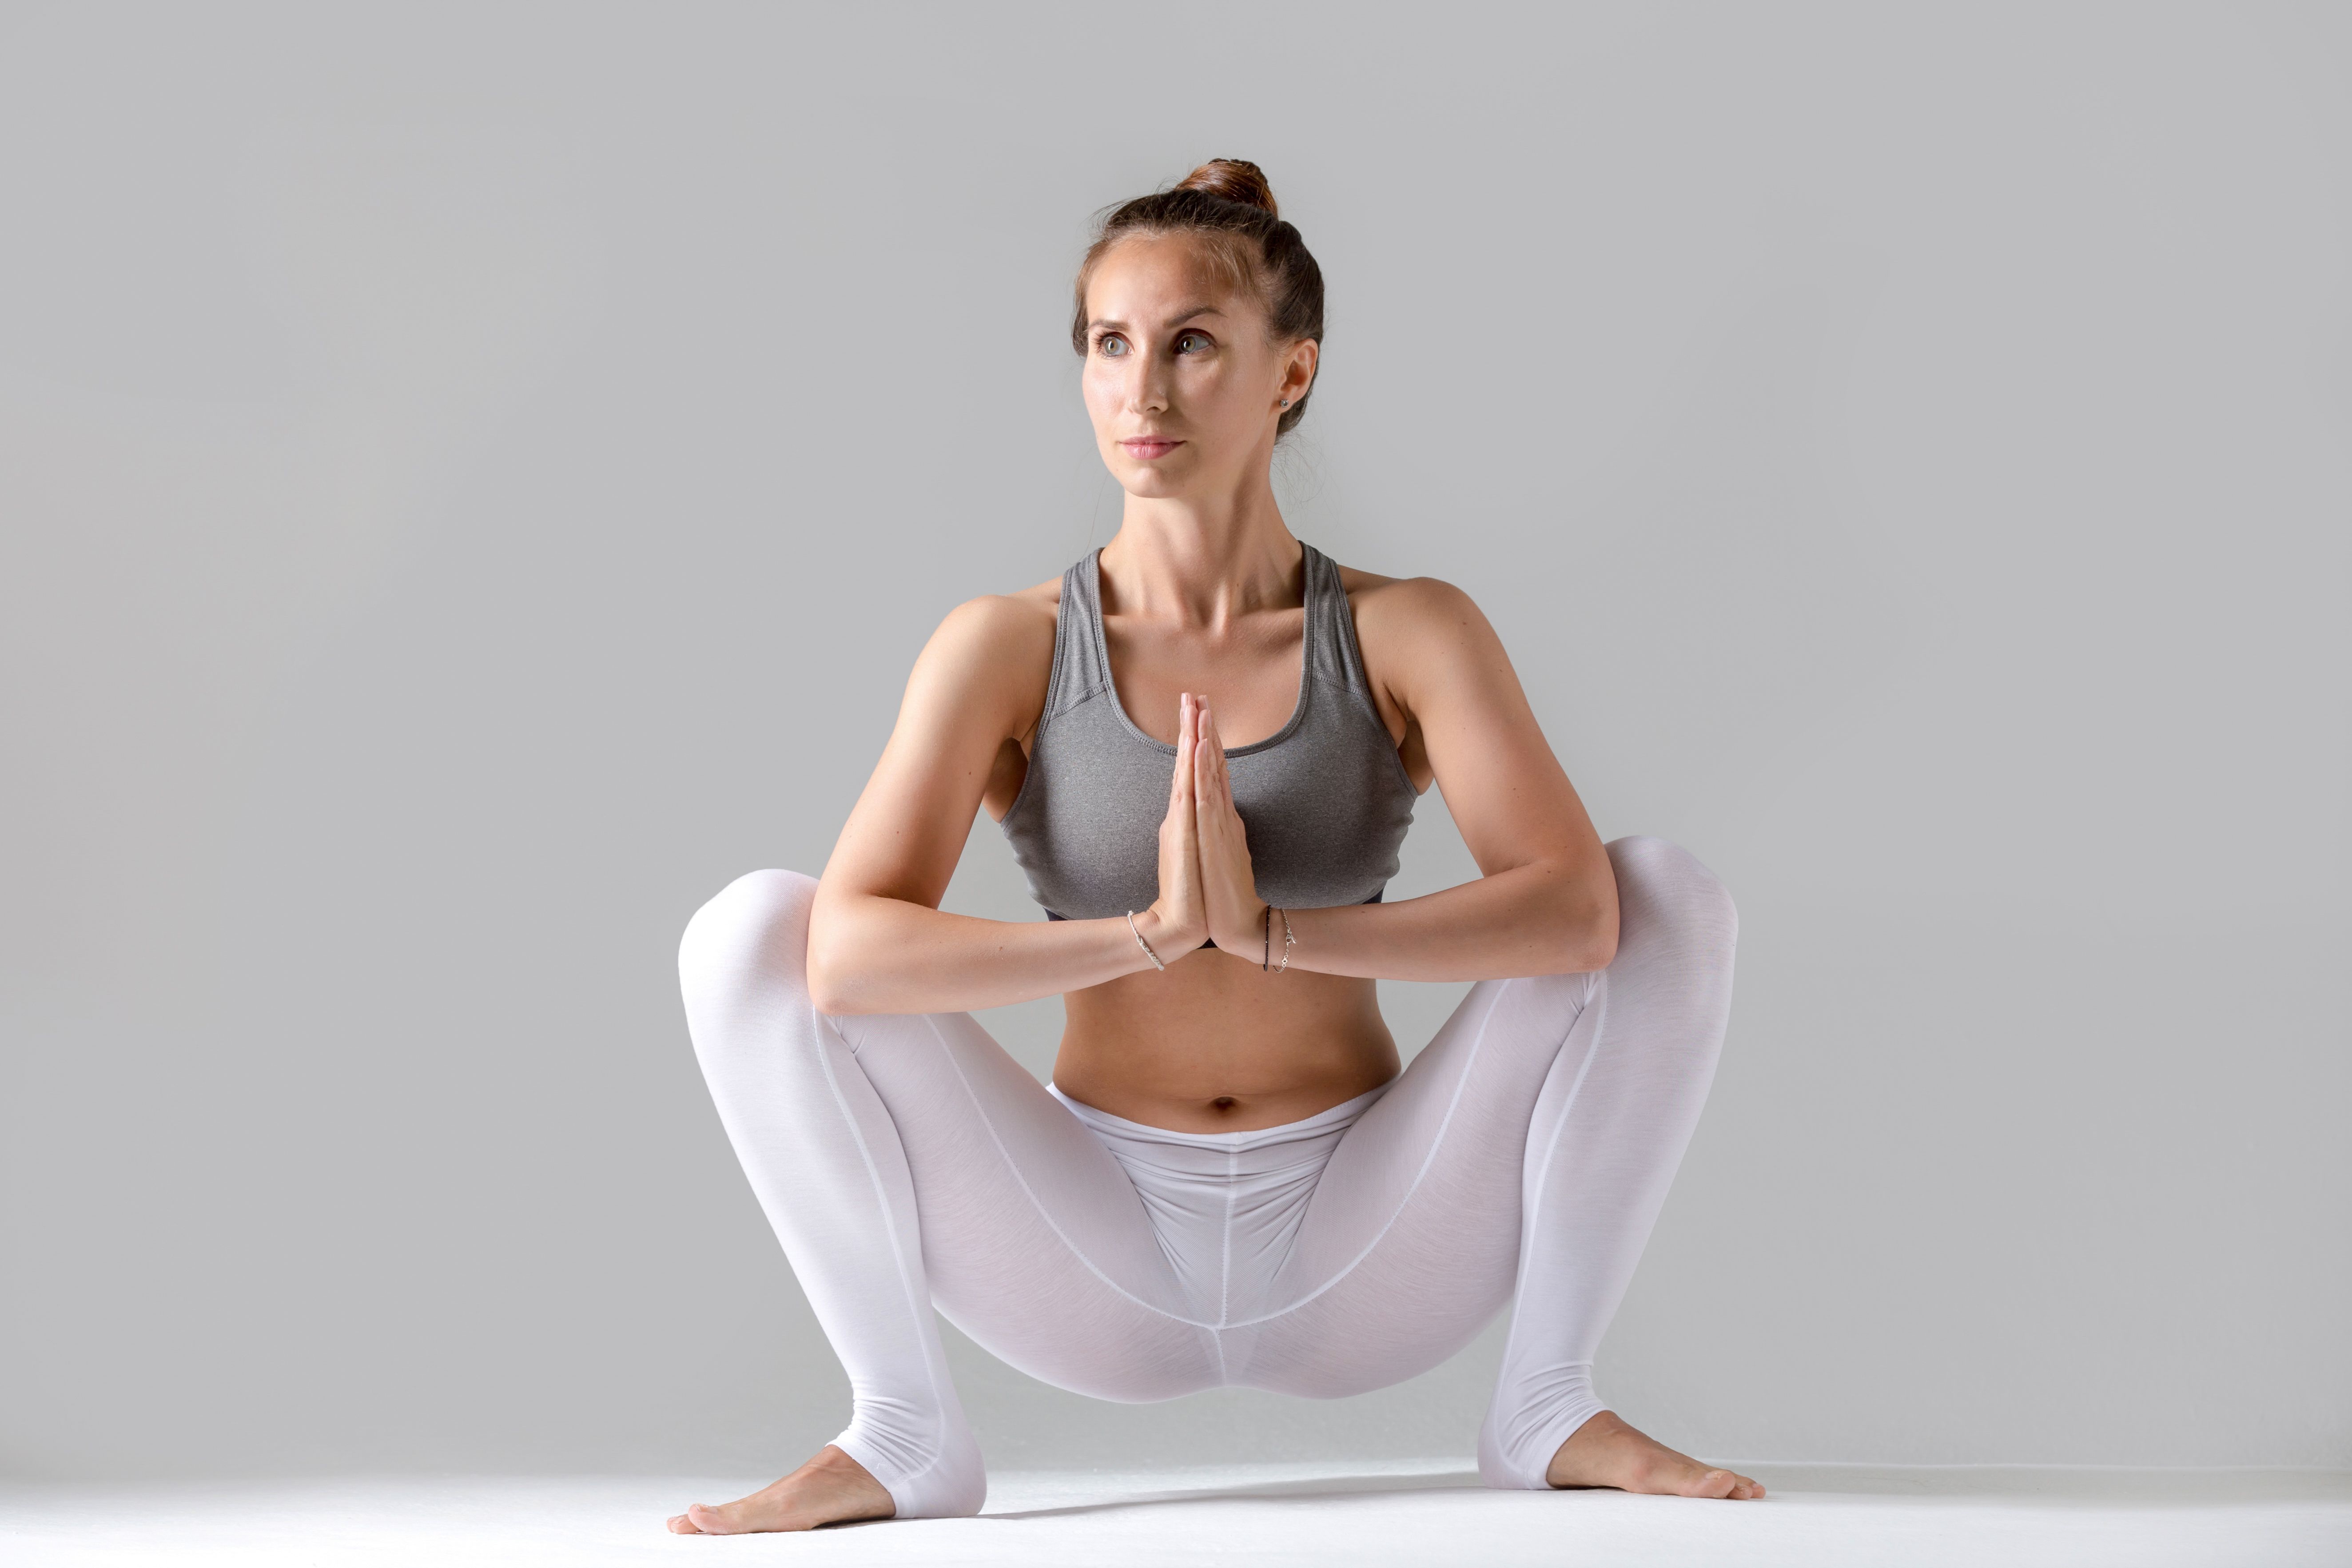
Place your arms close to your chest in prayer formation and make sure your thighs are pointing out with the resistance of your arms. Hold this pose and breathe deeply until your whole body feels relaxed.
Garudasana Variations to Consider
Take a look at these Eagle Pose variations for both beginner and advanced yogis:
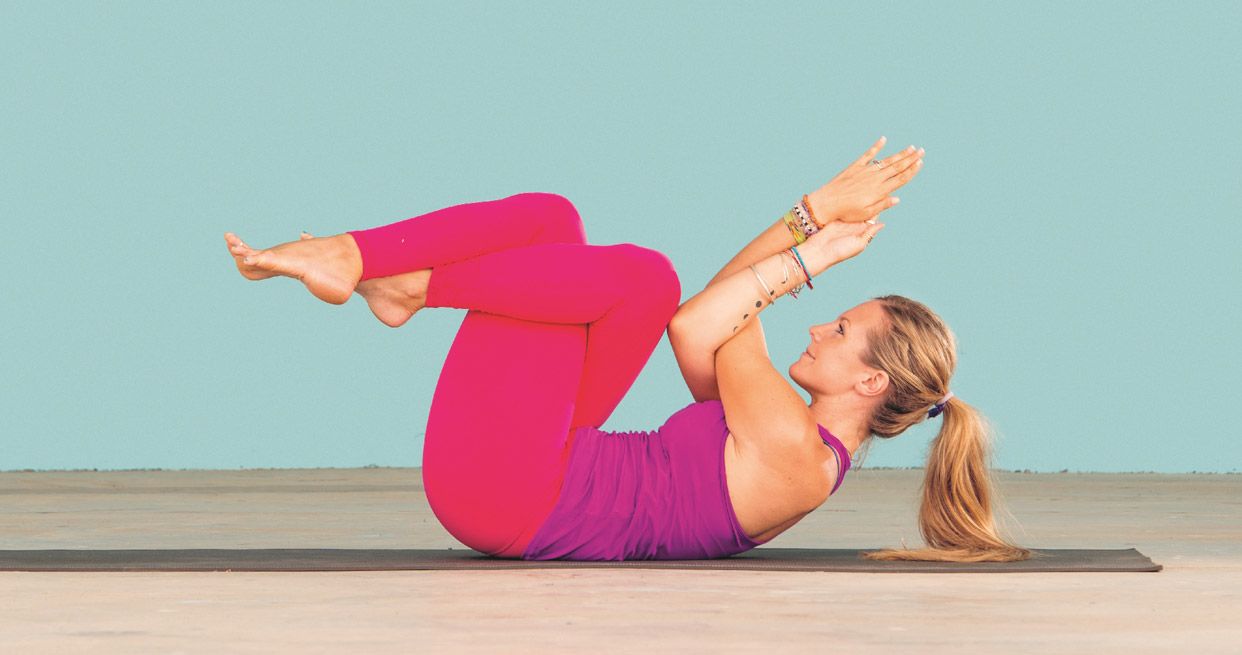
1. Reclining Eagle Crunch: This is a super core strengthening dynamic move for anyone who wants to work their abs. Start by lying down on your back on the yoga mat, and cross your legs and arms in the eagle formation. Engage your core muscle and try to perform crunches with your abs in this eagle formation.
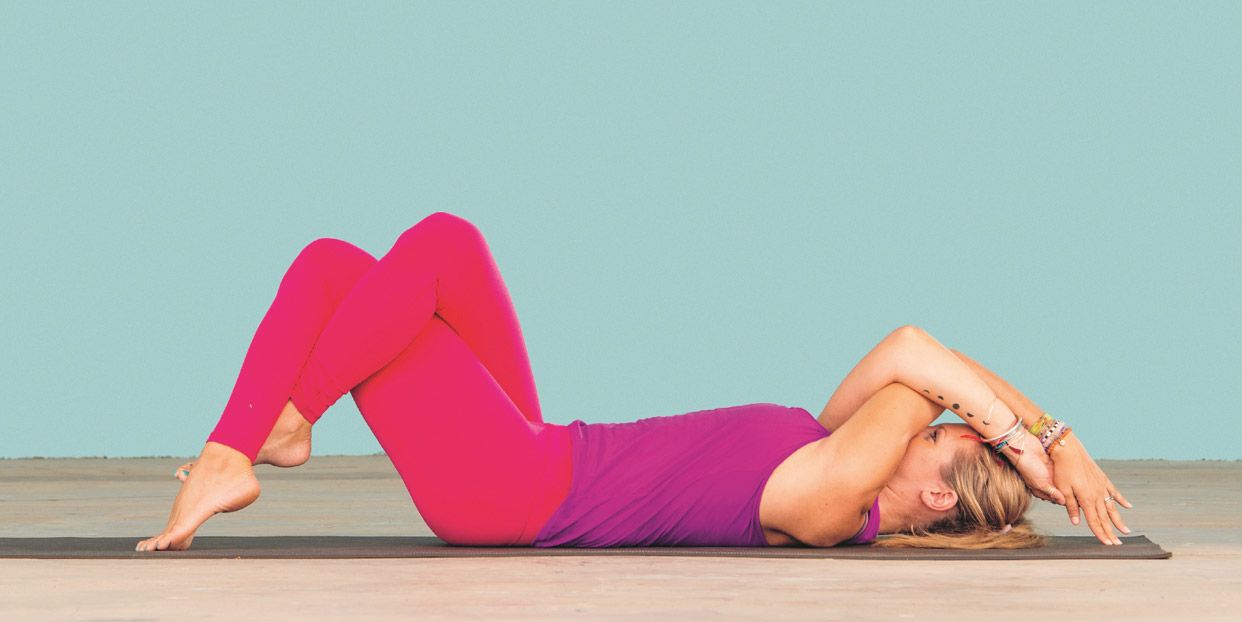
Take a deep breath and expand your abs. Now, exhale as you come up, touch your elbows with your knees as you crunch, and hold your body here for two seconds. Repeat, and perform ten reps of these for two rounds on each side.
2. Eagle Pose Low Squat: Try squatting low in Eagle Pose to feel a burn in your glutes. Start with the basic Garudasana practice, focus your gaze, and slowly lower your pelvis to the ground.
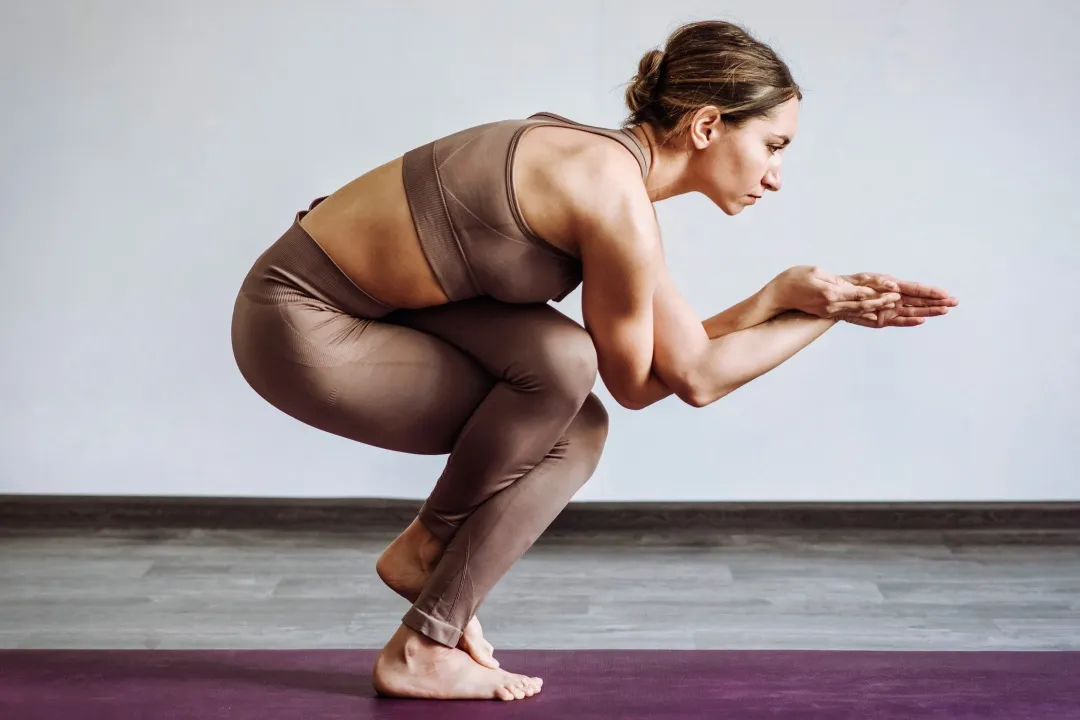
Stabilize your body with an engaged core and rounded back as you hold this variation for a few seconds on each side.

Enjoy a Free 1-on-1 Session with a Coach!
Receive personalized guidance tailored to your unique fitness goals, live with a dedicated coach—no credit card required.
Frequently Asked Questions about Garudasana
The following are some important health benefits of the Garudasana:
- Enhances concentration.
- Stretches the entire body.
- Tones the legs and shoulders.
- Strengthens the core and knees.
- Increases body balance and awareness.
- Improves flexibility and mobility in the body.
Beginners should avoid performing the Garudasana pose because of the complexity involved in executing the pose. Cross-formation with all limbs balanced on one leg may be difficult. It’s better to first work on standing body balance yoga asanas (e.g. chair pose) and some mobility drills for arms as well as legs. Then gradually, you can get into the main Eagle Pose.
Garudasana is a combination of Sanskrit words in which Garuda means Eagle and Asana means pose or posture or seat.
In Garudasana, the body is balanced on one leg at a time. This improves strength in your legs, glutes, and quads. Over time with regular practice, your thighs will begin to increase in tone. Garudasana is a great pose for improving the mobility of your ankle and knee joints.
It’s best to avoid Garudasana if you are a beginner, if you have knee or elbow arthritis, if you’re in your last pregnancy trimester, you have chronic back pain, or if you have a severe pelvis or spine injury.


.webp)
%20(7).jpg)
