What is Eka Pada Rajakapotasana (One-Legged King Pigeon Pose)?
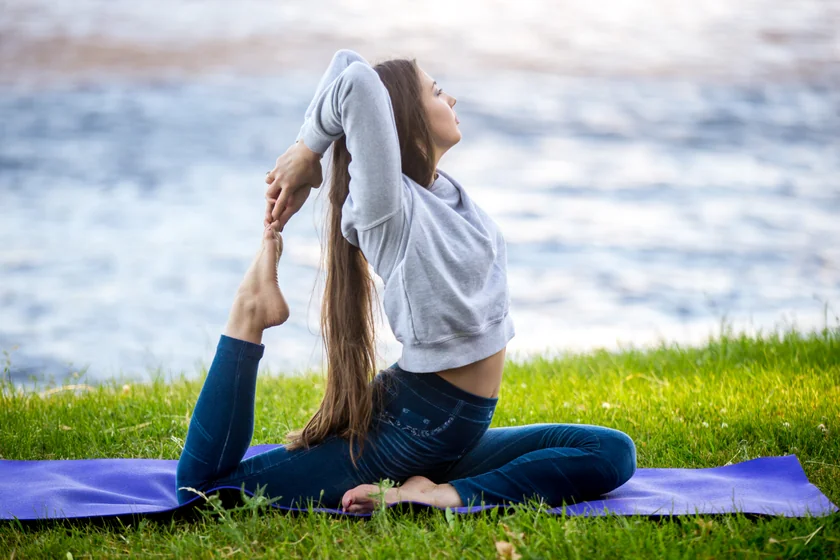
Eka Pada Rajakapotasana, or One-Legged King Pigeon Pose, is an advanced seated yoga asana to deepen your backbend yoga practice, and improve flexibility in your lower body and spine.
This advanced yoga pose is a combination of backbend and hip-opener yoga. Not only will it target the lower back, but also flex your lower body and help you strengthen your core, neck, and shoulders simultaneously.
Overview & Etymology
In Sanskrit 'Eka' means one, 'Pada' means foot, ‘Raja' means king, 'Kapota' means pigeon, and 'Asana' means posture.
One-Legged King Pigeon Pose is not found in any ancient Hatha yoga texts.
This pose was first officially described in the 20th century by Pattabhi Jois and B. K. S. Iyengar in their respective yoga books.
Sanskrit Name: एक पाद राजकपोतासन
Pronunciation: Ea-KAH pah-DAH rah-JAH-cop-poh-TAHS-anna
Pose Type: Seated Hipopener and Backbend Also known as: One-Legged King Pigeon Pose
Strengthens: Core Muscles, Lower Back, Pelvis, and Shoulders.
Stretches: Spine, Shoulders, Thorax, Inner Thighs, Hip-Flexors, and Abdomen.
Health Benefits of Eka Pada Rajakapotasana
Enhances body posture.
Activates the lower back.
Stretches and lengthens the hip flexors.
Opens the spine, abdomen, chest, and shoulders.
Enhances range of motion in the hip joint and tailbone area.
Stimulates Muladhara Chakra, Throat Chakra, and Sacral chakra.
Improves flexibility and strength in the inner thighs and groin area.
Has therapeutic effects like reduced back pain, anxiety, stress, and fatigue.
Simulates digestion, respiration, and reproduction organs for proper functioning.
When to Avoid Performing Eka Pada Rajakapotasana
Avoid during menstruation.
Avoid after an injury or any surgery.
Avoid during the final pregnancy trimester.
Avoid if you have chronic neck or back pain.
Avoid if you have osteoporosis or inflammatory arthritis.
How to do Eka Pada Rajakapotasana (One-Legged King Pigeon Pose)
The practice of getting into One-Legged King Pigeon Pose is divided into four different parts:
Part 1 - Preparatory Poses for Eka Pada Rajakapotasana
One-Legged King Pigeon pose is an intermediate to advanced level yoga pose. To avoid injury or sprain, it’s necessary to prep the essential muscles required for the main practice.
1. Baddha Konasana (Bound Angle Pose) - Sit in Staff pose and bend your knees to form a shape of butterfly wings with your legs. Your feet must be touching together, and your hands should be gripping both your feet together to ensure that your knees don't rise above ground level.
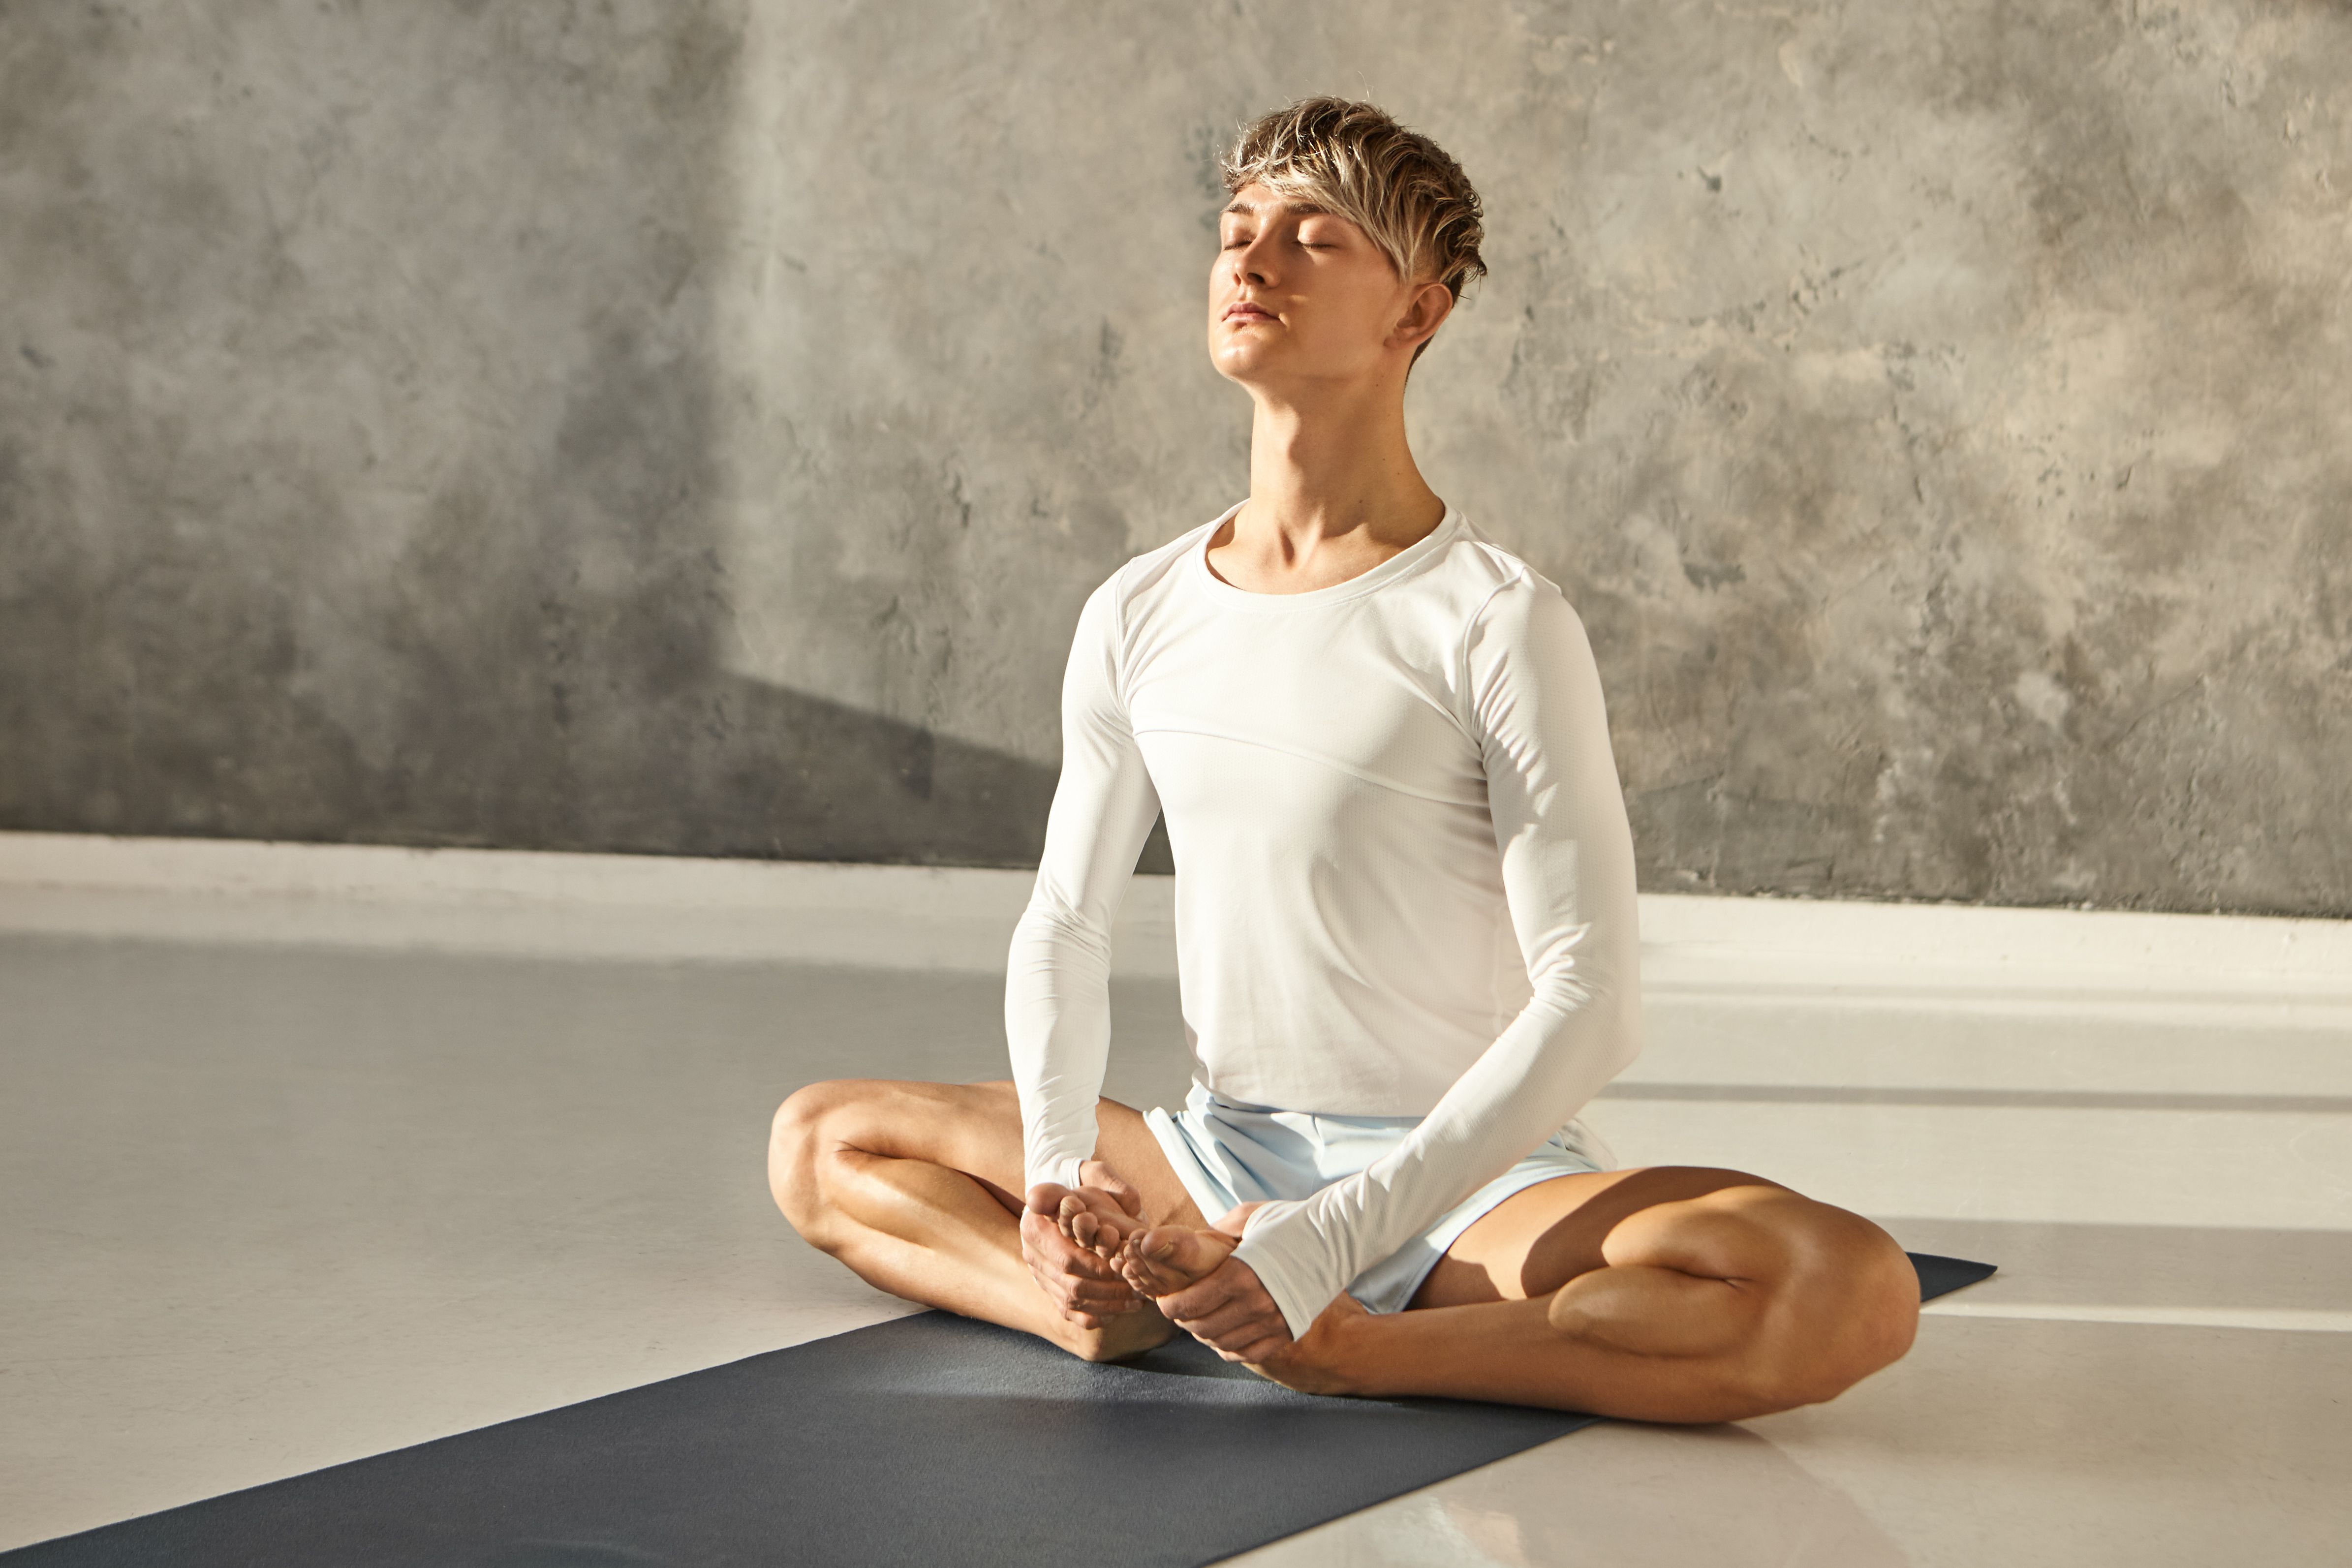
Sit with an upright spine as you feel the flexion around your pelvis and inner thighs. Hold this pose here for 1 to 2 minutes. You can also flap your legs for a few minutes in an up and down motion for enhanced blood circulation in the legs.
2. Salamba Bhujangasana (Sphinx Pose) - The Sphinx pose is also known as the Baby Cobra pose, and it's a warm-up backbend motion to activate blood circulation in the spine, tailbone, and lower back.
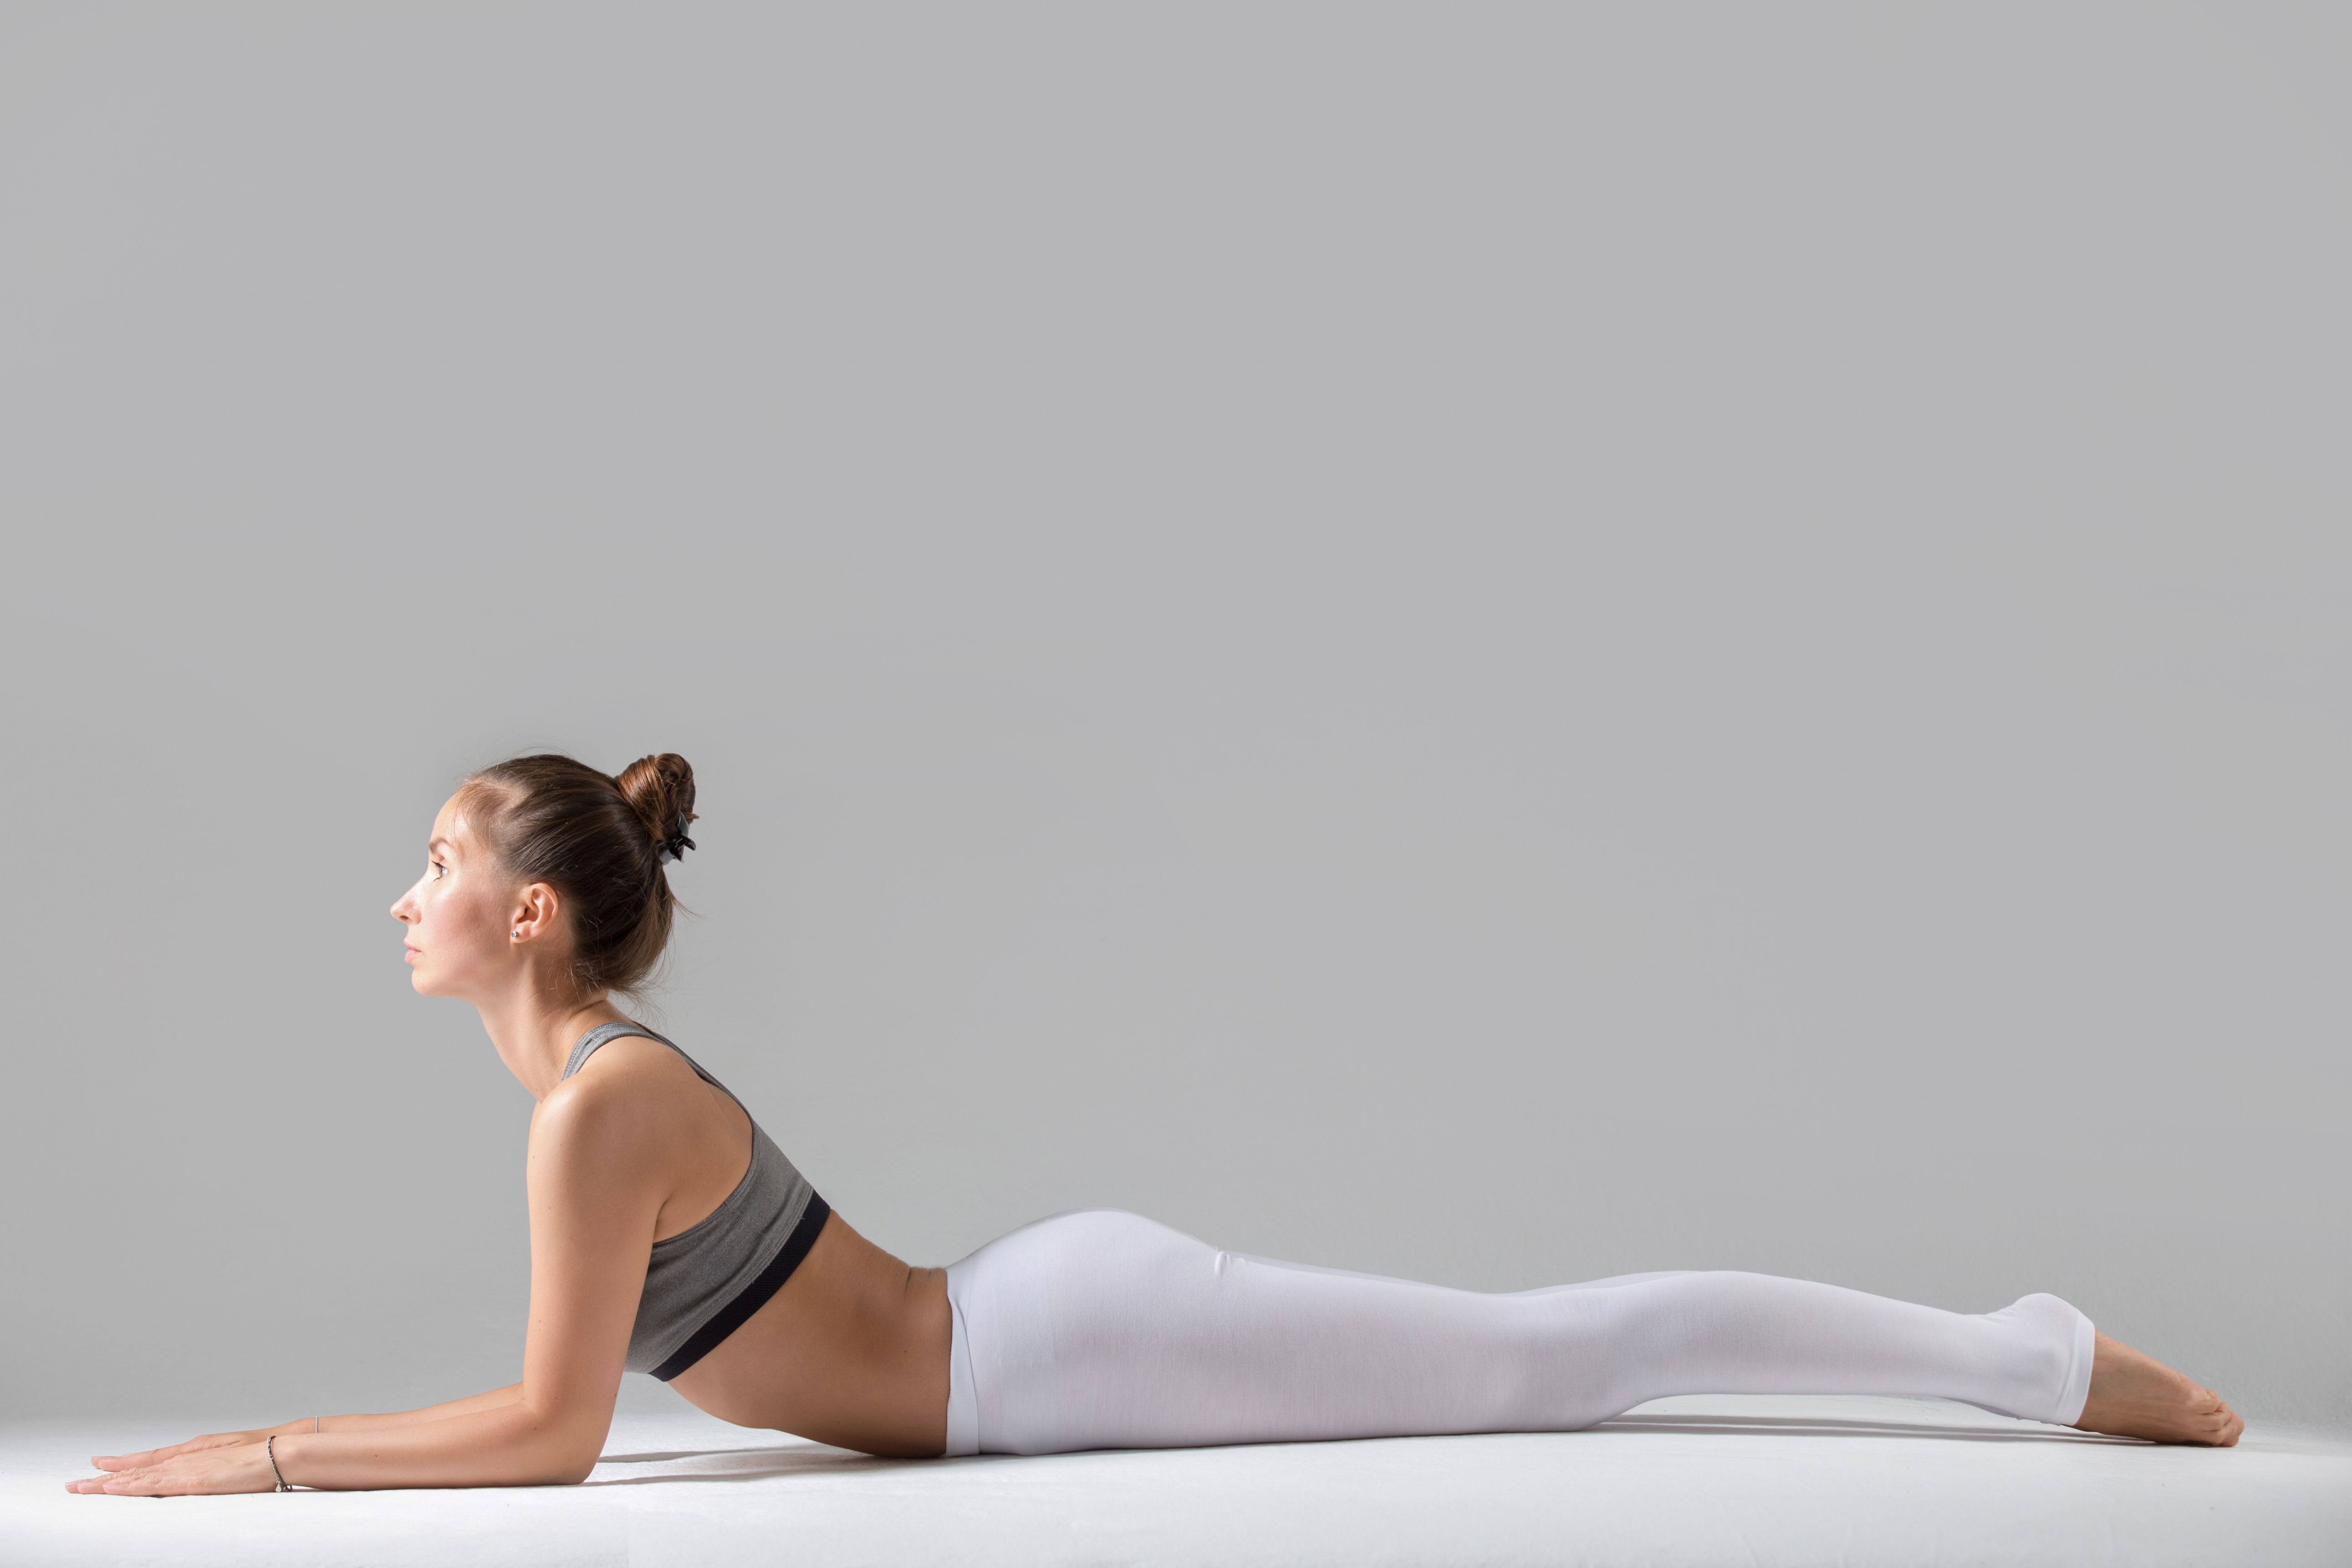
Start by lying down on your stomach and place your arms half-bent at your sides, close to your chest. Inhale gently as you lift up your upper body like the raised hood of a baby cobra. Feel your core compressing and lower back activating. Hold the pose here for 2 to 5 minutes.
3. Revolved One Leg King Pigeon Pose Prep - For your legs and arms to be prepared for the main asana, get into the Lizard Pose. As one leg is resting behind, place your knee on the mat and bend your leg.
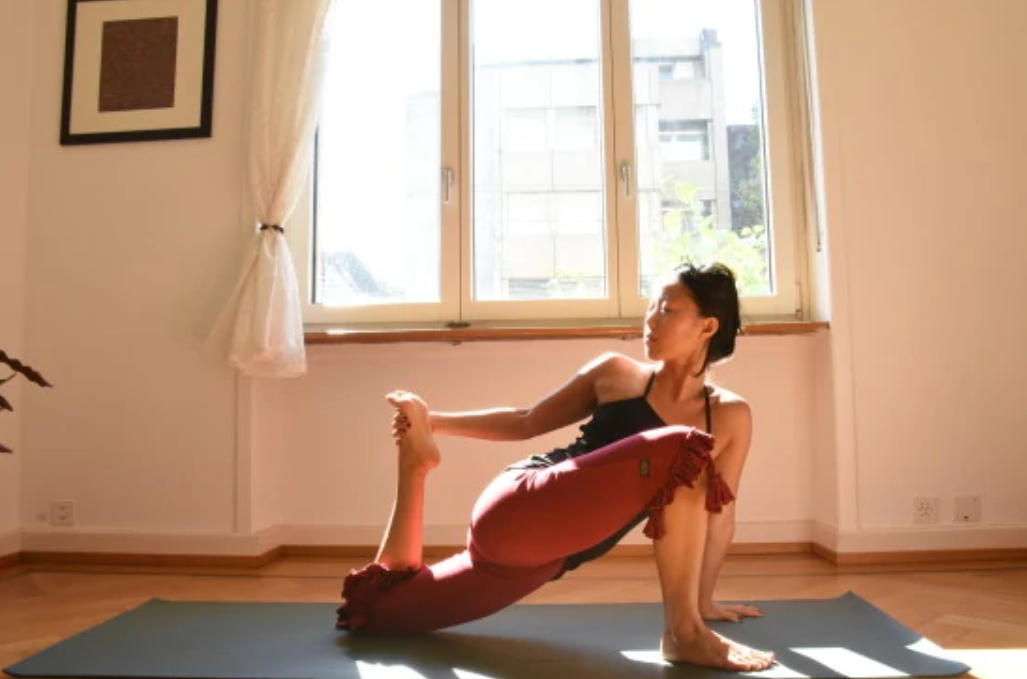
Gently twist your spine, gaze backward, and hold the foot of your same leg with your hands. Hold the pose here for a minute, then repeat the same on the other leg.
Part 2: Step-by-Step Instructions to Perform Eka Pada Rajakapotasana
The following are steps to practice Eka Pada Rajakapotasana:
Step 1- Start by getting into the Downward Facing Dog pose and take a moment to breathe deep as you rest your core and spine.
Step 2- Inhale in the Downward Dog pose, lift your right leg upwards, exhale, and bring your right leg toward the ground between your wrists.
Step 3- Make sure that your right knee is close to your right wrist and your right foot is close to your left wrist.
Step 4- Keep your left leg stretched behind you, with your toes pointing and heels facing the ceiling. Square your hips and sit comfortably on the mat.
Step 5- Again, inhale as you lengthen your spine, engage your core muscles and open your chest.
Step 6- Exhale to gently arch your lower back and bend your neck backward. This will help you open your chest, tailbone, and pelvic muscles even more.
Step 7- Inhale and bend your left leg behind you and hold the ankle with your left hand until you feel comfortable here.
Step 8- Once you feel comfortable enough, grab your left toe with both hands and twist your elbows toward the ceiling. Ensure that your arms are aligned overhead.
Step 9- Inhale and try to touch your head with your foot. Hold this pose for a few seconds here, and finally, exhale to release your left foot and get back into standard Pigeon Pose.
Step 10- Once you feel relaxed, repeat the same on the other side.
Breathe Awareness:
Inhale and exhale when in Downward Facing Dog position.
Inhale when your leg is lifted in the Downward Dog position.
Exhale as you rest one leg on the floor in between your wrists.
Inhale while lengthening your spine and engaging your core.
Exhale and arch your lower back.
Inhale, bend your leg behind, twist your elbows overhead, and touch your foot with your head.
Finally, exhale to release the pose and come to a resting position.
Performance Duration for Beginners: Hold One-Legged King Pigeon pose for 10-30 seconds on each side.
Performance Duration for Advanced: Hold One-Legged King Pigeon pose for 60-90 seconds on each side.
Part 3: Things to Keep in Mind
Follow the important alignment cues below if you are just starting your One-Legged King Pigeon Pose practice:
Keep your abdomen engaged: A tight core is the key to success for perfect execution of Eka Pada Rajakapotasana because it helps you to arch your back and open your chest properly. Ensure that you inhale and pull your navel inwards before getting into the main pose.
Keep that rear leg neutral: It's highly recommended to make sure your rear leg is pointing backward with your head facing toward the ceiling. Avoid any bending of the knee and curling of the foot.
Square your hips: Feeling confused about how to square your hips? While you are flexing the pelvis in Pigeon Pose, your body weight should not impact the balance in your glutes.
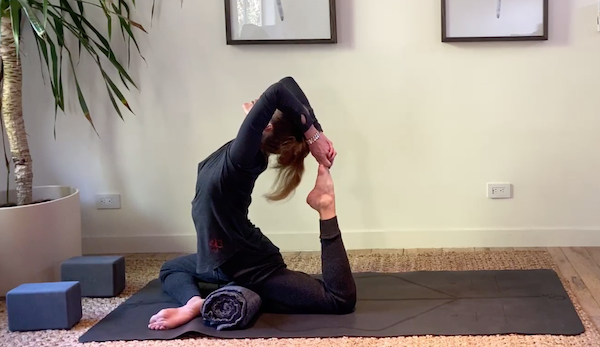
Make sure both your hips get equally stressed while you flex in Pigeon pose. Observe that your glutes are touching the ground completely and your body is balanced straight in the middle. If you’re unable to square your hips, try adding a rolled towel below your pelvis.
Part 4: Relaxing Poses After Eka Pada Rajakapotasana
To get your spine back into its neutral shape, and to relax your entire lower body, try the following relaxation poses post-practice:
1. Resting Pigeon Pose: Transition into a resting position from the One-Legged King Pigeon Pose. Bend your upper body forward on the ground and relax here for a few deep breaths.
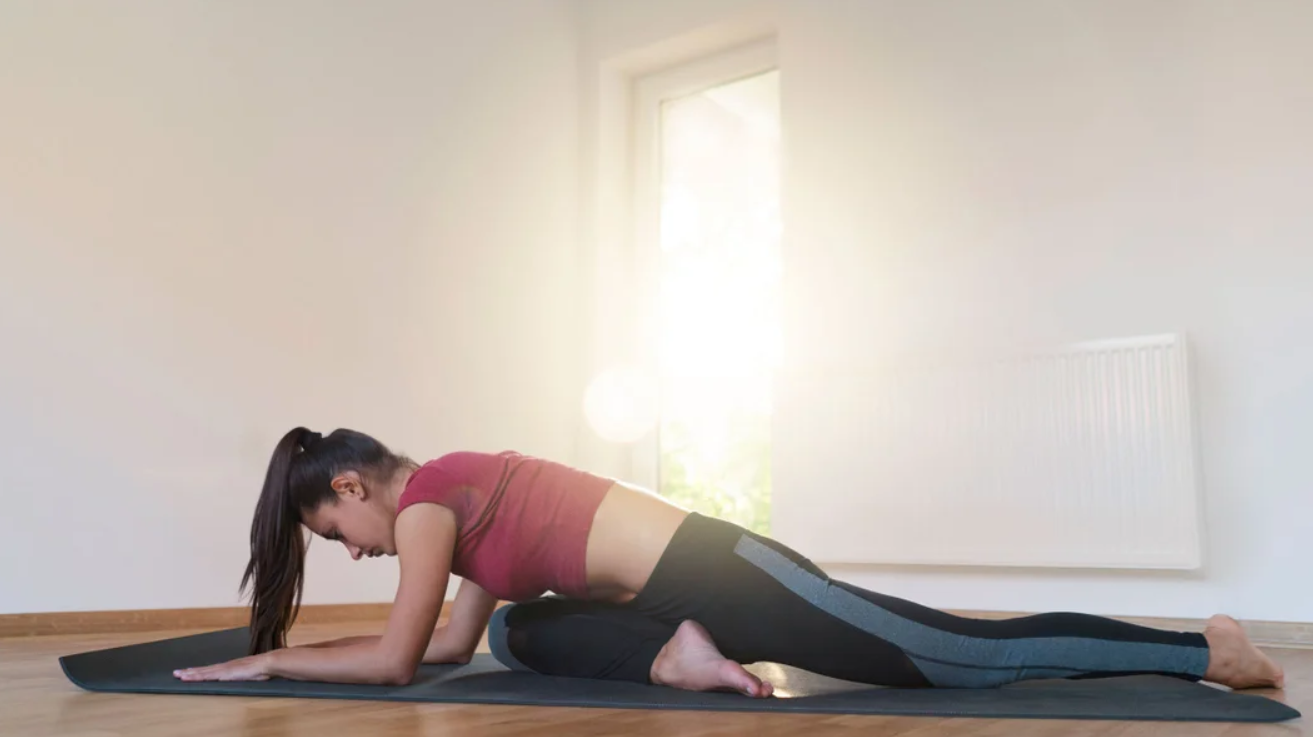
This pose will re-energize your lower back and upper body. You can also stretch your arms forward to relax your upper back and shoulders. Take deep breaths to hold the pose for one minute and repeat the same on the other side.
2. Adho Mukha Svanasana (Downward-Facing Dog Pose): From Resting Pigeon pose, move into Downward-Facing Dog. This pose will completely relax your core, tailbone, upper body, and hamstrings.

You can also bend one leg at a time for more relaxation in the glutes, calves, and hamstrings. Hold this pose on each side for one minute, and then move into a Standing Forward Bend.
Eka Pada Rajakapotasana Variations to Consider
Based on how comfortable you are, here are some easy and challenging variations of different levels:
1. Resting One-Legged King Pigeon Pose:
From Downward-Facing Dog, lift one leg upwards and sit in a One-Legged Pigeon pose. Engage your core muscles, arch your back little, and gently drop your head.
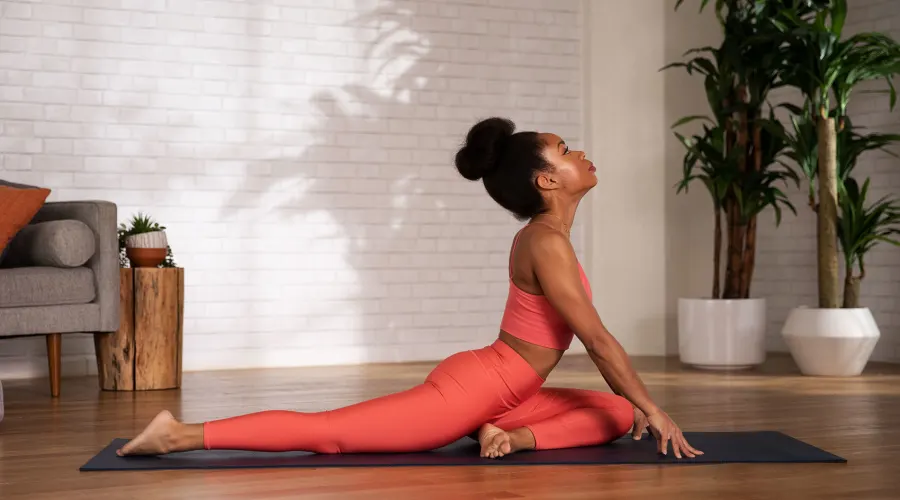
Beginners can practice this pose on both sides until they feel comfortable moving further. You can also perform this pose before transitioning onto another side.
2. Mermaid Pose: To get into Mermaid pose, continue the previous variation, bend your rear leg, and point your toes towards the ceiling. Lift both your arms overhead, bend your elbows, and clasp both hands behind your head.
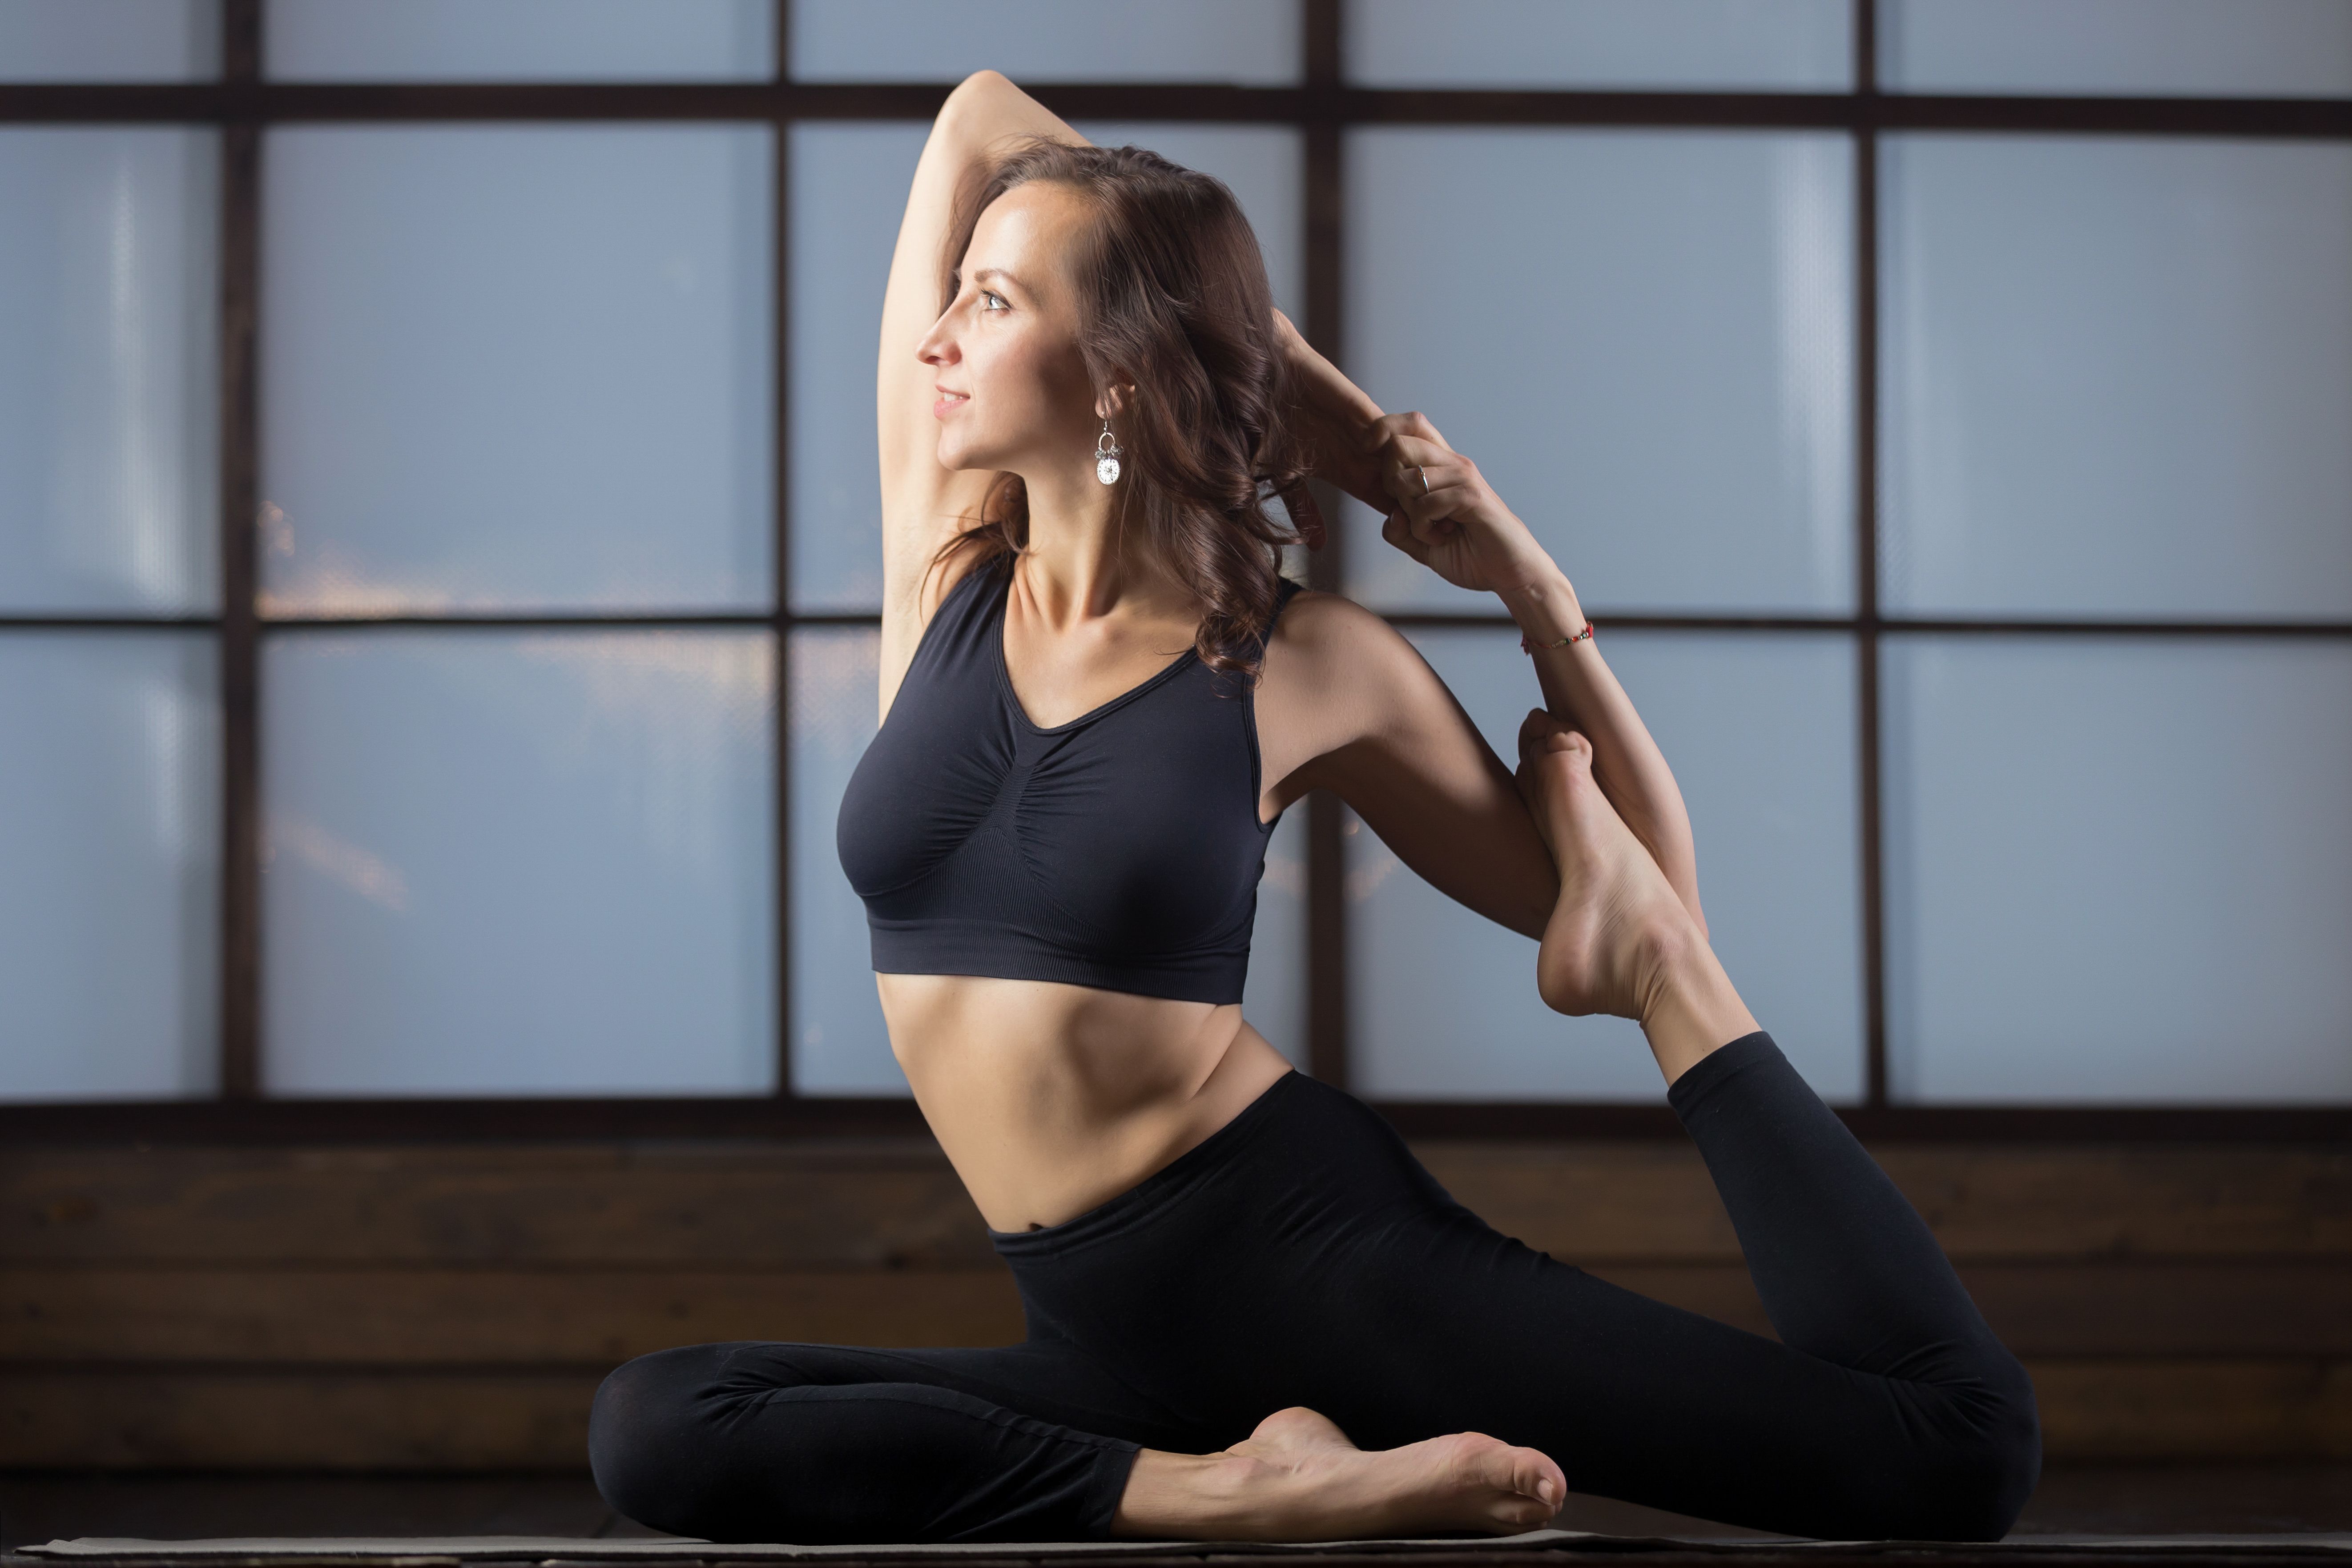
Now, hook your rear foot in the adjacent elbow. Hold this pose here on each side for a few seconds. This variation will help you build arm twisting strength and stability in your rear leg to perform the main pose.
Enjoy a Free 1-on-1 Session with a Coach!
Receive personalized guidance tailored to your unique fitness goals, live with a dedicated coach—no credit card required.
Frequently Asked Questions about Eka Pada Rajakapotasana
Yes, beginners can definitely perform Pigeon pose to open their hip and back muscles.
Pigeon pose will increase the range of motion in your lower body and create a foundation for more advanced yoga poses.
This pose is perfect for new yogis who are working on executing the Eka Pada Rajakapotasana or Kapotasana poses and want to build more strength.
There are various variation stretches in Pigeon pose for all levels of yogis to try:
- King Pigeon Pose
- Flying Pigeon Pose
- Classic Pigeon Pose
- Reclining Pigeon Pose
- Pigeon Pose with Spine Twist
- One-Legged King Pigeon Pose
- Resting Pigeon Pose with Forward Bend
- Bound Revolved One-Legged King Pigeon Pose
Reclining Pigeon pose or Dead Pigeon pose is a relaxation pose for your back and legs. In this pose, lie on your back, and position your legs in a number four formation.
Next, hold your lower leg and pull it towards your chest for a deep lower body opening stretch. Performing this on both sides for 4-5 minutes will release all tension in your lower body. This pose soothes tight muscles around your groin, quads, lower back, and hamstrings.
Pigeon pose can be painful for beginners with tight inner thighs, glutes, and hamstrings. Usually this pain only lasts a few days if you work on the pose regularly, helping your muscles get used to the stretch, which over time become stronger.
The following are some essential health benefits of the Eka Pada Rajakapotasana:
- Helps improve seated body balance.
- Opens the legs, thighs, pelvis, chest, and shoulders.
- Therapeutic for mild lower back pain and work stress.
- Lengthens and strengthens the chest, shoulders, and spine.
- Enhances flexibility, agility, and range of motion in the body.
You should not perform Rajakapotasana if you are a beginner with little flexibility, you have inflammatory arthritis, you are in the last trimester of pregnancy, you are currently in your menstrual cycle, or have had any serious injury or surgery.



.webp)
%20(7).jpg)
