What is Bakasana (Crow Pose)?

Bakasana, or Crane Pose, is an arm-balancing yoga asana for intermediate to advanced yoga practitioners. In this pose, both the palms are dug into the mat, with the legs off the mat and balanced on the elbows.
Crane Pose primarily works on your shoulder, arms, and core strength, and it helps to increase mental focus.
Bakasana is also very similar to Kakasana or Crow Pose, but the only difference between both is the arms' alignment. The arms are bent in Crow Pose, whereas the arms are kept entirely straight in Crane Pose (straight arms in Crane Pose symbolize the crane’s legs).
Overview & Etymology
Bakasana originated from Sanskrit words, ‘Baka’ meaning Crane, and ‘Asana’ meaning pose.
In the ancient scripture Mahabharata, Baka is described as a forest ogre who occupies the place where Pandavas came to live for their 12 years of exile.
After talking with the ogre, Yudhishthira (eldest Pandava) realizes that the ogre is not Baka but a mischievous nature spirit who’s here to test his patience. This story is symbolic of the power of calmness, communication, and kindness.
In a 17th-century Hatha Yoga text, Haṭha Ratnāvalī, Bakasana is mentioned on number 62 out of the 84 yoga asanas taught by Lord Shiva.
Also, Sritattvanidhi, a 122 hatha yoga posture text from the 19th century, has mentioned details about both Bakasana and Kakasana.
According to different yoga books, lineages, and gurus, Crane Pose is executed in different ways.
For example - B.K.S Iyengar describes Bakasana as a straight arm balance. Whereas many practitioners in the West perform it with a bent arm and call it Bakasana.
Sanskrit Name: बकासन Pronunciation: bah-KAHS-ah-nah
Pose Type: Arm Balance Also known as: Crane Pose or Crow Pose
Strengthens: Arms, Wrist, Shoulders, and Core
Stretches: Forearms and Upper Back
Health Benefits of Bakasana
Improves core strength.
Enhances focus and concentration.
Strengthens and lengthens the spine.
Tones the muscles in the upper body.
Improves digestive and reproductive organs' function.
Strengths the shoulders, forearms, wrists, hip flexors, and traps.
Activates Manipura Chakra (Solar Plexus) and increases the flow of Prana (energy).
When to Avoid Performing Bakasana
Avoid after surgery.
Avoid if you have spondylitis.
Avoid if you have a severe injury.
Avoid if you have a hiatal hernia.
Avoid during migraines and vertigo.
Avoid if you have inflammatory knee arthritis.
Avoid during pregnancy and the menstrual cycle.
How to do Bakasana (Crane Pose)
Crane Pose is an advanced yoga asana, so beginners should divide their practice into a few segments for better understanding and speedy progress.
Below, we have divided this asana practice into four main parts – starting with warming up, moving to the main asana steps, correcting your posture, and relaxing your tensed muscles.
Lastly, for beginners as well as intermediates, we have added pose modifications and variations to adjust their Bakasana practice as per their comfort.
Part 1: Preparation for Bakasana
The following are some warm-up poses that you should practice to activate the glutes, core, wrists, and forearms before moving into Crane Pose.
1. Malasana (Garland Pose) - Malasana or the Yogi Squat is a deep hip opening position in yoga. This pose will quickly stretches your pelvis and improves blood circulation from your tailbone to your toes.
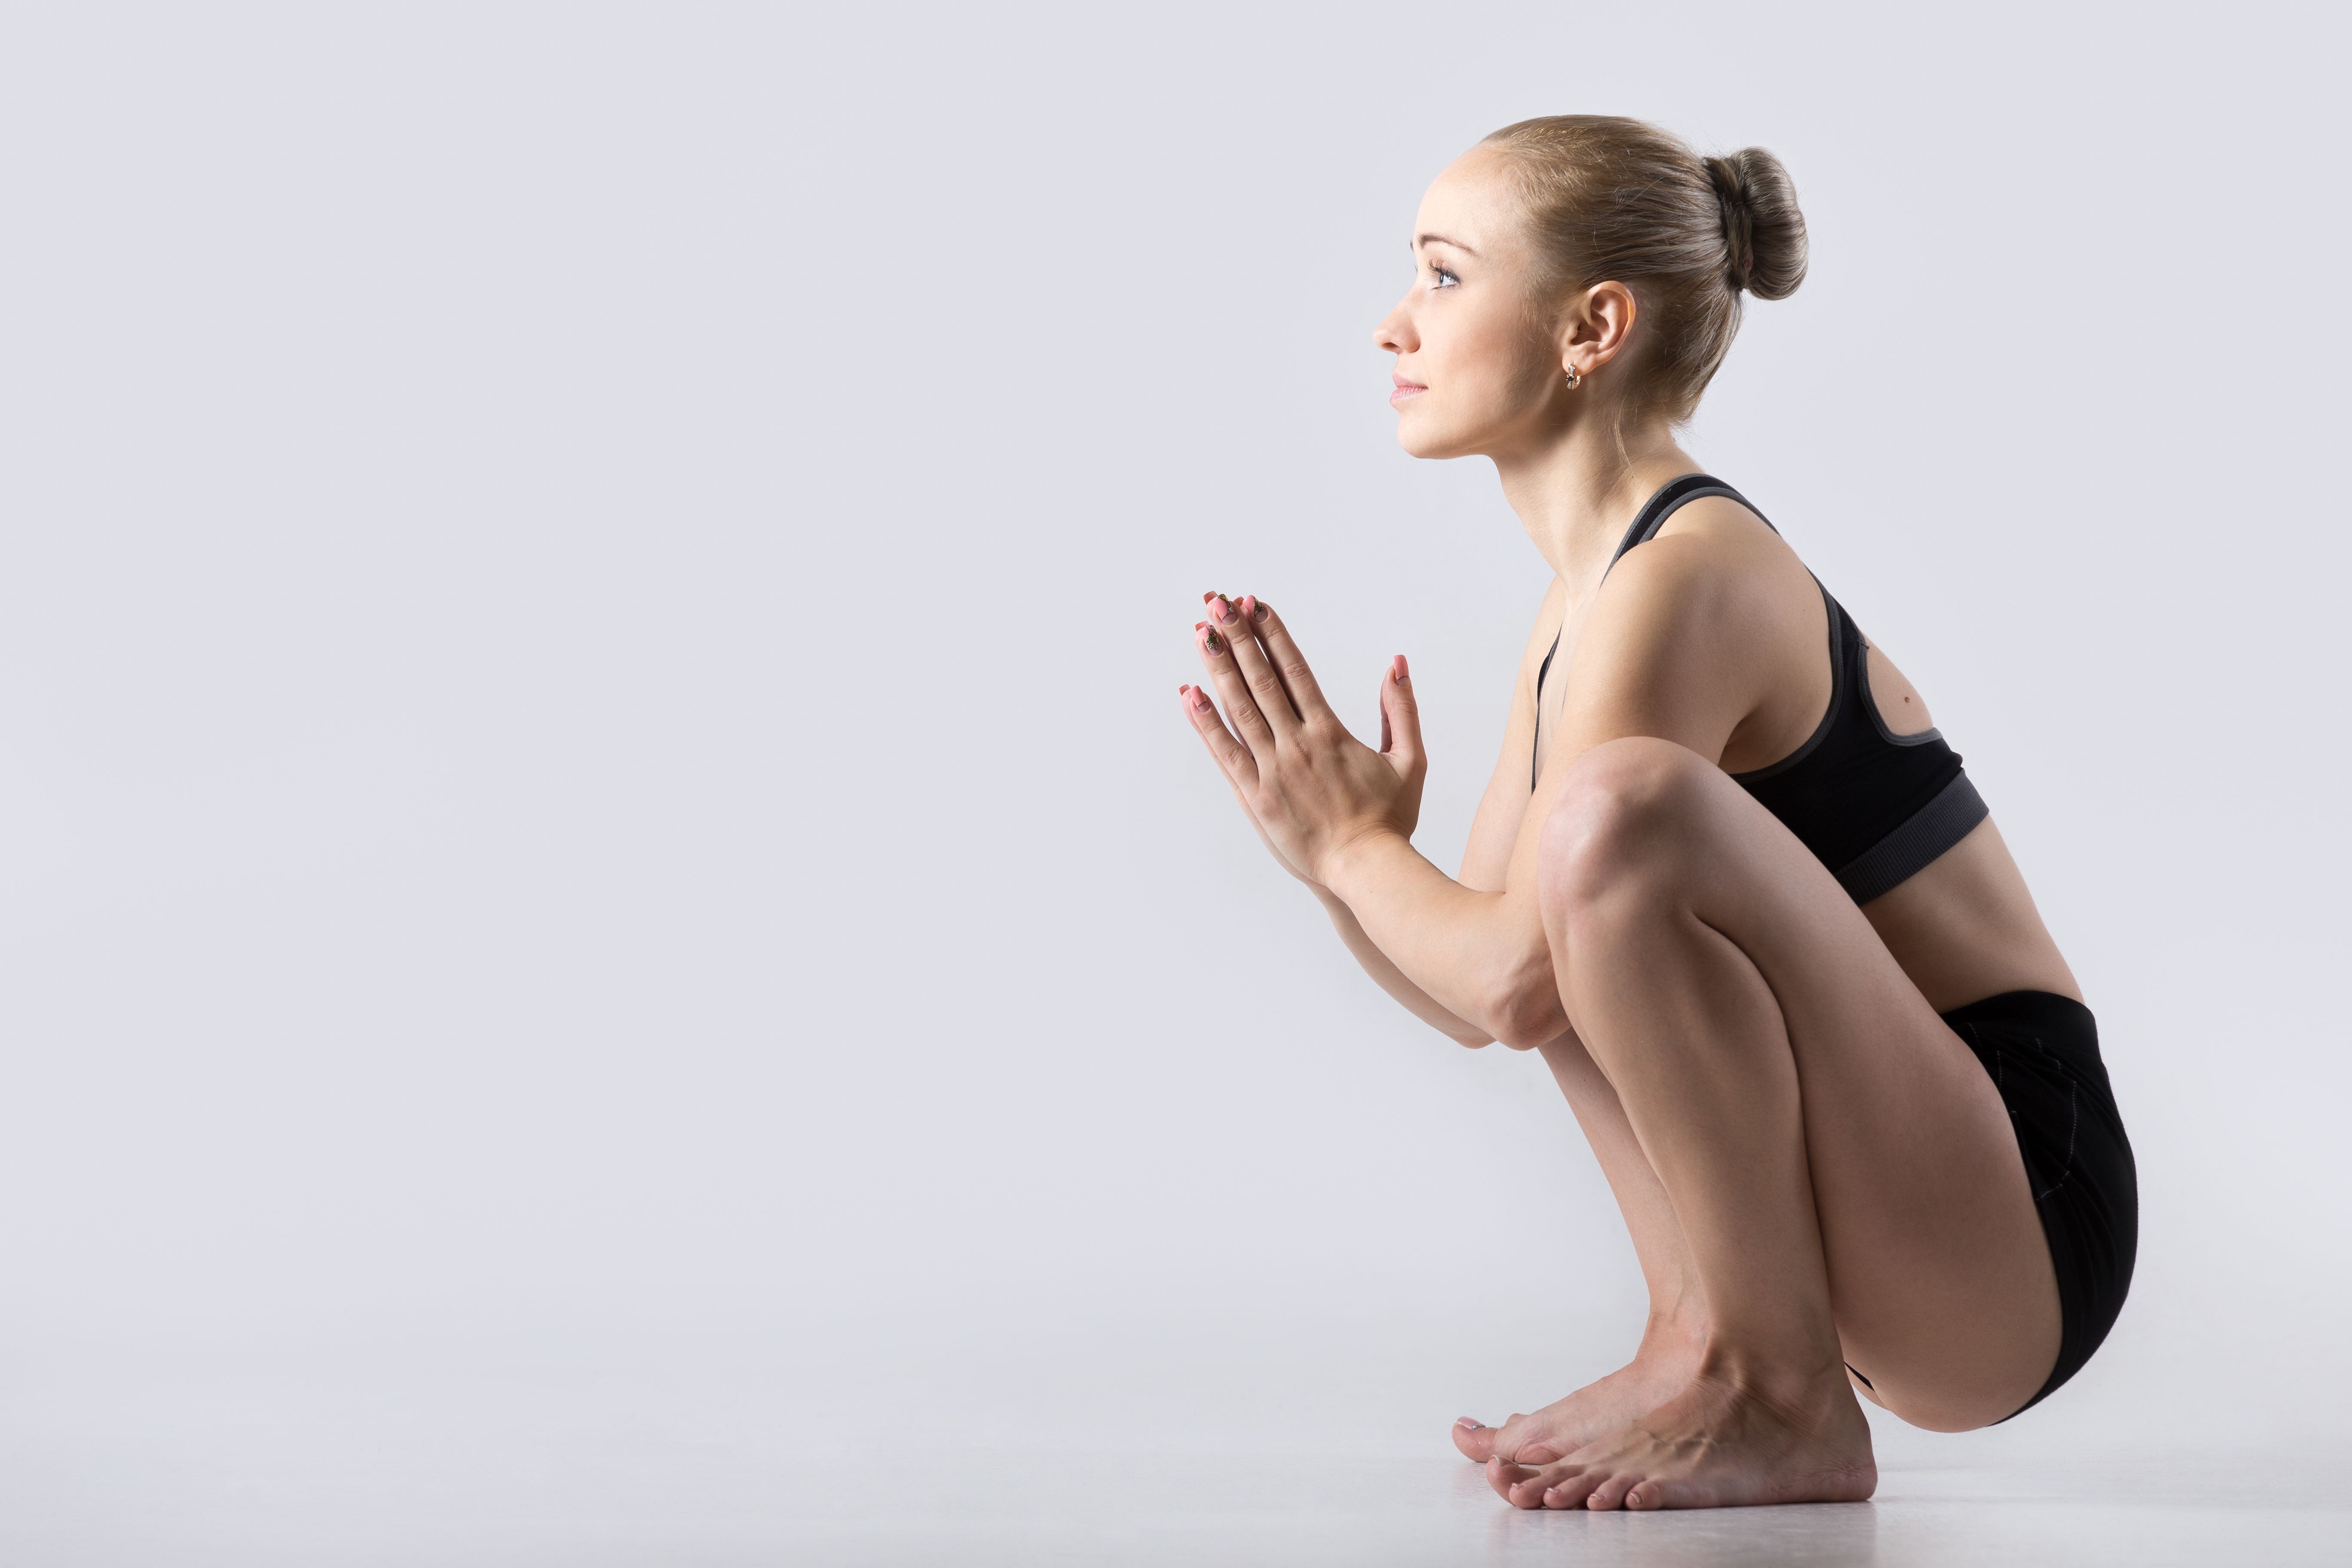
Simply squat with your thighs pointing outwards and hold your pelvis close to the ground. Keep the arms in a prayer position and adjust the resistance in your thighs and hip flexors with your elbows. Hold this pose for 1 to 5 minutes.
2. Navasana (Boat Pose) -
This is an excellent yoga asana for total core activation and strengthening. Sart by sitting in Staff Pose, bending your knees, lifting your legs off the mat, and engaging your core while shifting your body weight onto your tailbone.
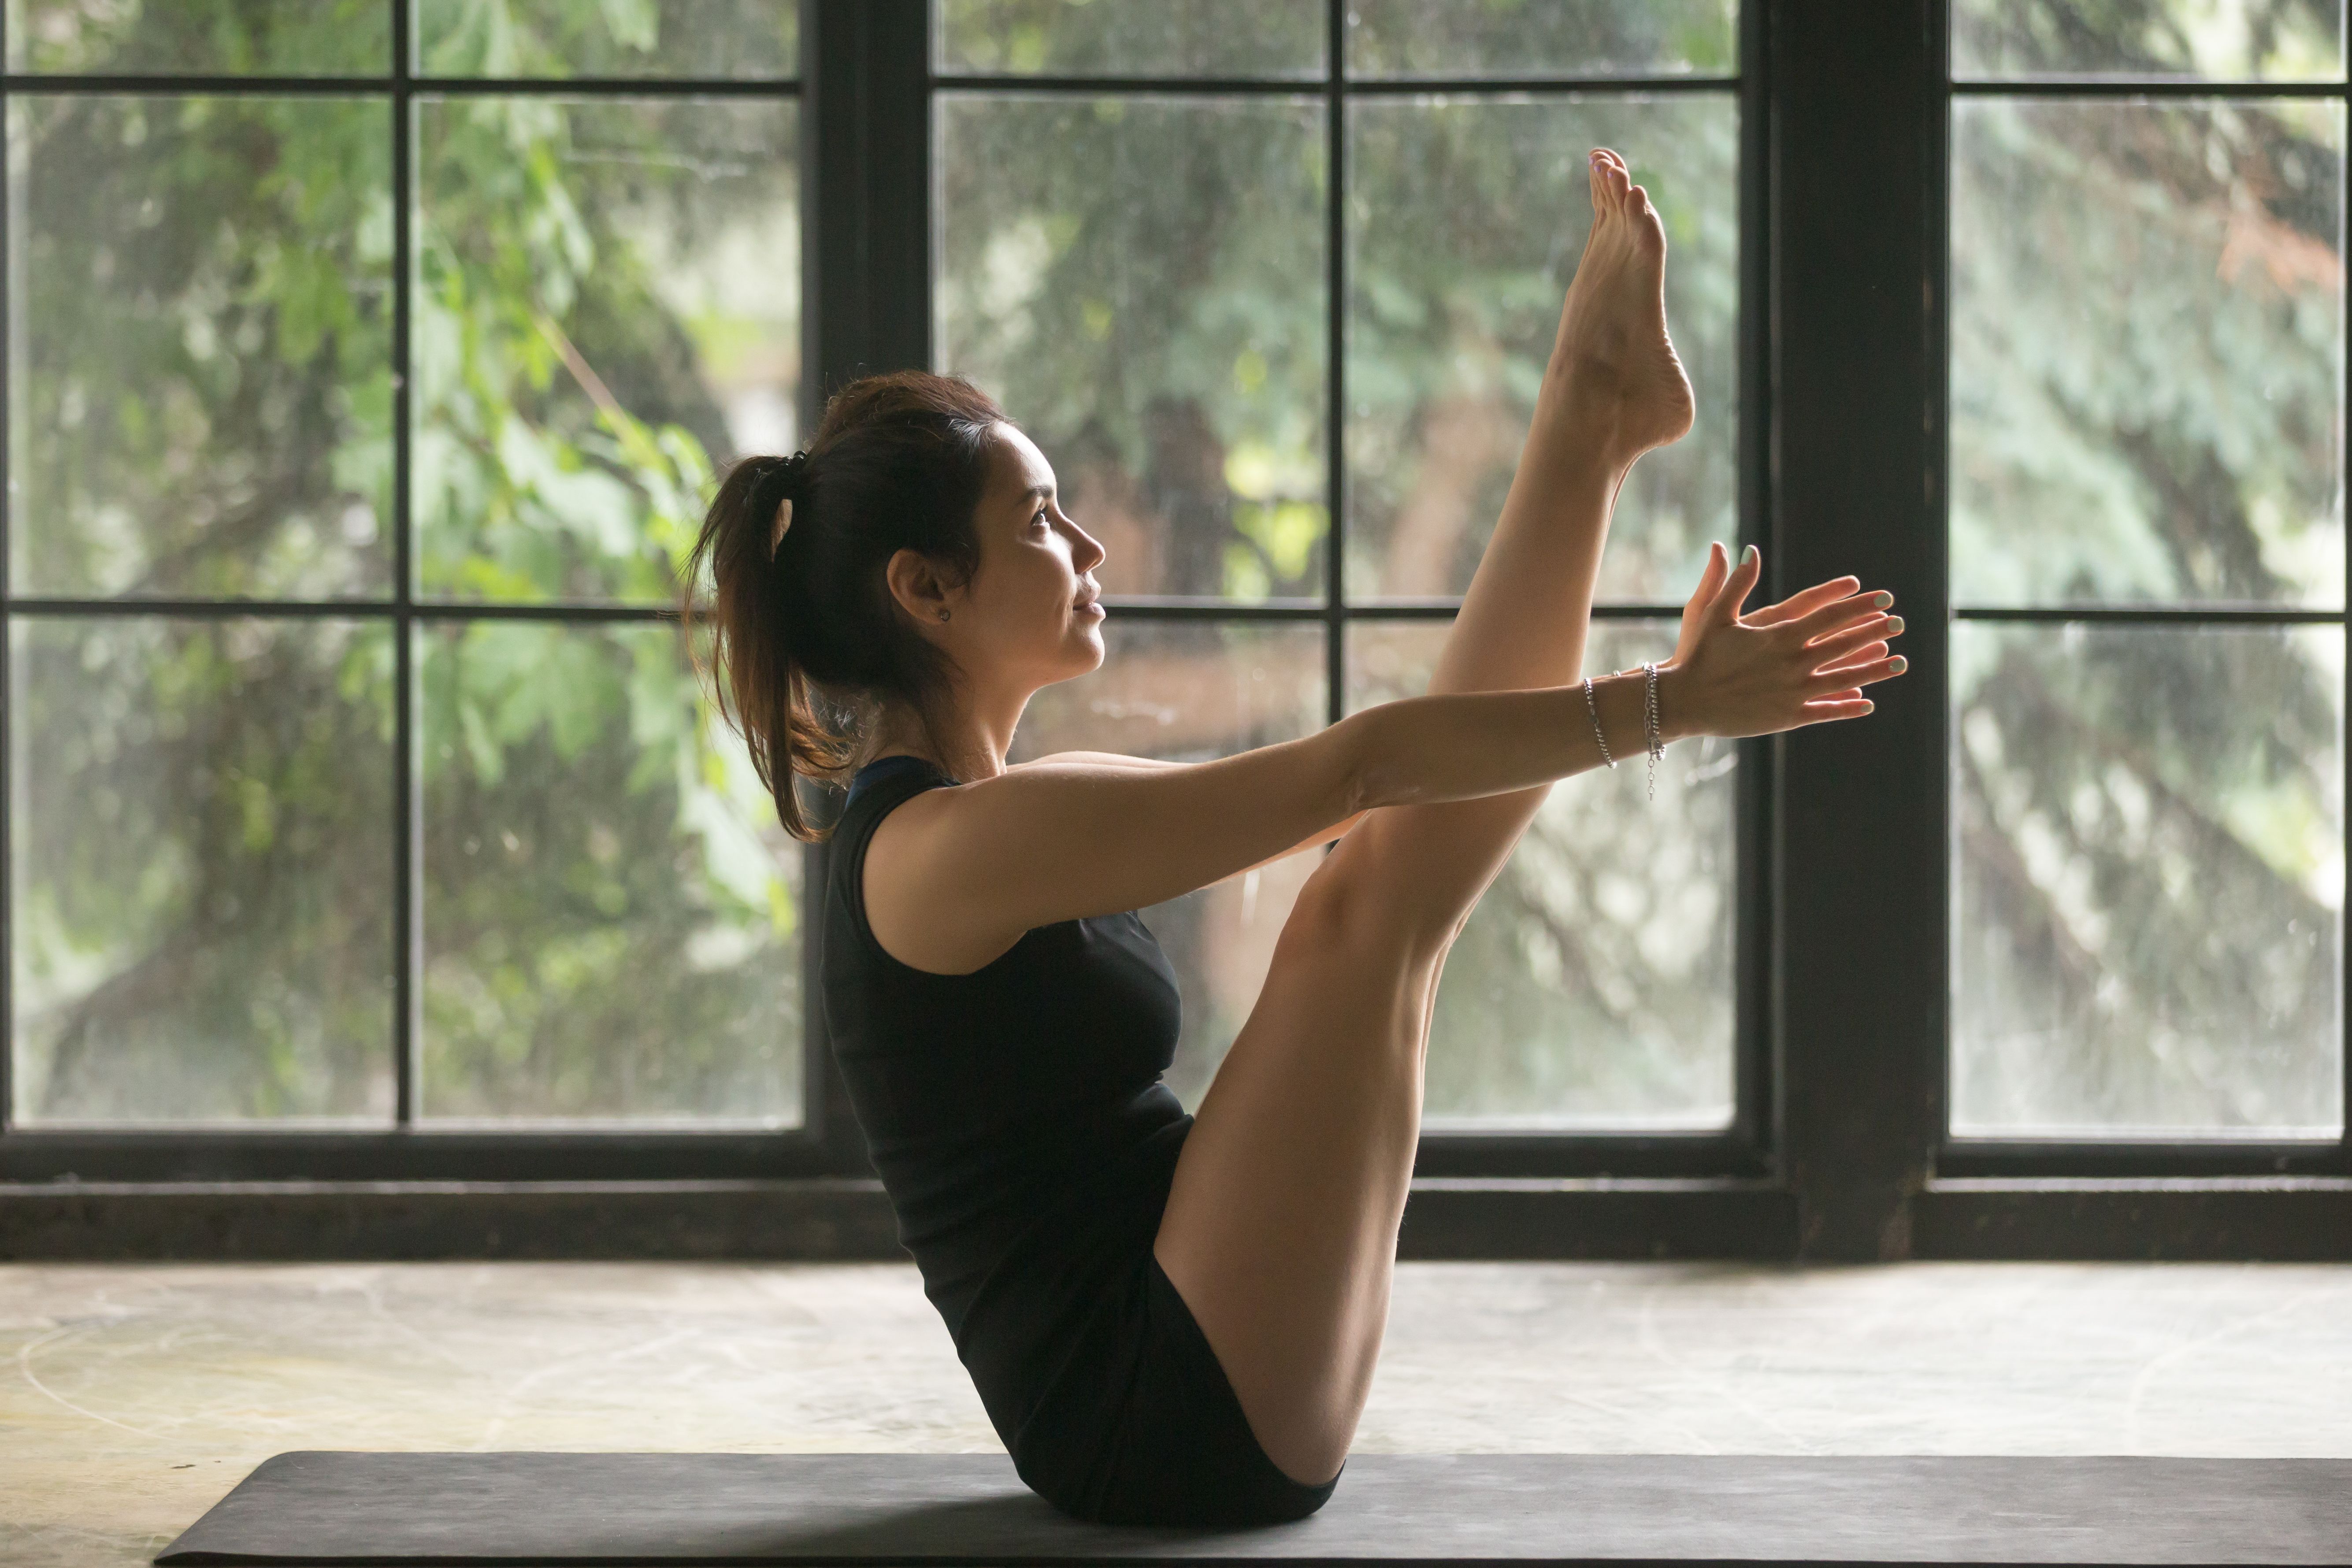
Hold here and maintain the posture for a few seconds, for 4 to 5 rounds. This pose will help you hold Crane Pose for longer intervals.
3. Chaturanga Dandasana (Four-Limbed Staff Pose) - To activate essential body parts like the wrists, forearms, and shoulders, practice Chaturanga Dandasana before Crane Pose.

Start in Downward-Facing Dog, move into a high plank, and bend your elbows to get into Chaturanga Dandasana. Hold this low plank for a few seconds and repeat for 5 to 10 rounds.
Part 2: Step-by-Step Instructions to Perform Bakasana
The following are steps to practice Bakasana or Crane Pose:
Step 1- Squat in the middle of your mat, with your elbows resting on the inside of your knees.
Step 2- Keep your head straight, heels lifted off the mat, and your hands in a prayer position in front of your chest.
Step 3- Place your palms down, align them with your ankles, and spread your fingers wide to grip the yoga mat.
Step 4- Next, fix your gaze on the mat, and engage your shoulders as well as your core muscles. Now, bend your upper body slightly forward and try to lift your feet off the mat.
Step 5- Concentrate on your breath and one-by-one lift your feet off the mat. Finally, press your arms into as straight a position as possible, and hold this position here for a few seconds.
Breath Awareness:
Inhale: When your palms are on the floor and you’re engaging your core.
Exhale: When you lift your feet off the mat and balance your body in this pose.
Performance Duration for Beginners: Hold Crane Pose for 15 to 30 seconds.
Performance Duration for Advanced: Hold Crane Pose for 30 to 90 seconds.
Part 3: Things to Keep in Mind
Due to the level of physical and mental challenge involved in the execution of Bakasana, you must be very mindful of your mind and body in order to balance.
If you’re not focused, even a minor alignment issue can cause extreme physical injury and pain in the long term. So, below are some Crane posture cues to be mindful of:
Engage your core and shoulders: If you’re feeling super shaky and you’re unable to lift your legs off the ground, this means you’re not engaging the right muscle groups.
Always keep your traps, shoulders, and core muscles tightened for a stable hold during Bakasana.
- Don’t rush it: When you are in a rush to perform Bakasana pose, you can potentially dislocate your knees, elbows, or wrist joints. That’s why a mindful approach is necessary for Crane Pose.
Stay focused on your breath, be calm, lift one foot at a time and fix your gaze as you hold the pose with raised legs.
You’re not rounding your spine: This is probably the most underlooked aspect of Crane Pose. Many people don’t realize that a rounded back can actually help them engage their core even more profoundly, as well as increase the duration of their holds.
Fingers are not gripping the mat: One more reason for a wobbly crane position is the foundation of your wrist. You need to spread all your fingers and press them into the mat.
If your wrists are weak or your palms are not properly gripping the yoga mat, then there’s a high chance your wrists could become severely injured.
Part 4: Relaxing Poses After Bakasana
Below are some relaxing poses that you can perform after an intense Bakasana practice session:
1. Ustrasana (Camel Pose) - This posture acts as a counter pose that can help you relax your trapezius, shoulders, and core muscles.
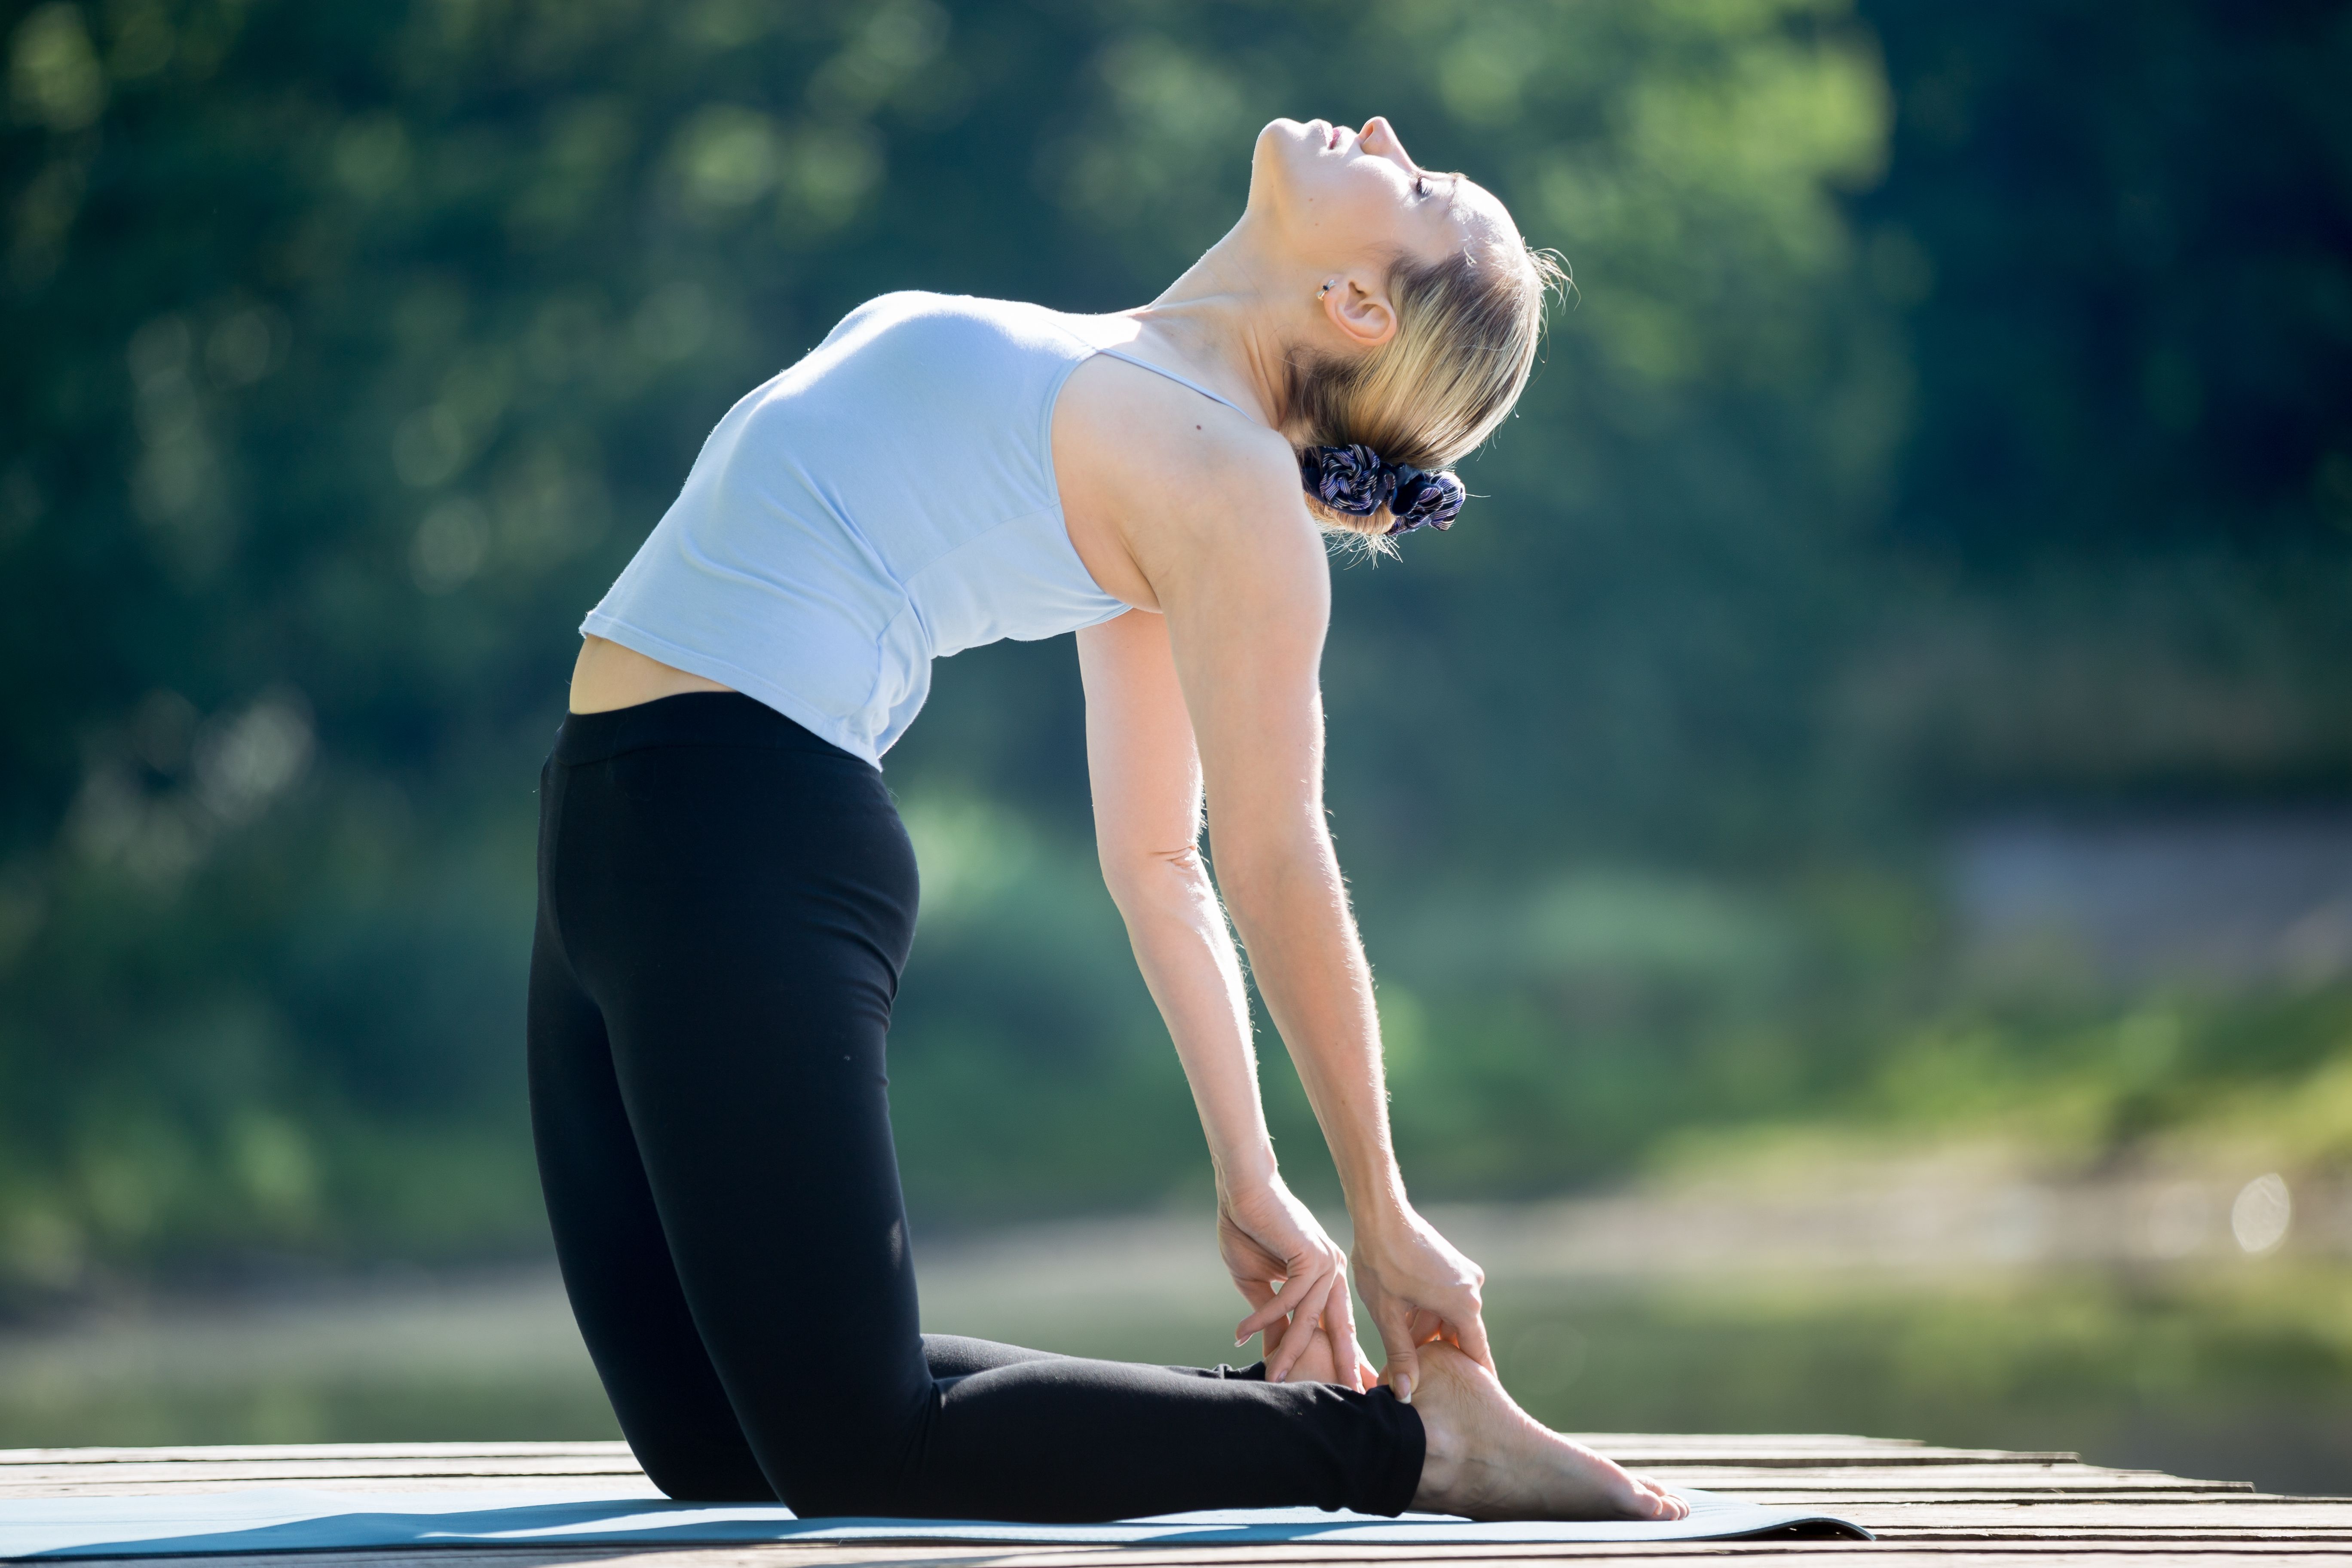
Kneel on your mat, tuck your tailbone, and gently arch your lower back. Gently drop your neck back, hold your ankles with your hands, and hold this pose here for 30 to 60 seconds.
2. Balasana (Child’s Pose) - Relax your back muscles from extreme arching and rounding with Child’s Pose. From Camel Pose, sit back on your shins and bend your upper body in front.
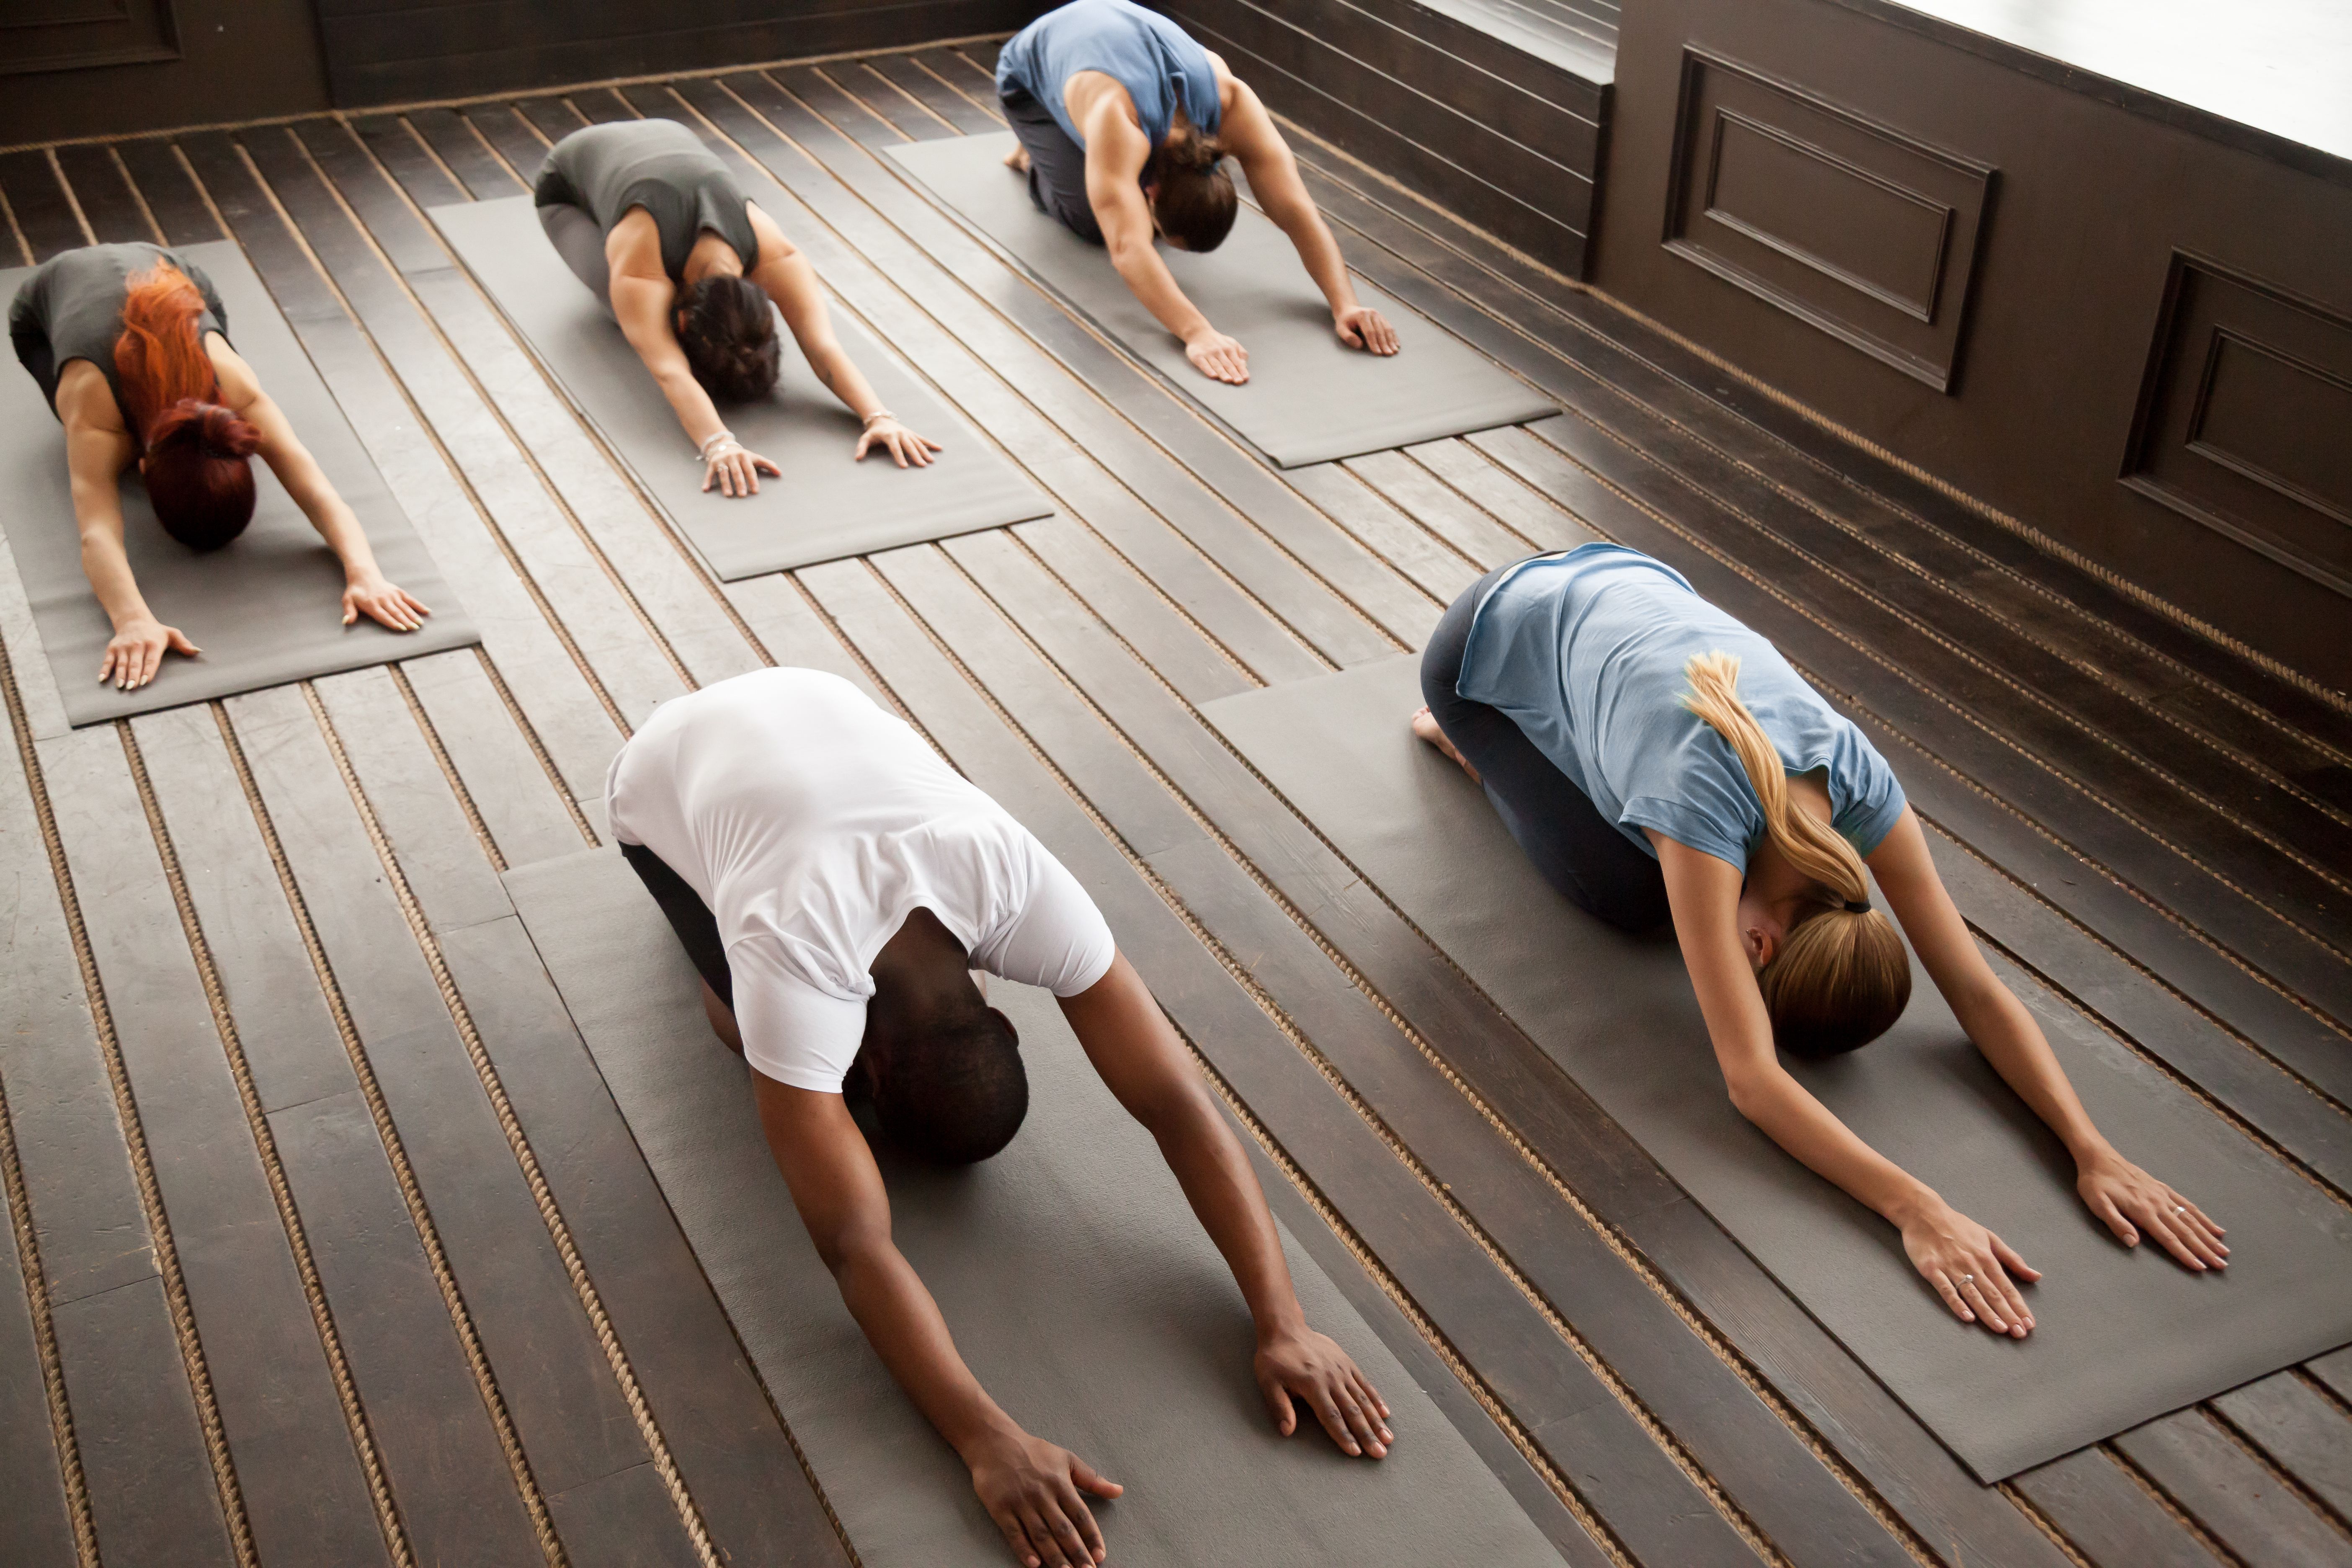
Keep your head relaxed and your spine extending forward. Hold this pose here for as long as it takes for your spine to return to its neutral shape.
Bakasana Variations to Consider
The following are some interesting Crane Pose variations that you can incorporate into your regular arm balance yoga practice:
1. Bala Kakasana (Baby Crow Pose): This variation is best for beginners starting their arm balance practice. Start with Malasana, then place your forearms on the ground and grip the mat with your fingers.
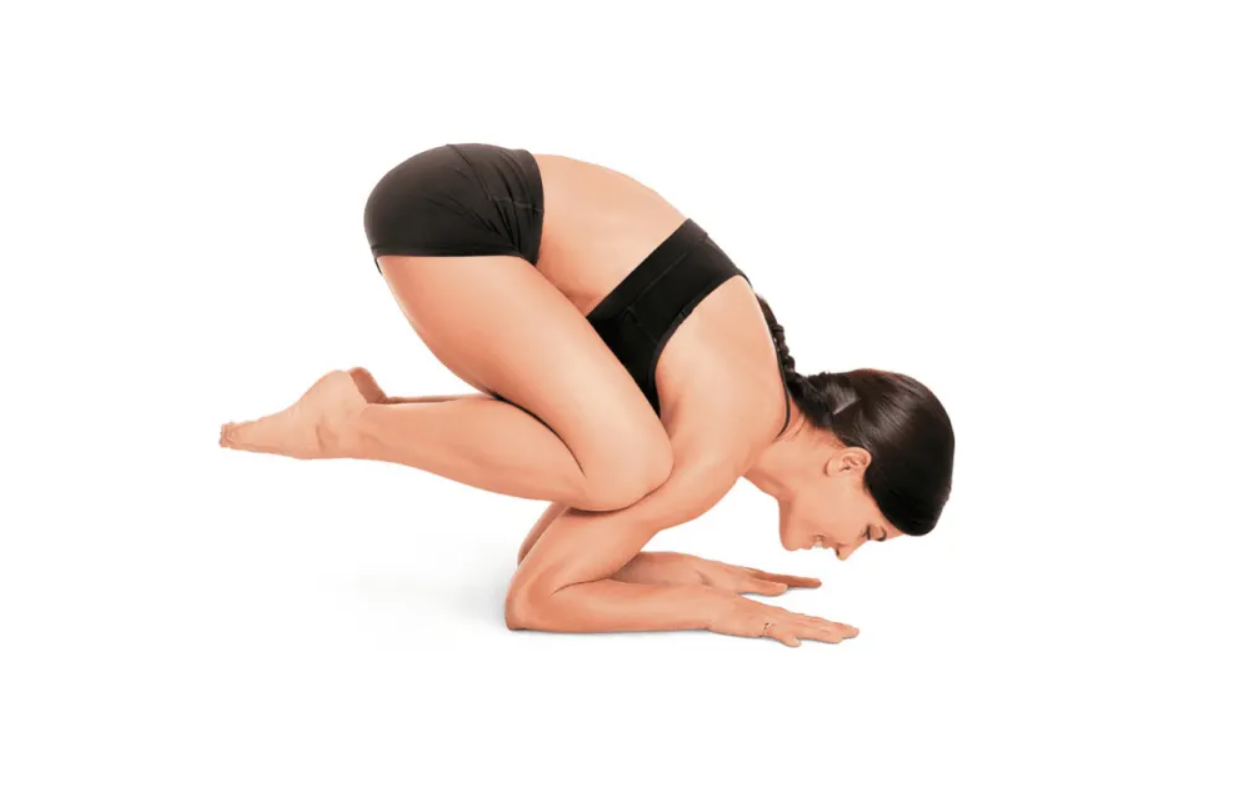
Now, place one knee on each tricep at a time, engage your core muscles, shift your body weight a little bit forward and lift both legs off the mat.
2. Kakasana (Crow Pose): This variation is perfect for intermediates who are still mastering arm balance. Start by getting in Malasana, then place your palms on the ground and grip the yoga mat with your fingers.
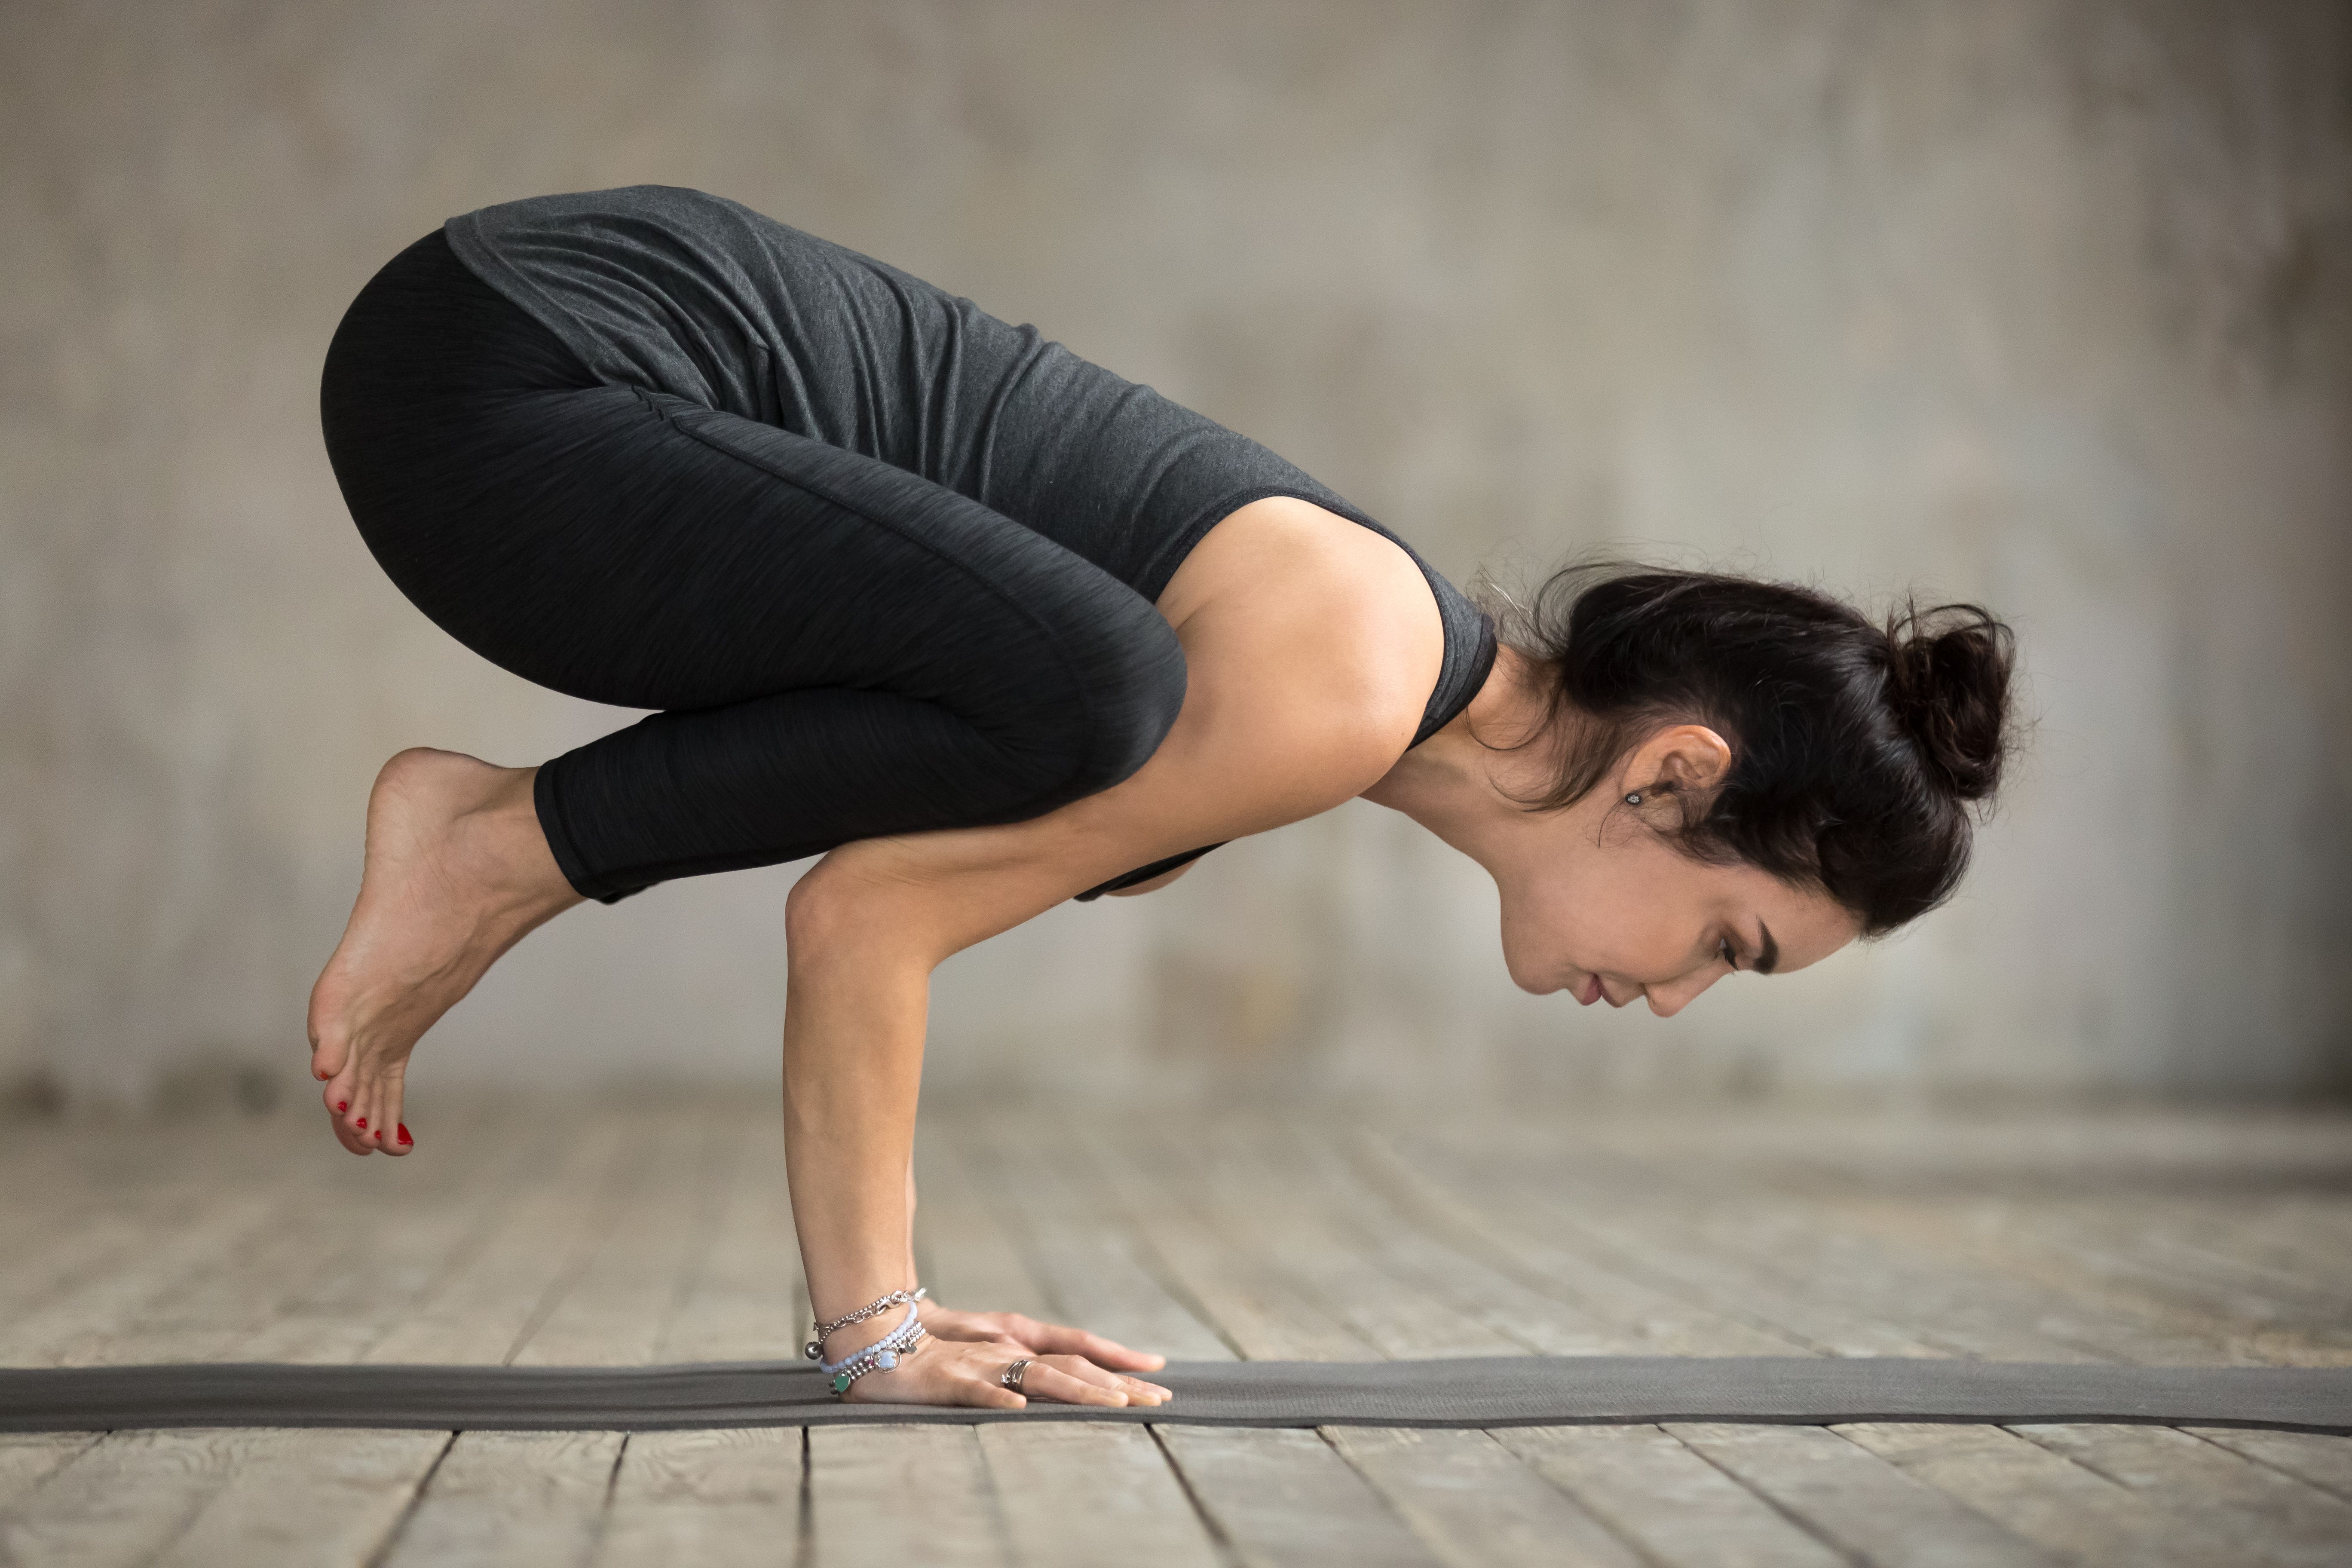
Keep a generous bend in your elbows, and place your knees on your triceps. Engage your core and focus your gaze, as you slightly shift your body weight forward, lifting both of your legs off the mat one by one.
Enjoy a Free 1-on-1 Session with a Coach!
Receive personalized guidance tailored to your unique fitness goals, live with a dedicated coach—no credit card required.
Frequently Asked Questions about Bakasana
No, Bakasana (Crane Pose) and Kakasana (Crow Pose) are not the same postures. They both belong to the same yoga asana category, which is known as arm balance, but the execution process for both is slightly different.
In Crow Pose, the arms position is bent, and the body is balanced quite close to the ground. But, for Crane Pose, you must keep your arms straight and balance your body further away from the ground.
The following are some vital health benefits of Bakasana:
- Tones the arms and shoulders.
- Increases focus and concentration.
- Improves wrist and forearm strength.
- Improves body awareness and balance.
- Increases strength in arms, shoulders, and core.
Beginners should avoid performing the Bakasana pose at first, because a beginner or intermediate yoga practitioner may find Bakasana to be physically overwhelming. It’s better to train your body and mind to balance in yoga asanas before starting the Bakasana practice.
Parsva Bakasana is a powerful arm balance variation for Bakasana. In Sanskrit, Parsva means side, Baka means crane, and Asana means posture, together meaning Side Crane Pose. In this posture, both the arms are balanced on one elbow and then repeated on the other side.
Eka Pada Bakasana is also known as One-Legged Crane Pose, and it’s a level-up arm balance pose for Bakasana. To perform the Eka Pada Bakasana yoga pose, follow these steps:
- Start by getting into Bakasana and hold your body in this pose for a few seconds.
- Now, keep your core super tight and gradually shift your body weight from your left elbow to your right elbow.
- Slowly extend your leg in the air and keep your focus on breathing.
- Hold this pose as long as it feels comfortable. Then release, relax, and repeat on the other side.


.webp)
%20(7).jpg)
