What is Wind-Relieving Pose (Pavanamuktasana)?
Wind-Relieving Pose (Pavanamuktasana) is a gentle, beginner-friendly, supine posture practiced by drawing one or both knees toward the chest. This simple movement helps release trapped gas, ease bloating, and relieve lower back tension.
Ideal for busy professionals or anyone seeking quick digestive relief, Pavanamuktasana is often part of warm-ups, cool-downs, or therapeutic routines for abdominal comfort and relaxation.
Wind-Relieving Pose: Overview & Meaning of Pavanmuktasana
Pavanamuktasana (Wind-Relieving Pose) is a gentle yoga posture that helps release trapped gas, relieve bloating, and support healthy digestion. In Sanskrit, Pavana means “wind” or “air,” Mukta means “release,” and Asana means “pose.” So, as the name suggests, this pose uses light abdominal pressure to free internal energy and improve digestive flow.
Rooted in Hatha Yoga and Ayurvedic traditions, Pavanamuktasana reflects the belief that good digestion nurtures clear energy, focus, and emotional stability. Over time, it has evolved into a widely taught therapeutic pose for people with sedentary lifestyles, sluggish digestion, or mild lower back stiffness.
When you draw your knees toward your chest in Pavanamuktasana, it creates a light massage for your stomach, intestines, and lower back muscles. This gentle compression improves blood flow, supports digestion, and relaxes the hips and spine. The pose also activates the core muscles and helps release tension caused by sitting for long hours.
At a Glance
- Sanskrit Name: पवनमुक्तासन (Pavanamuktasana)
- Pronunciation: pah-vahn-ah-mook-TAHS-anna
- English Names: Wind-Relieving Pose, Gas-Release Pose, Wind-Removing Pose
- Pose Type: Supine, Digestive, Restorative
- Level: Beginner
- Duration: 30 seconds – 5 minutes (single or both legs)
Benefits of Pavanamuktasana (Wind-Relieving Pose)
Wind-Relieving Pose (Pavanamuktasana) offers a complete mind-body therapy — easing bloating, supporting digestion, relieving tension, and promoting calmness. Regular practice can bring noticeable improvement in gut health, spinal comfort, and emotional balance:
Digestive & Abdominal Benefits
For optimal digestive benefits, practice this pose on an empty stomach or 2–3 hours after meals.
- Relieves bloating and gas: The compression of the abdomen stimulates trapped gas to move through the intestines, providing instant comfort.
- Improves digestion: Gentle massage to the digestive organs encourages enzyme secretion and supports smoother metabolism.
- Eases constipation: The pose’s rhythmic compression helps activate peristalsis—the wave-like movement of the intestines—to support regular bowel function.
- Reduces acid reflux symptoms: By promoting better gastric flow and posture, it helps regulate stomach acid and prevents discomfort.
- Stimulates liver and kidneys: Enhanced blood flow improves natural detoxification processes.
- Strengthens abdominal muscles: Mild core engagement tones and supports the digestive system.
Physical Benefits
- Releases lower back tension: Gentle spinal traction soothes tight lumbar muscles.
- Stretches hip flexors: Counteracts stiffness from sitting or long commutes.
- Eases sciatica pain: Reduces nerve compression when practiced slowly and mindfully.
- Improves spinal flexibility: Encourages gentle vertebral articulation.
- Reduces menstrual cramps: Abdominal massage supports pelvic circulation.
- Enhances pelvic floor health: Strengthens core and pelvic muscles.
- Improves circulation: Promotes blood flow to the abdomen and lower body.
Mental & Emotional Benefits
- Calms the nervous system: The supine position activates the parasympathetic (“rest and digest”) response.
- Reduces stress and anxiety: Deep belly breathing soothes the body-mind connection.
- Promotes better sleep: Physical relaxation prepares the body for rest.
- Encourages emotional release: The hips and abdomen are emotional storage centers; compression can help release tension.
- Enhances body awareness: Builds mindfulness through breath and movement coordination.
- Grounds your energy: Ideal when you’re feeling restless or unfocused.
Therapeutic Applications
Use the Pavanamuktasana pose as a therapeutic tool for:
- Irritable Bowel Syndrome (IBS) and chronic constipation
- Post-meal bloating or indigestion
- Lower back discomfort from prolonged sitting
- Premenstrual cramps and pelvic tension
- Anxiety or stress
- Sleep challenges or insomnia
- Prenatal (first trimester) practice with modifications
To reap the maximum benefits of Wind-Reliving Pose, practice with 1-on-1 guidance. Book your free session today!
How to Do Wind-Relieving Pose (Pavanamuktasana): Step-by-Step Guide
Learning how to do Wind-Relieving Pose (Pavanamuktasana) correctly ensures you experience its full digestive and relaxation benefits. Follow these easy, beginner-friendly steps.
Part 1: Preparing for the Pose
Before starting with Wind-Relieving Pose, take out 5 minutes for this warm-up sequence:
1. Supine Relaxation (Savasana)
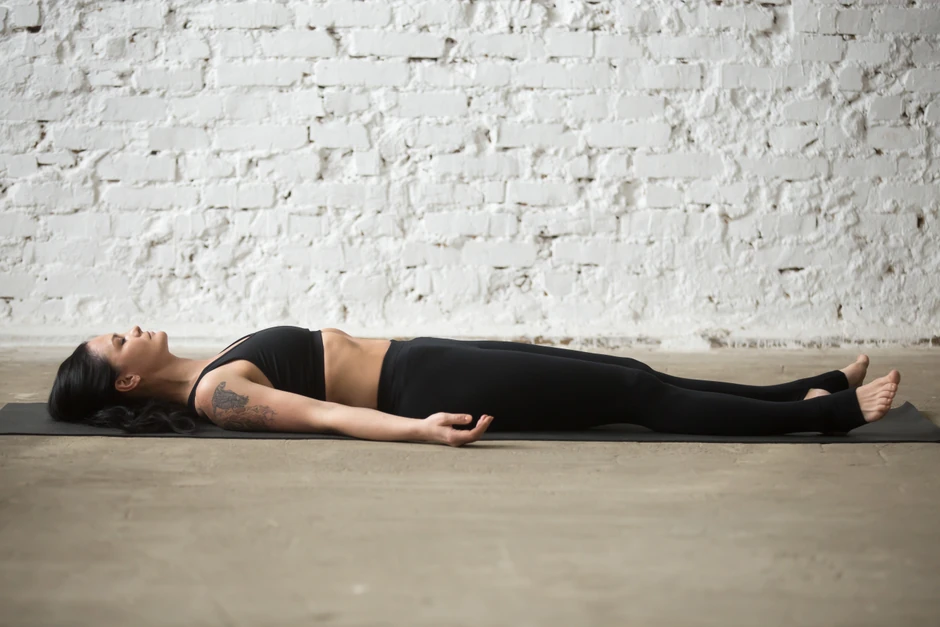
Centers the mind and relaxes the body before starting movement.
- Lie flat on your back with legs extended and arms by your sides.
- Close your eyes and take slow, deep breaths into your belly.
- Let your body feel heavy and supported by the mat for one minute.
2. Gentle Knee Circles
Loosens tight hips and improves joint mobility.
- Lie on your back and draw one knee toward your chest.
- Hold the shin and make slow circles with your knee in one direction, then the other.
- Switch sides after one minute, keeping movements smooth and easy.
3. Cat-Cow (Marjaryasana–Bitilasana)

Warms up the spine and improves flexibility.
- Come onto hands and knees with shoulders over wrists and hips over knees.
- Inhale to arch your back and lift your chest (Cow Pose).
- Exhale to round your spine and tuck your chin (Cat Pose). Continue for one minute.
4. Knees-to-Chest Pose (Apanasana)
Gently activates the core and prepares the spine for deeper release.
- Lie on your back and bring both knees toward your chest.
- Wrap your arms around your shins and hug gently.
- Take slow, deep breaths for one minute, relaxing your shoulders and lower back.
Part 2: How to Do Pavanmuktasana (Wind-Relieving Pose): Step-by-Step Instructions
Single-Leg Wind-Relieving Pose (Ardha Pavanamuktasana)
- Lie on your back, legs extended, arms at your sides, palms down. Take 2–3 slow breaths.
- Press the lower back gently into the mat, engaging abdominal muscles. Exhale fully.
- Inhale and bend the right knee toward your chest, keeping the left leg active on the floor.
- Interlace fingers just below the knee (or behind the thigh if knees are sensitive).
- Exhale and gently hug the knee closer to the right armpit. Keep shoulders relaxed.
- Maintain light pressure of the thigh against the abdomen for digestive massage.
- Breathe deeply 5–10 times.
- Beginners: 30–60 sec
- Intermediate: 1–2 min
- Restorative: 3–5 min
- Exhale and lower the leg gradually to the mat.
- Mirror all steps on the opposite side.
- Relax both legs in Savasana for 30–60 seconds.
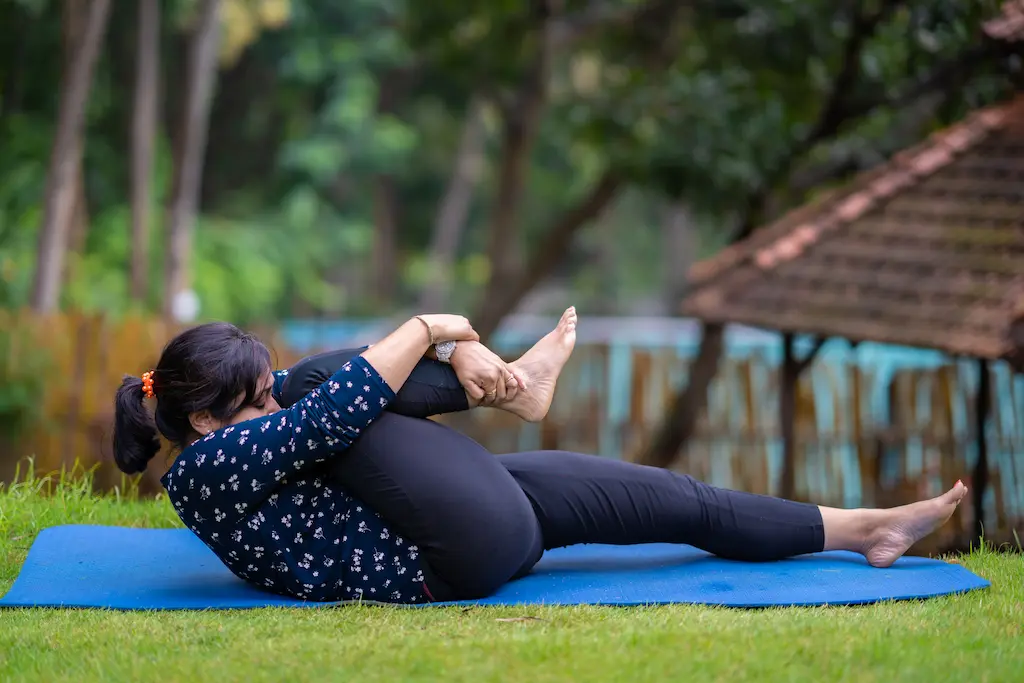
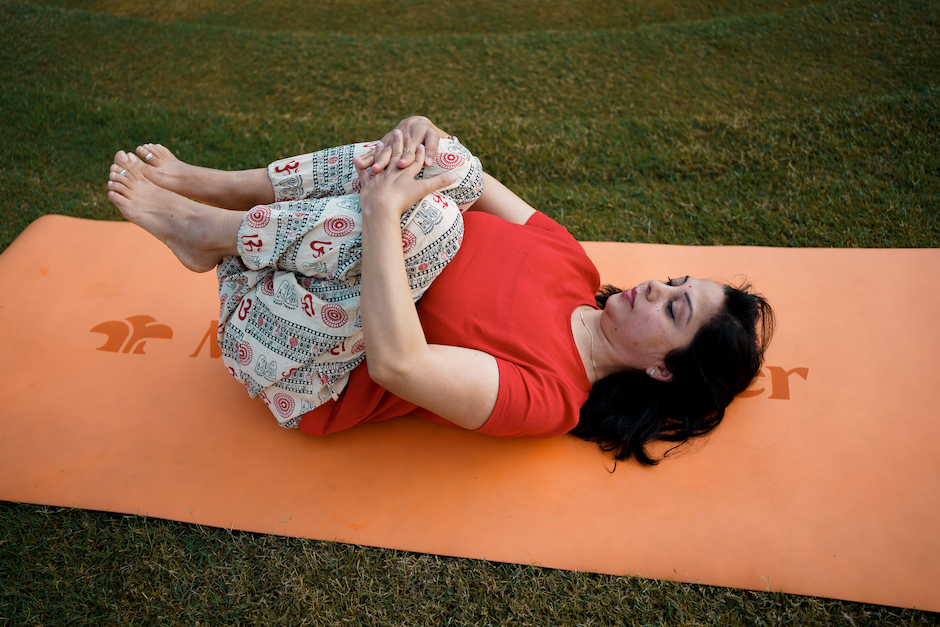
Double-Leg Wind-Relieving Pose (Full Pavanamuktasana)
- Begin lying flat, knees bent.
- Inhale and hug both knees toward the chest.
- Exhale as you draw knees slightly outward toward armpits.
- Gently press thighs into abdomen for a deeper massage.
- Hold 30 seconds – 3 minutes, breathing steadily.
- Option: Rock softly side to side for a spinal massage.
- Exhale to release, lowering both feet to the mat.
Common Mistakes & How to Fix Them
- Lifting the head/neck strains the neck. Keep the head down, chin slightly tucked.
- Pulling knees too close to the face restricts breathing. Guide knees toward armpits, not straight down.
- Forcing the stretch may strain the back or knees. Use slow, mindful movement and props if needed.
- Holding breath reduces digestive benefits. Maintain smooth, rhythmic breathing.
- Extended leg lifting off the mat creates an imbalance. Keep the extended leg grounded and active.
Want real-time alignment feedback? Book a free 1-on-1 session and learn directly from expert Indian teachers.
Pavanmuktasana Variations
These variations make the posture accessible for all, whether you’re easing into yoga or deepening your practice.
Beginner-Friendly Modifications
1. Strap-Assisted Version
Reduces strain on hips and shoulders — ideal for tightness or limited flexibility.
- Loop a yoga strap around the sole of your foot.
- Hold both strap ends and gently pull the knee toward your chest.
- Keep shoulders relaxed and neck neutral.
2. Bent-Knee Support
Easier on the lower back and hamstrings.
- Keep both knees bent, feet on the floor.
- Draw one knee toward your chest while the other stays bent.
- Maintain gentle compression without strain.
- Hold, and repeat on the other side.
3. Wall-Assisted Version
Offers stability and support — great for beginners and prenatal practice.
- Lie with your hips near a wall.
- Place both feet flat on the wall with knees bent.
- Draw one knee toward the chest while keeping the other foot grounded.
- Hold, and repeat on the other side.
Intermediate Variations
4. Rocking Wind-Relieving Pose
Massages the spine and boosts flexibility.
- Hug both knees to the chest.
- Gently rock side to side or front to back.
- Keep movement smooth and breath coordinated.
5. Extended Leg Variation
Strengthens the abdomen and stretches hip flexors.
- Hug one knee to the chest.
- Extend the opposite leg straight, hovering slightly above the mat.
- Engage the core to stabilize.
- Hold for a few counts, and repeat on the other side.
6. Twisted Wind-Relieving Pose
Adds a spinal twist for deeper digestive stimulation.
- Hug the right knee to the chest.
- Guide it gently across your body toward the left side.
- Keep both shoulders grounded.
- Hold for a few breaths.
- Repeat on the other side.
Advanced Variations
7. Dynamic Wind-Relieving Pose
Builds core strength and energizes the body.
- Alternate hugging one knee at a time, synchronized with breath.
- Inhale to switch sides, exhale to draw the knee in.
- Maintain a steady rhythm for 10–20 repetitions.
8. Wind-Relieving Pose with Head Lift
Engages upper abdominals for deeper compression.
- From the double-knee position, lift your head and shoulders toward your knees.
- Hold for 3–5 breaths, then relax back down.
Pavanmuktasana (Wind-Relieving Pose): Precautions & Contraindications
While Pavanamuktasana (Wind-Relieving Pose) is generally safe and beginner-friendly, there are specific conditions where it should be modified or avoided. Understanding these precautions helps you practice confidently and prevent injury.
To practice with maximum safety and effectiveness, book a free 1-on-1 session with a certified coach!
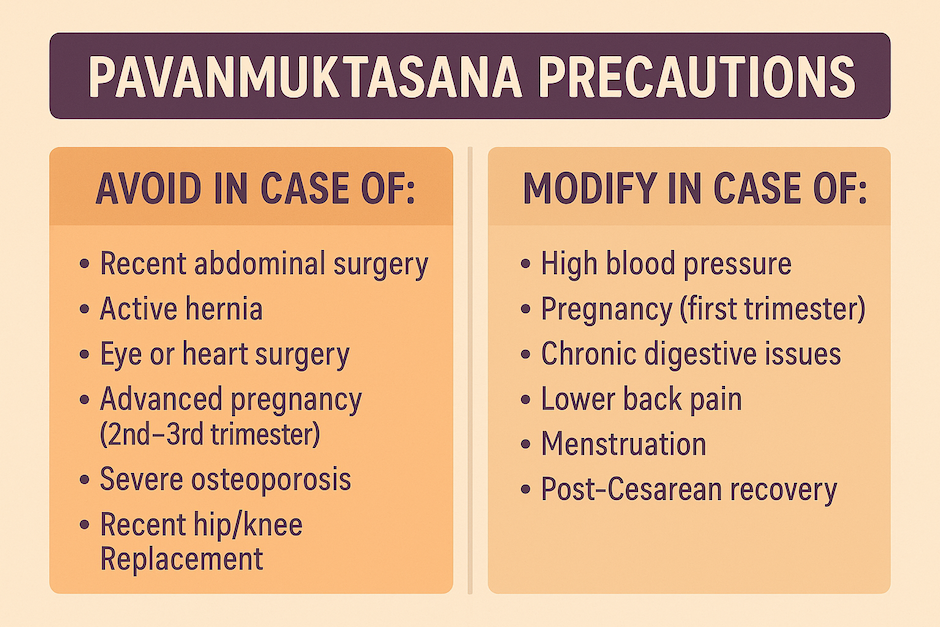
Avoid practicing Pavanmuktasana if you have:
- Recent abdominal or pelvic surgery
- Active hernia or abdominal inflammation
- Eye or heart surgery
- Advanced pregnancy (2nd–3rd trimester)
- Severe osteoporosis
- Recent Hip/Knee Replacement
If unsure, seek medical clearance before adding this pose to your routine.
Practice with Caution in case of:
- High blood pressure (controlled): Practice the single-leg version only
- Pregnancy (First Trimester): Practice single-leg version only with light pressure and keep duration short (30–60 seconds).
- Chronic digestive issues: Begin with very mild compression.
- Lower back pain: Support the lower back with a folded blanket.
- Menstruation: Avoid deep holds on heavy-flow days.
- Post-Cesarean Recovery: Wait 6–8 weeks minimum.
- Arthritis (Hips or Knees): Hold behind the thigh instead of the shin.
Always listen to your body. Discomfort means pause; pain means stop.
General Safety Guidelines
- Never force the stretch — let gravity and breath do the work.
- Breathe continuously; avoid holding your breath.
- Start with the single-leg variation before attempting the double-leg version.
- Practice on an empty stomach for better digestive relief.
- Use props (strap, bolster, or blanket) freely — comfort matters.
- Stop immediately if you feel sharp pain, dizziness, or nausea.
- Increase hold time gradually as your body adapts.
Wind Relieving Pose (Pavanmuktasana): Related Yoga Poses
If you enjoy the benefits Pavanmuktasana provides, here are a few related poses to try:
1. Reclined Butterfly Pose (Supta Baddha Konasana)
Opens the hips and inner thighs while calming the nervous system.
- Lie on your back and bring the soles of your feet together, letting your knees fall open.
- Place your hands on your belly or by your sides.
- Stay here for a few deep breaths, relaxing your hips and shoulders.
2. Happy Baby Pose (Ananda Balasana)

Releases lower back tension and opens the hips with a playful stretch.
- Lie on your back and draw your knees toward your chest.
- Hold the outsides of your feet (or ankles if feet aren’t reachable).
- Gently pull your knees toward your armpits and breathe deeply.
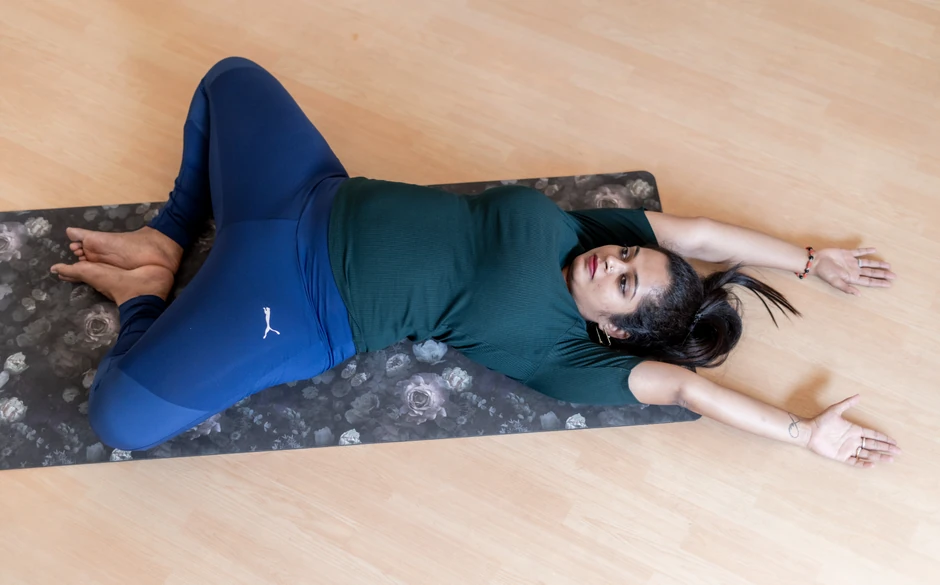
3. Reclined Spinal Twist (Supta Matsyendrasana)
Relieves spinal tension and supports digestion.
- Lie on your back and hug your knees to your chest.
- Drop both knees to one side while extending the opposite arm out.
- Turn your head gently toward the opposite shoulder and breathe into your twist.
4. Legs-Up-the-Wall Pose (Viparita Karani)
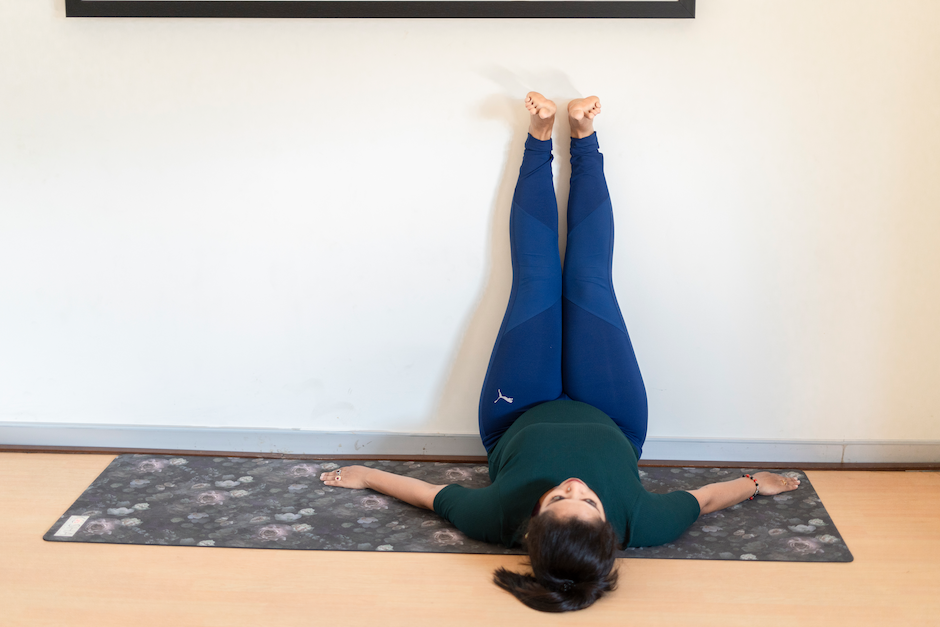
Boosts circulation, reduces fatigue, and promotes full-body relaxation.
- Sit sideways next to a wall, then swing your legs up as you lie back.
- Adjust so your hips are close to the wall and your legs rest comfortably upward.
- Relax your arms by your sides and breathe deeply for several minutes.

Enjoy a Free 1-on-1 Session with a Coach!
Receive personalized guidance tailored to your unique fitness goals, live with a dedicated coach—no credit card required.
Frequently Asked Questions
Wind-Relieving Pose (Pavanamuktasana) helps relieve bloating, trapped gas, and constipation through gentle abdominal compression. It also soothes lower back tension, stretches the hips, and improves digestion. Regular practice enhances intestinal movement (peristalsis) and supports detoxification. It’s often recommended in yoga therapy for IBS, chronic constipation, and menstrual cramps.
Though similar, Apanasana (Knees-to-Chest Pose) and Pavanamuktasana (Wind-Relieving Pose) differ slightly. In Apanasana, both knees stay together with lighter compression for relaxation. In Pavanamuktasana, knees move slightly outward toward the armpits for deeper abdominal massage and gas release. Both aid digestion, but Pavanamuktasana offers stronger therapeutic benefits.
Hold time varies by experience:
- Beginners: 30–60 seconds per side
- Intermediate: 1–3 minutes
- Restorative: 3–5 minutes
For digestive benefits, longer holds (2–5 minutes) are ideal. Never force the posture — breathe deeply and release if you feel discomfort.
Yes—only during the first trimester and with gentle effort. Avoid lying flat on your back after the first trimester, as it can compress major blood vessels. Use the single-leg version and skip deep compression.
Always consult a prenatal yoga coach before continuing the pose. Book a free 1-on-1 session today!
Absolutely. The abdominal pressure in Pavanamuktasana stimulates the intestines and helps relieve constipation naturally. It encourages the movement of trapped gas and improves digestive efficiency. For best results, practice on an empty stomach, ideally in the morning.
Yes. The pose decompresses the lumbar spine and stretches the lower back muscles, reducing tension from long hours of sitting. When practiced gently, it can relieve mild sciatica, stiffness, and fatigue.
Related Articles on Padmasana

Yin vs Restorative Yoga: What’s the Difference?
Yin vs Restorative Yoga explained. Compare intensity, hold times, props, and benefits. Learn the key differences and choose the right slow yoga style for you.
.webp)
Detox Yoga Sequence: Refresh and Renew After Holiday Indulgence
Refresh and renew after holiday indulgence with this 12-pose detox yoga sequence. Gentle twists and mindful stretches for digestion, circulation, and energy.
%20(7).webp)
Yoga for Gut Health: How This Ancient Practice Heals Your Gut-Brain Connection
Discover how yoga improves gut health through the gut-brain connection. Learn 8 poses to balance microbiomes, reduce inflammation, and heal your digestive system.